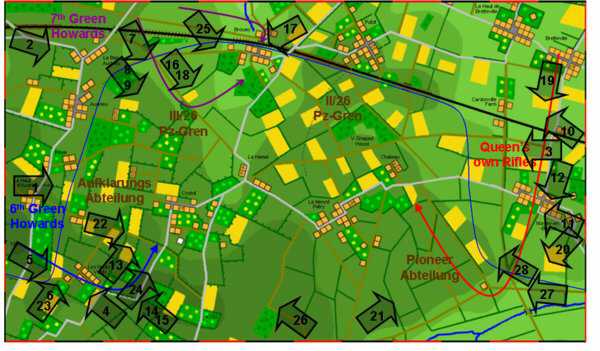
The Map
From the West
From the North West Corner
From the East
| Click on the Thumbnail for a full-size photo | Description |
|---|---|
The Map |
This map shows the board lay-out for the scenario, the main battalion positions and also shows where the photos below were taken from. |
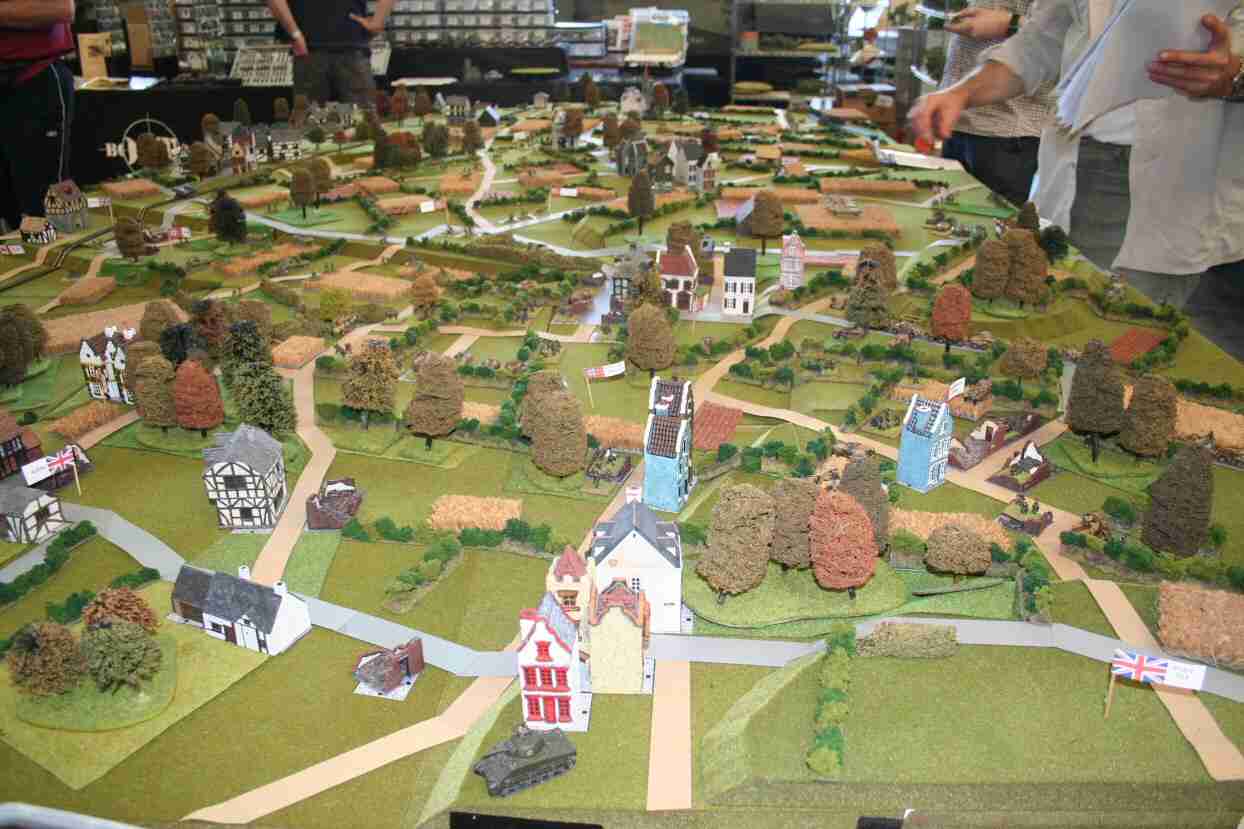
From the West |
Looking from the west, the salient fills most of the board, based on the right edge of the photo. The village of Cristot lies deep in the bocage at the centre of the photo. The initial objective for the first two companies of the 6th Green Howards is the village of Les Hauts Vents, in the bocage at the bottom right of the photo (light blue house) |
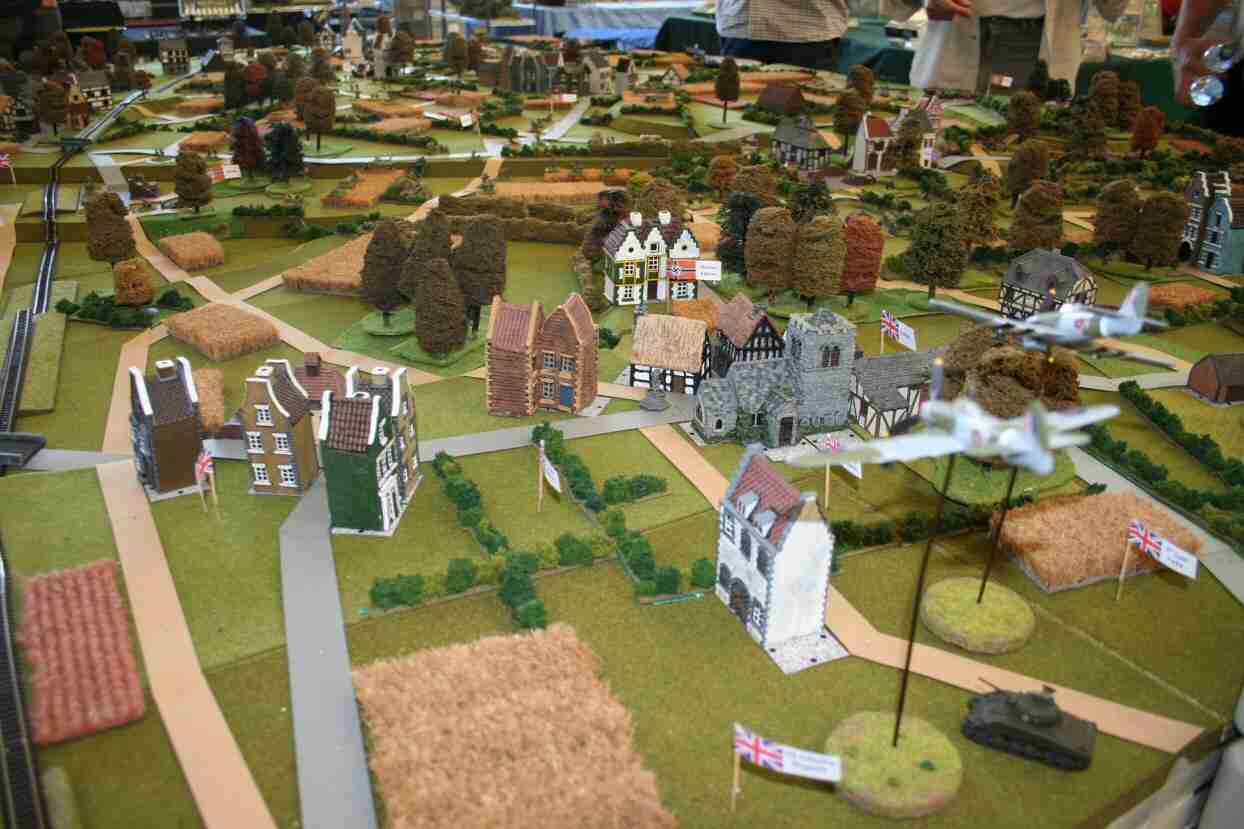
From the North West Corner |
Looking from the north-west corner, the 7th Green Howards will attack from here towards the centre of the board. Their early objectives include Audrieu Chateau (white house in centre of the photo), together with the woods and hedge-lines to the left of the Chateau. |
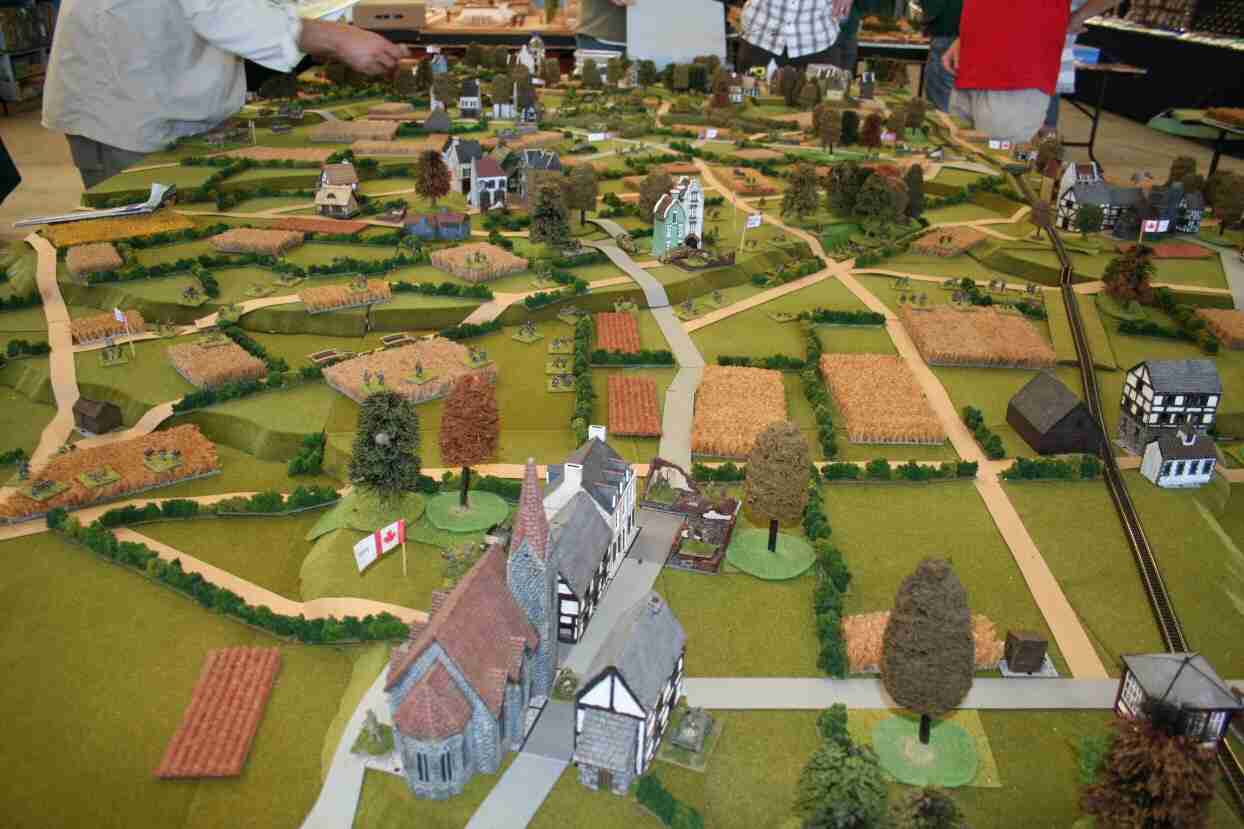
From the East |
Looking from the east, the Canadians enter the board at the north-west corner (bottom right of photo). Their objective, Le Mesnil Patry is in the centre of the photo. Canadian defensive minefields block the direct route (immediately after crossing the railway) and channel the Canadian towards the narrow streets of Norrey (centre bottom). From here, they must launch their attack - up the central road, or flanking from the left (south)? |
| Click on the Thumbnail for a full-size photo | Description |
|---|---|
 Immediate Contact |
Where is no-man's land in the bocage? As soon as the 6th Green Howards and 4/7 Dragoon Guards cross their start-line, they run into Aufklarungs Abteilung units on the outskirts of Les Hauts Vents. |
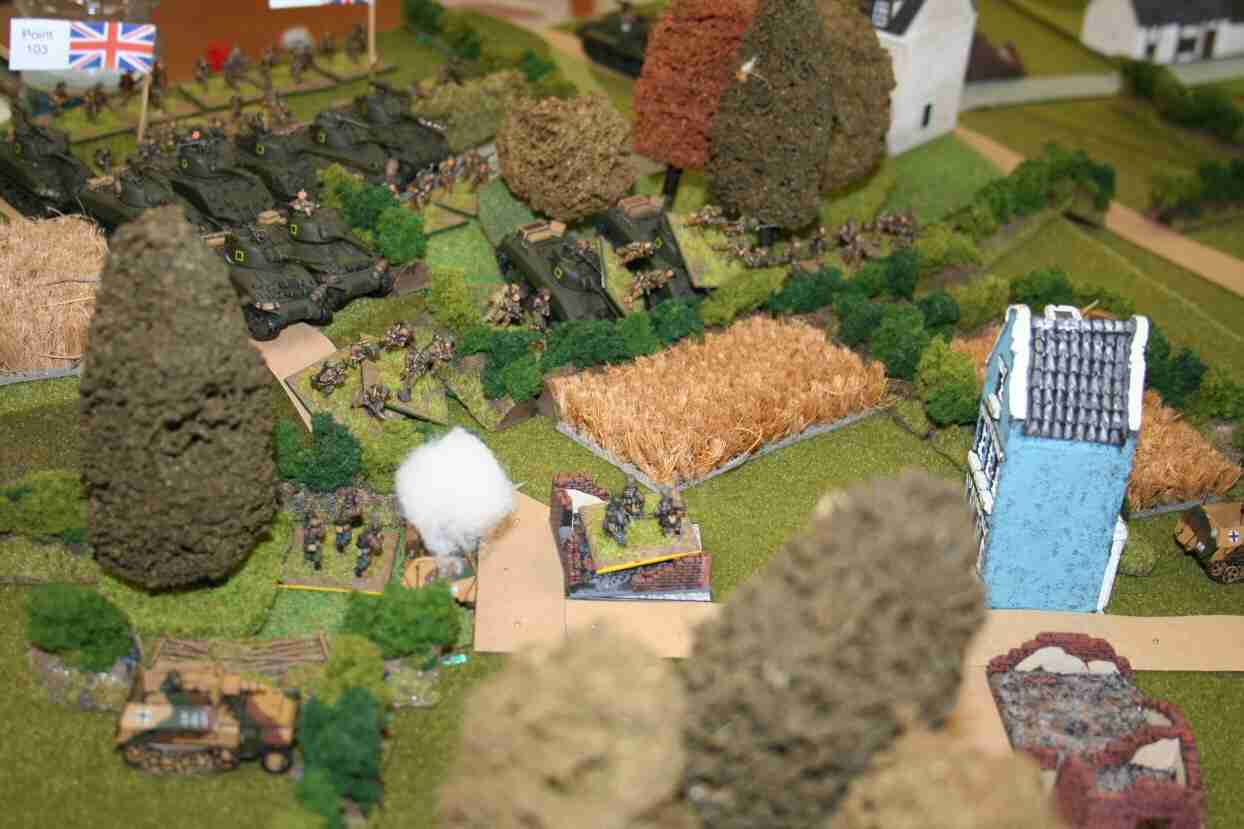
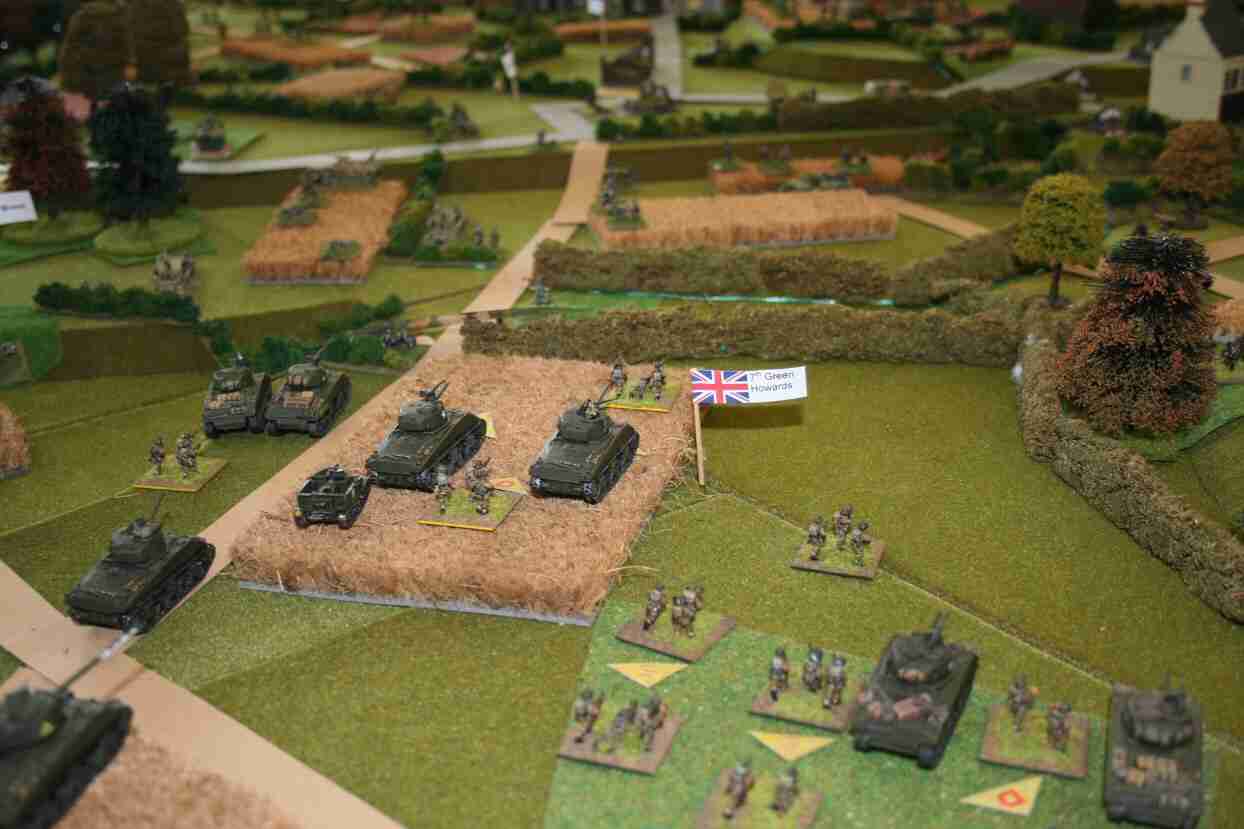
 Breaking into Les Hauts Vents |
The 6th Green Howards and 4/7 Dragoon Guards break into Les Hauts Vents and start to push back the relatively lightly armed recce units from Aufklarungs Abteilung. Lacking good AT weapons, the German commander starts to request release of Panthers from the reserve to stabilise his line. |
 A Hole? |
As the Hitlerjugend pull out of Les Hauts Vents, there is the glimpse of an open road through the bocage into Cristot. Can the British capitalise on this early success? |
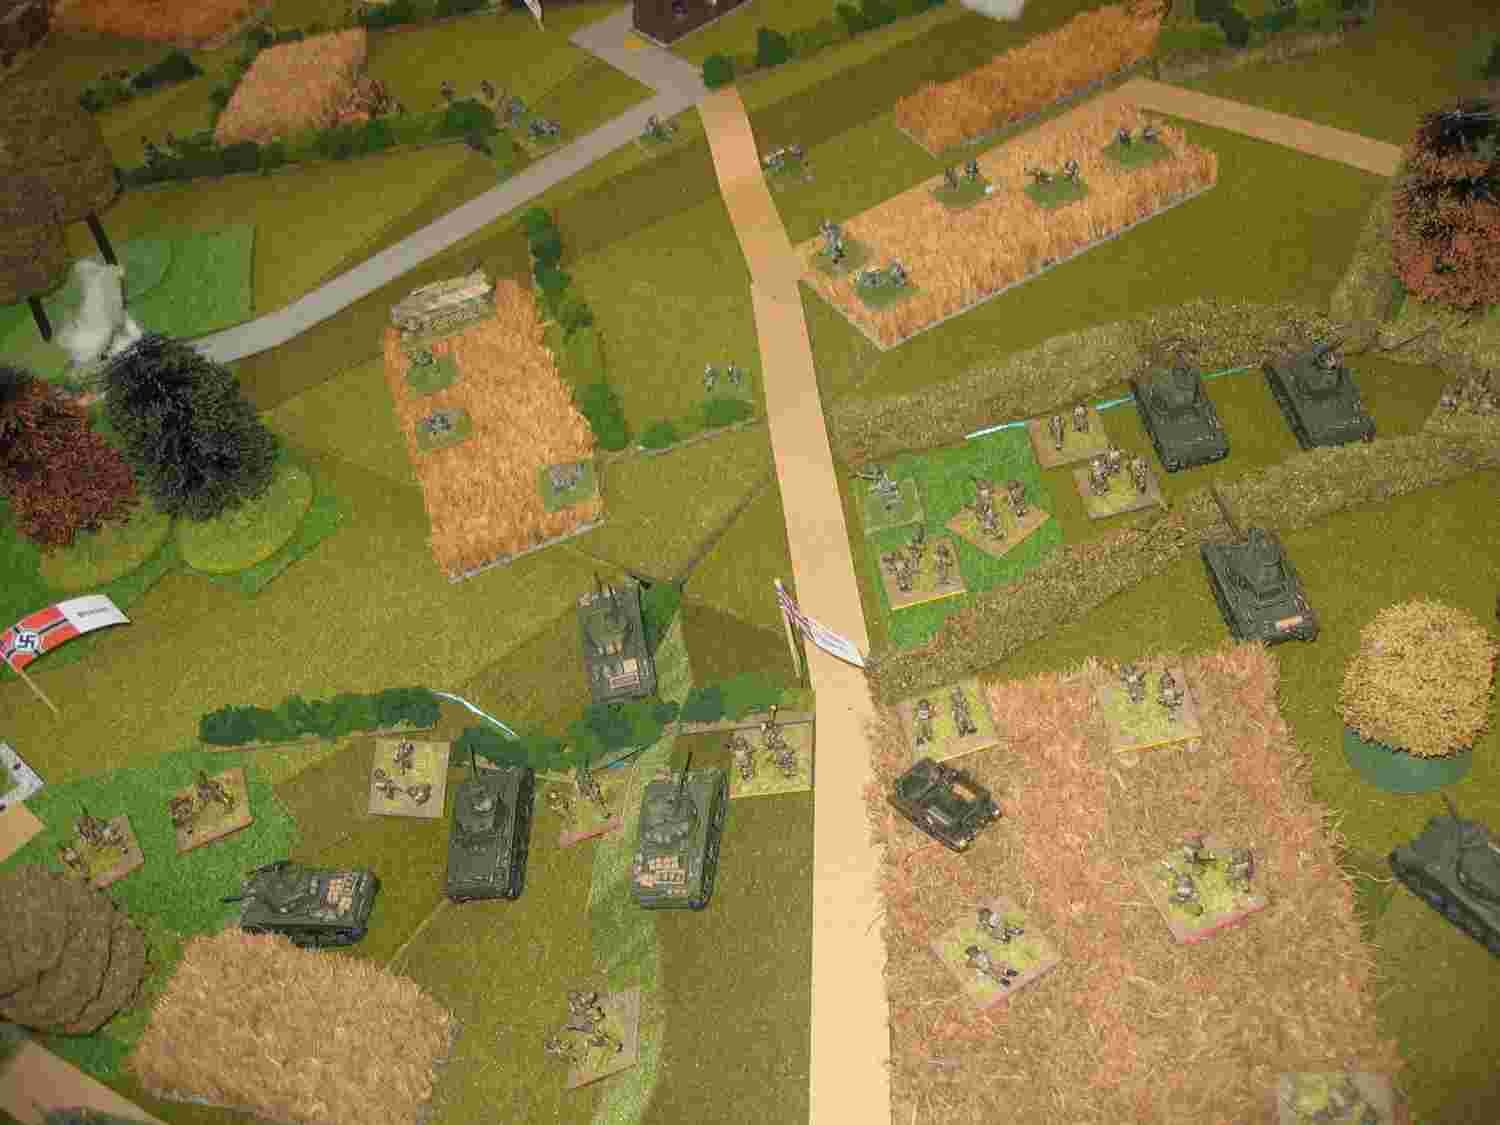
 Attack in the North |
To the north, 7th Green Howards move ahead of more tanks of 4/7 Dragoon Guards. Under cover of smoke, they move across open-ground towards Panzer-grenadiers in the hedges and woods close to Audrieu Chateau. |
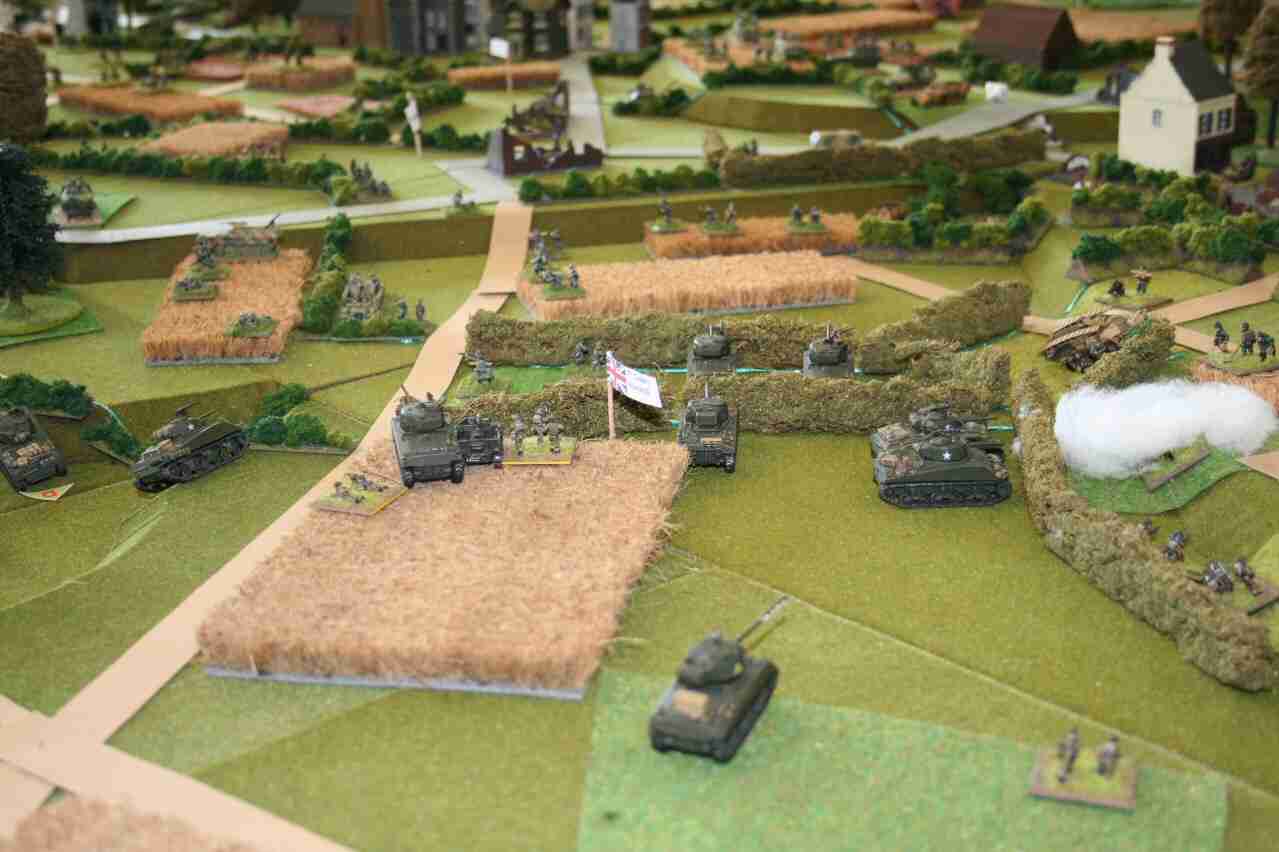
 Forward together |
Maintaining cohesion, 7th Green Howards and 4/7 Dragoon Guards approach the first German positions. How well will this co-ordination survive as they cross hedges into 2nd and 3rd defensive lines? |
 Running out of steam |
After getting across the first hedge-line, mounting infantry casualties start to take the momentum out of the 7th Green Howards assault. |
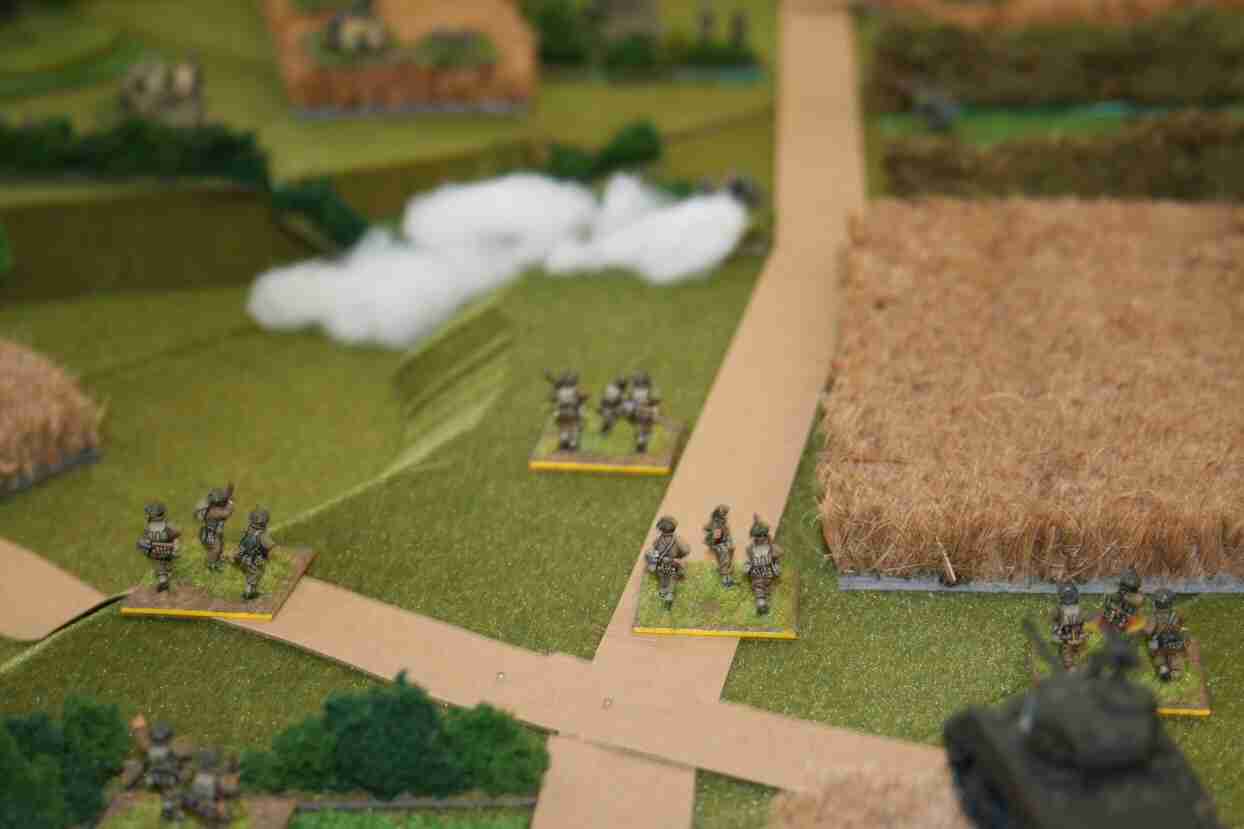
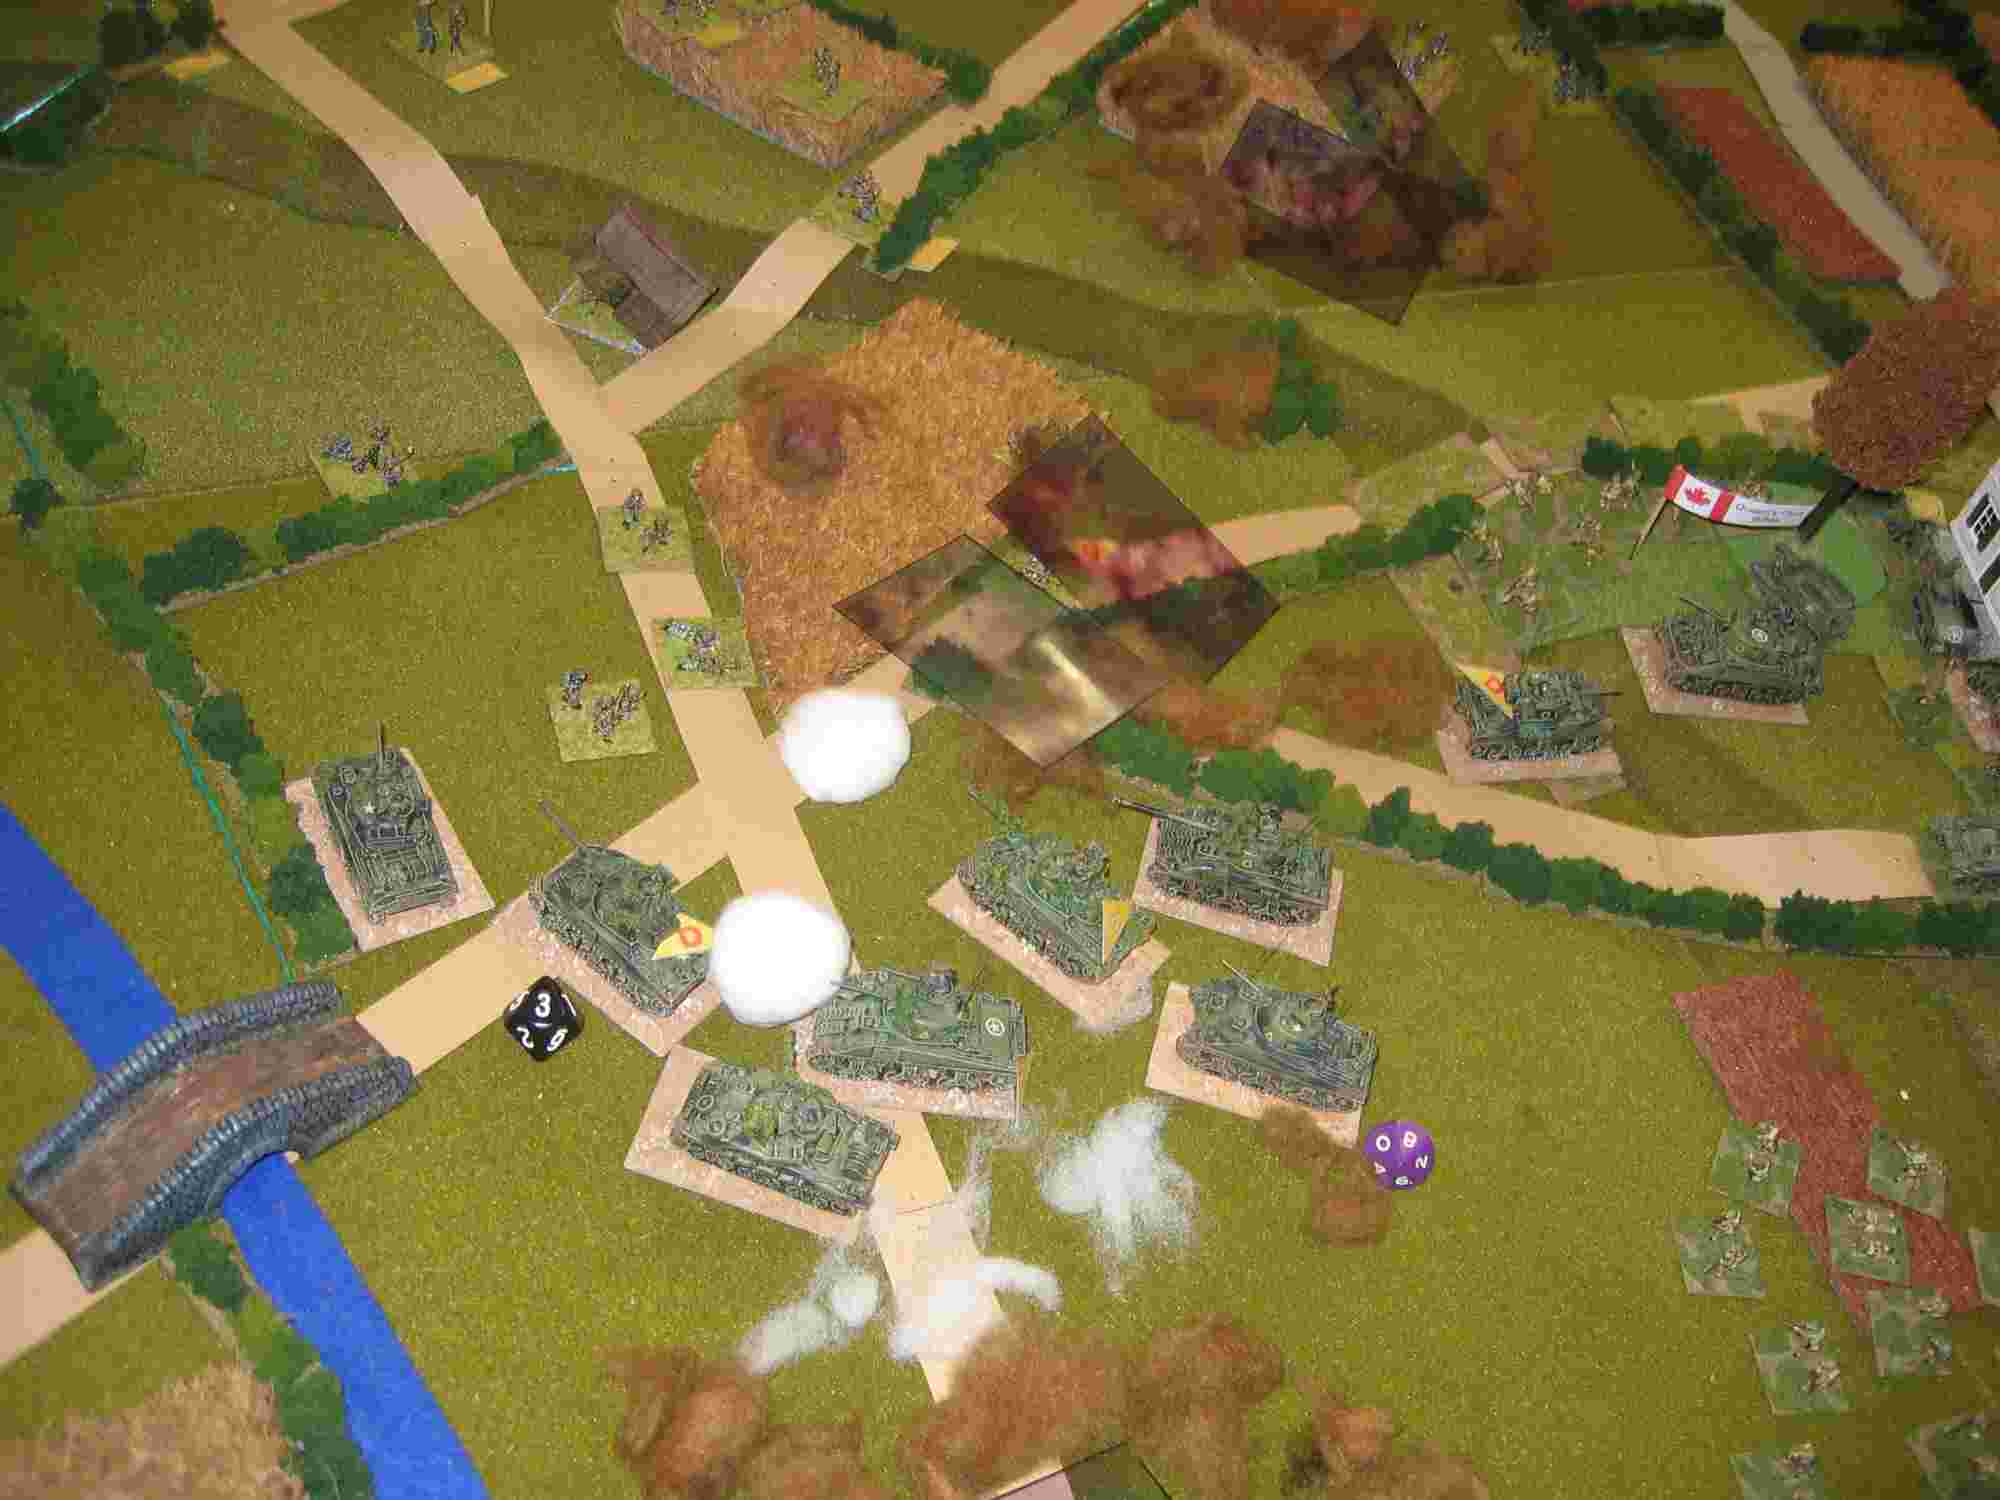
Moving toward Norrey |
Canadian tanks from the 1st Hussars, carrying the lead companies of the Queen's own Rifles, come under immediate heavy artillery fire as they move down towards Norrey. Canadian mine-fields channel them and prevent them from turning east towards the German lines. |
Trouble in Norrey |
The narrow streets of Norrey become a choke-point. The Canadian advance becomes disorganized as tank riders abandon the tanks under the heavy artillery fire. |
Moving out of Norrey |
Finally breaking through Norrey, the lead Canadian units keep heading south, choosing to launch their attack on Le Mesnil Patry from south east flank. Hitlerjugend Panzerpioneers lie in wait |
| Click on the Thumbnail for a full-size photo | Description |
|---|---|
Jabos |
Panthers appear - closing the door for a rapid move on Cristot. The British attack turns once more into the bocage. "Limejuice, Limejuice". Red smoke appears over the Panther's positions, beckoning to the circling Tiffies. |
Panthers survive |
Shrugging of the disappointing Typhoons, Panthers continue to dominate all the roads through the bocage into Cristot. The depleted ranks of the 4/7 Dragoon Guards are bolstered by the 6th Green Howards anti-tank guns. |
 Once more into the breach |
Bolstered by fresh rifle companies, the 6th Green Howards assemble in Les Hauts Vents to prepare for one more effort to force open the road into Cristot. |
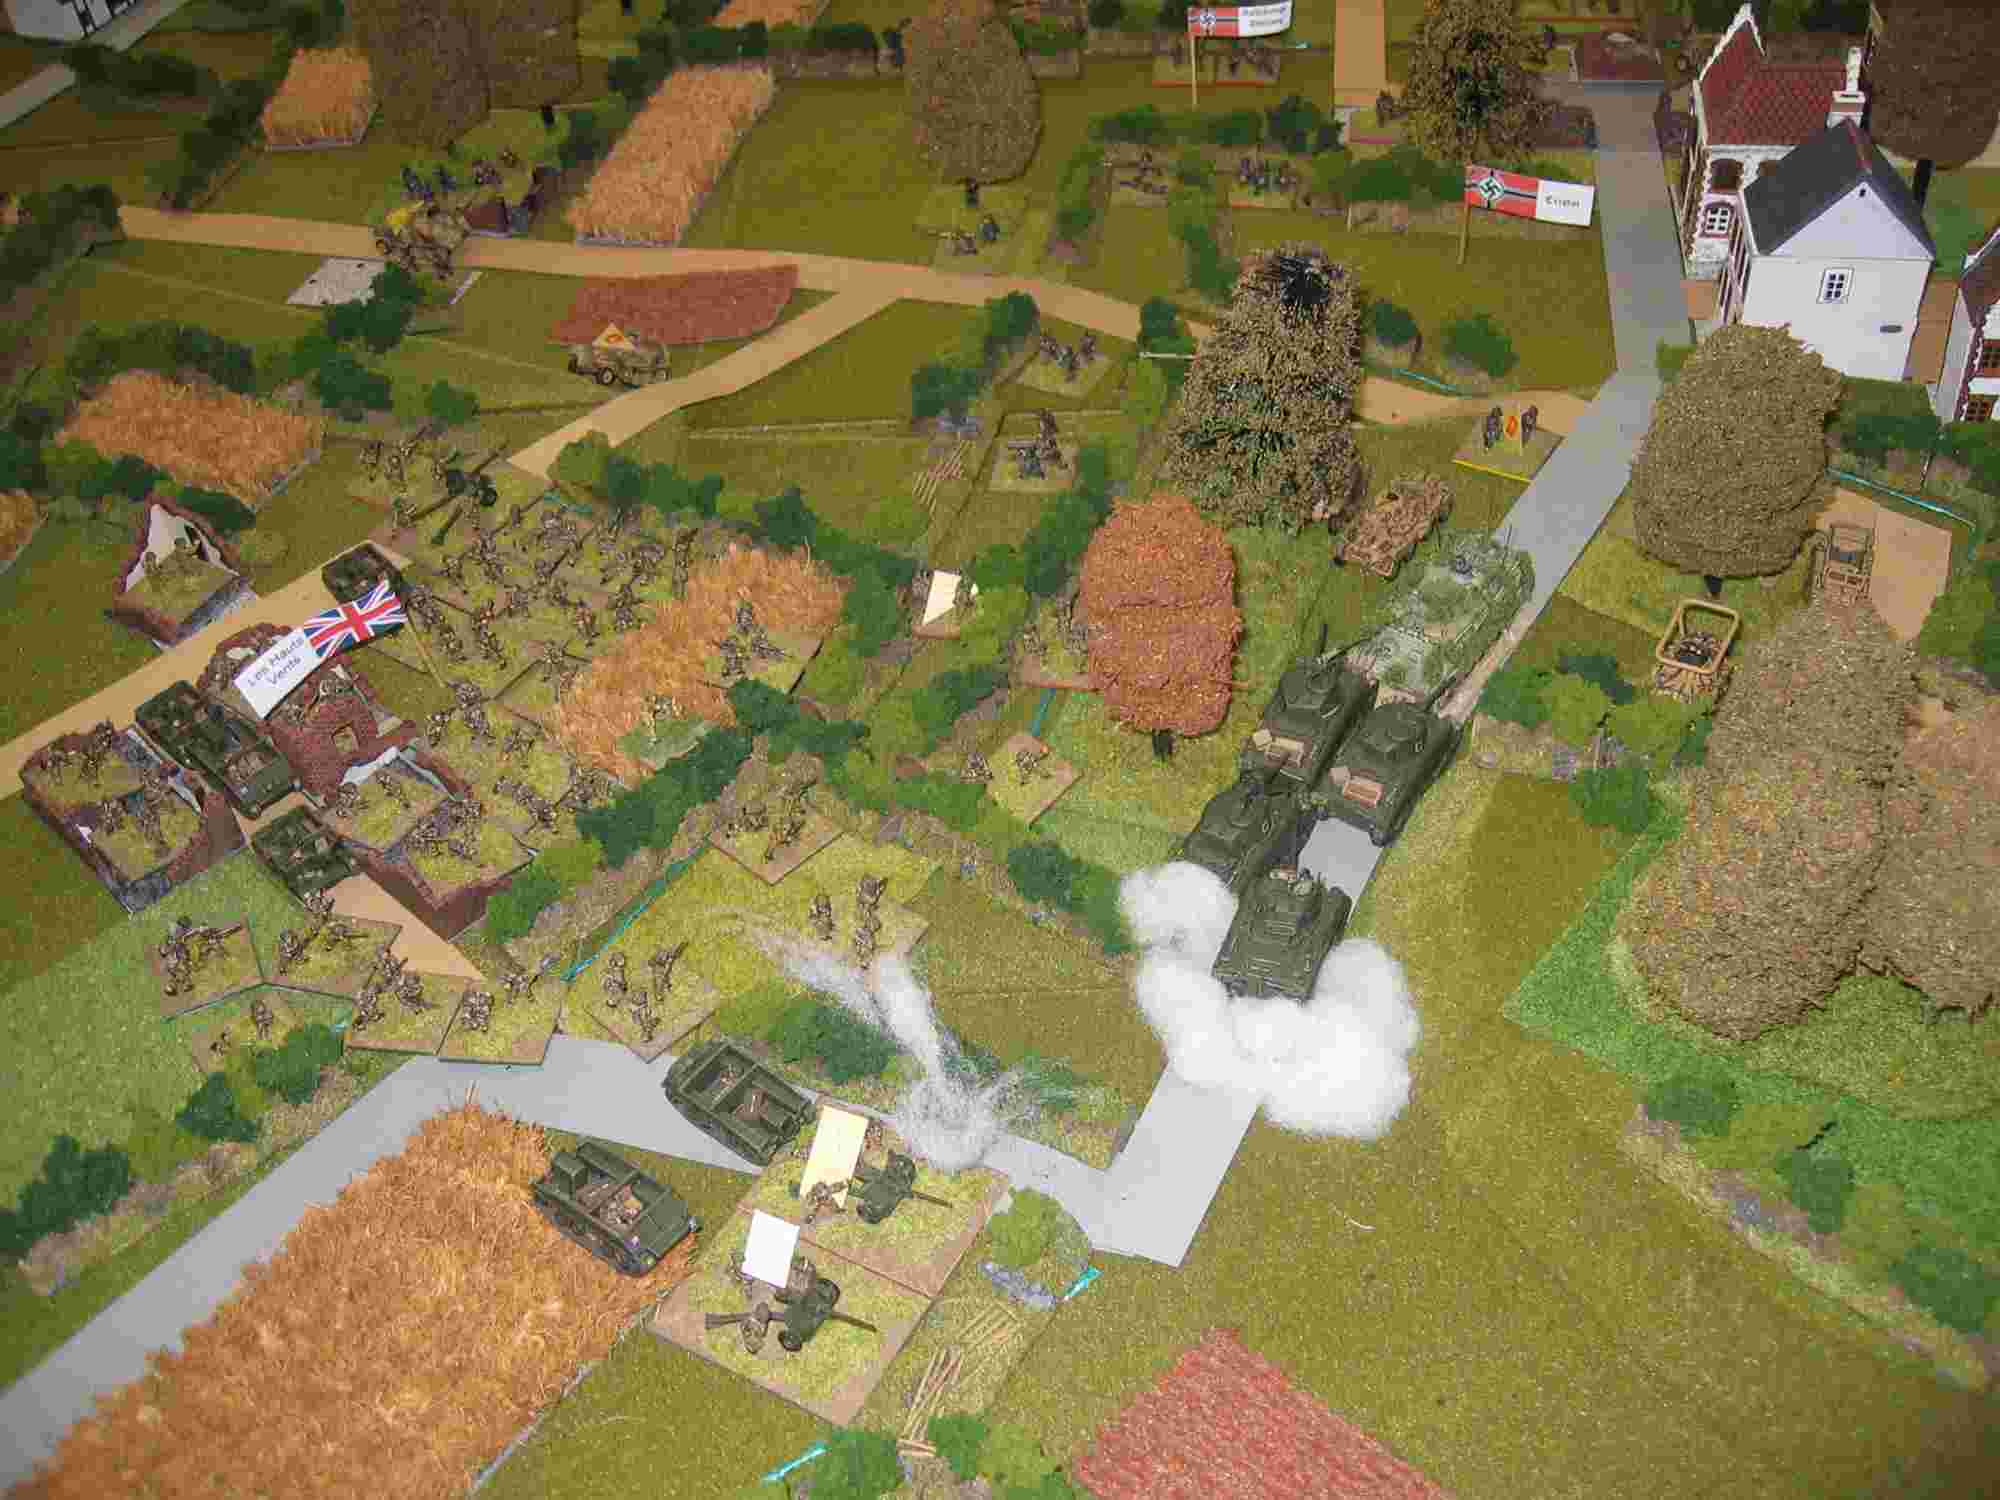
 Attack on Brouay |
7th Green Howards, reinforced by their Carrier Platoon, start to move on the west flank of the German positions in Brouay. |
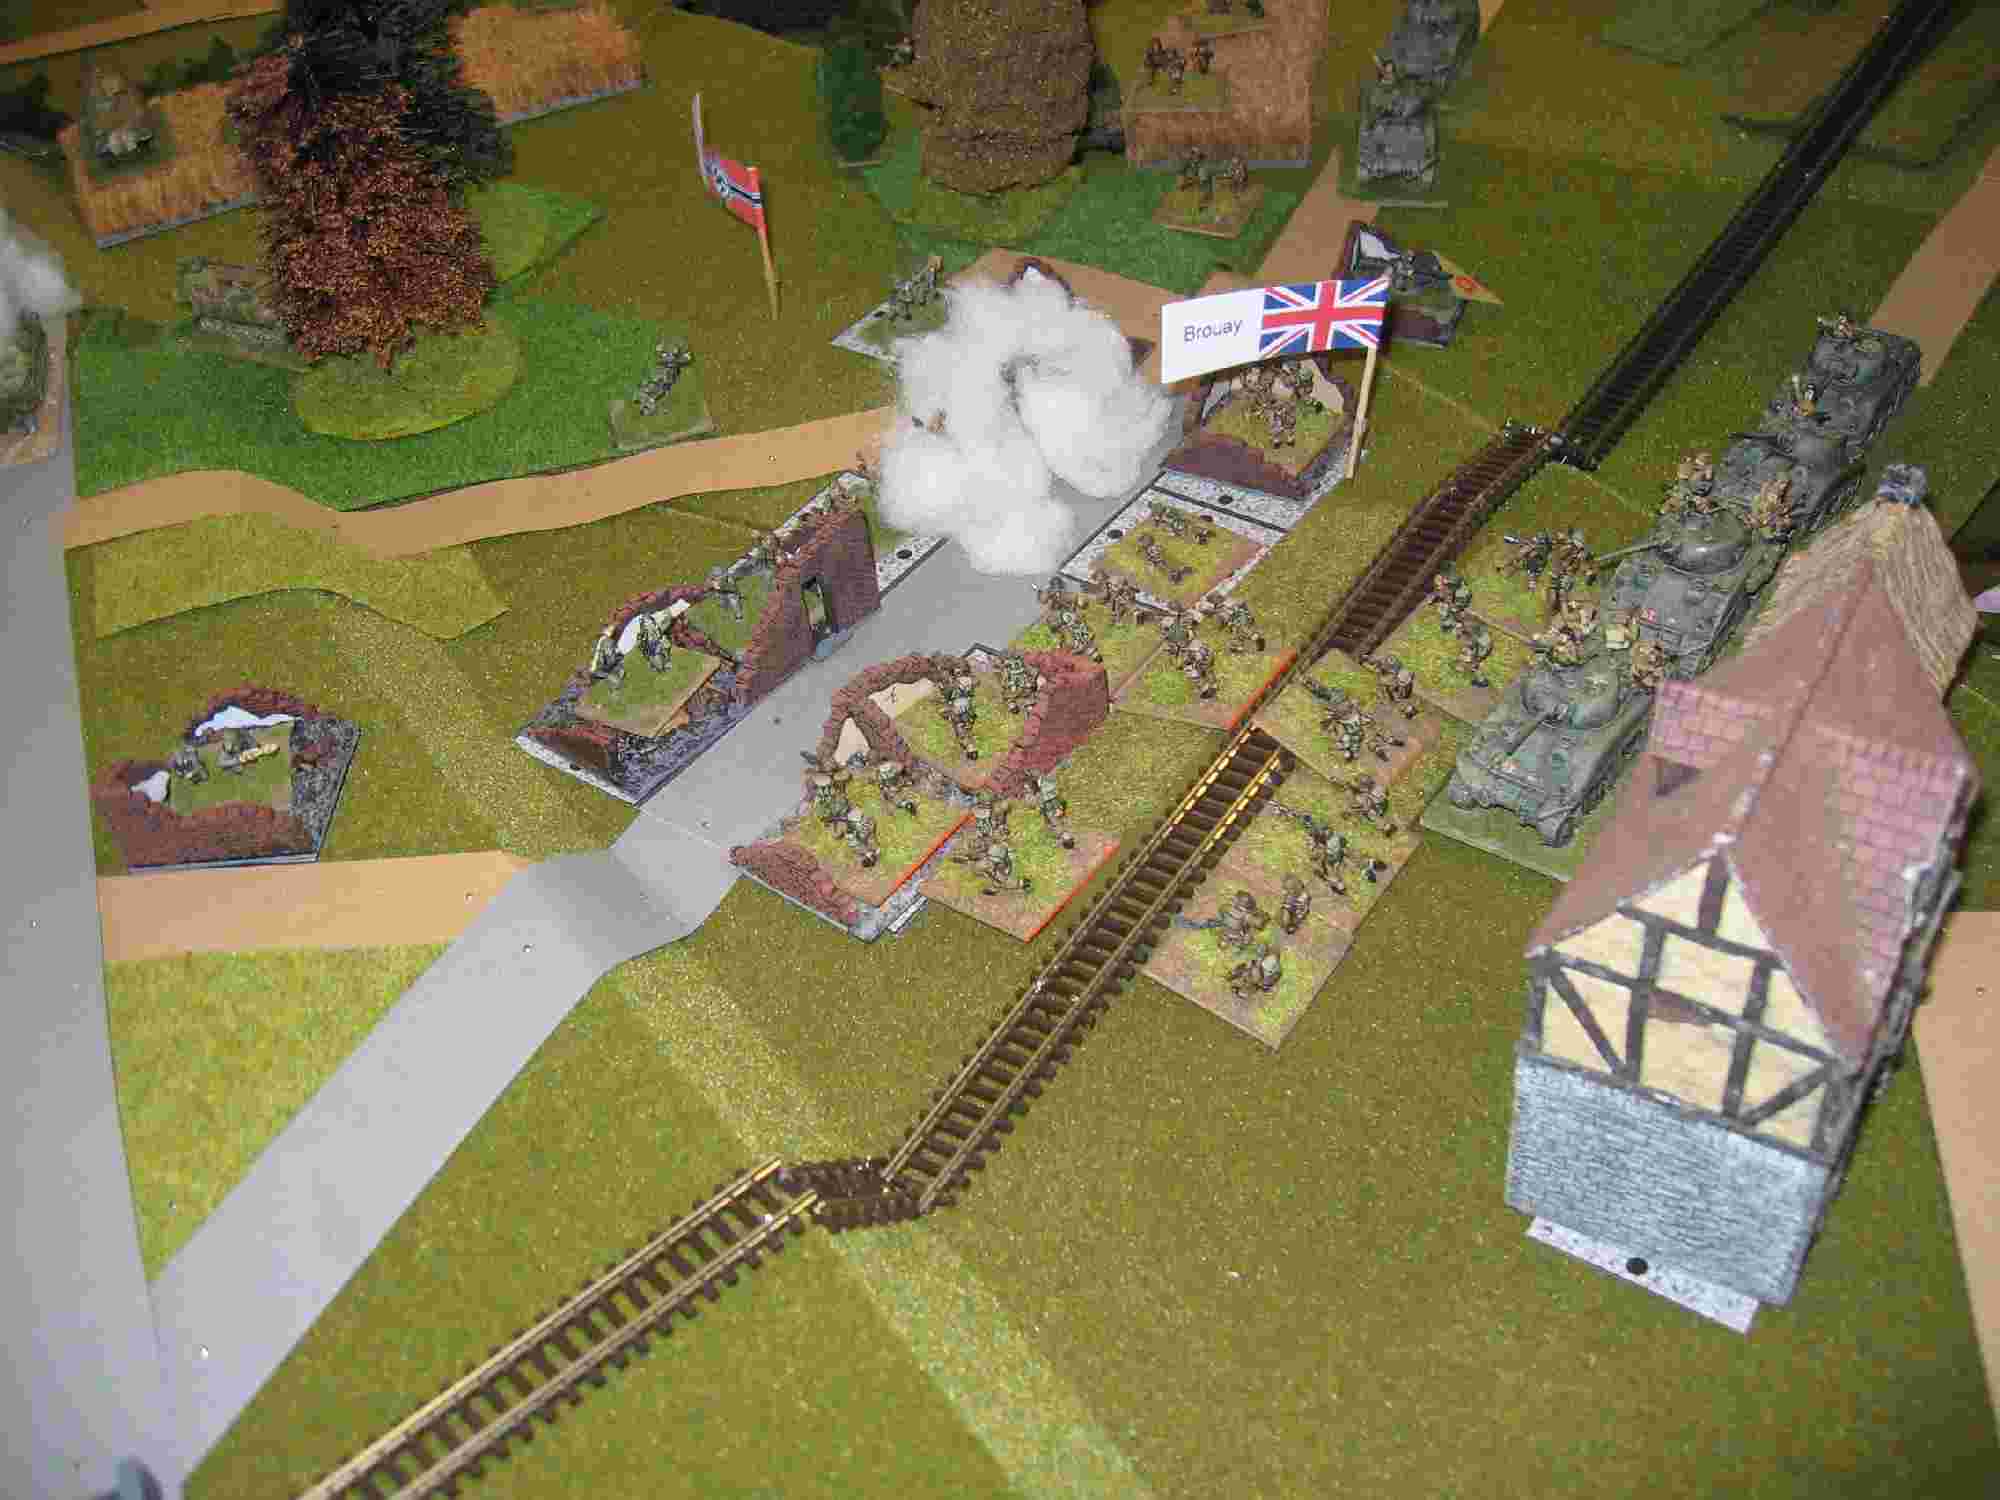 Supporting attack |
A fresh company from the 7th Green Howards supports this move by launching an attack across the railway into the other side of Brouay |
 Maintaining the Pressure |
Other elements of the 7th Green Howards maintain the pressure on the Hitlerjugend line south-west of Brouay. |
Artillery on Defense |
Heavy and accurate German artillery fire continues to cause disruption. The Canadian follow-up elements try and bypass the rubble of Norrey. |
Moving Forward |
Still taking a steady steam of casualties, the Canadians finally make contact with the Panzer Pioneers south of Norrey. |
Attacking toward Le Mesnil Patry |
After overcoming the first line of German defensive positions, the Canadians must now turn through 90º to attack up the hill towards Le Mesnil Patry. Ominously, in the foreground Panzer IV's start to bolster the Pioneer's defensive lines |
| Click on the Thumbnail for a full-size photo | Description |
|---|---|
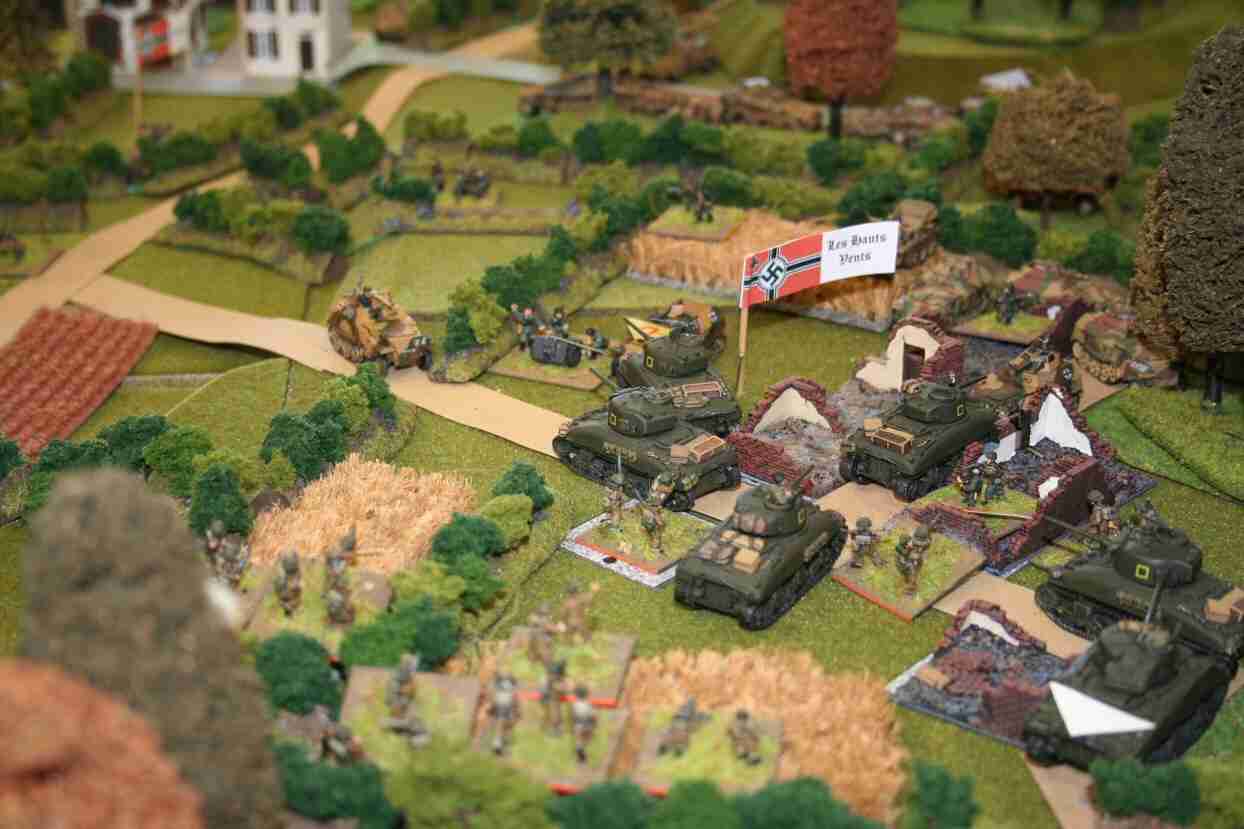
Holding Cristot |
Aufklarungs Abteilung, bolstered by Panthers, holds the British deep in the bocage on the outskirts of Cristot. The lane & bocage hedge in the centre of the photo (by the PaK 40) is the sunken lane where CSM Stan Hollis famously close-assaulted a German HMG position, without taking the pin out his grenade |
Death-ride of the 250's |
An unexpected penetration by a strong patrol of 250's deep into Les Hauts Vents severely disrupts preparations for the final assault on Cristot by the 6th Green Howards. |
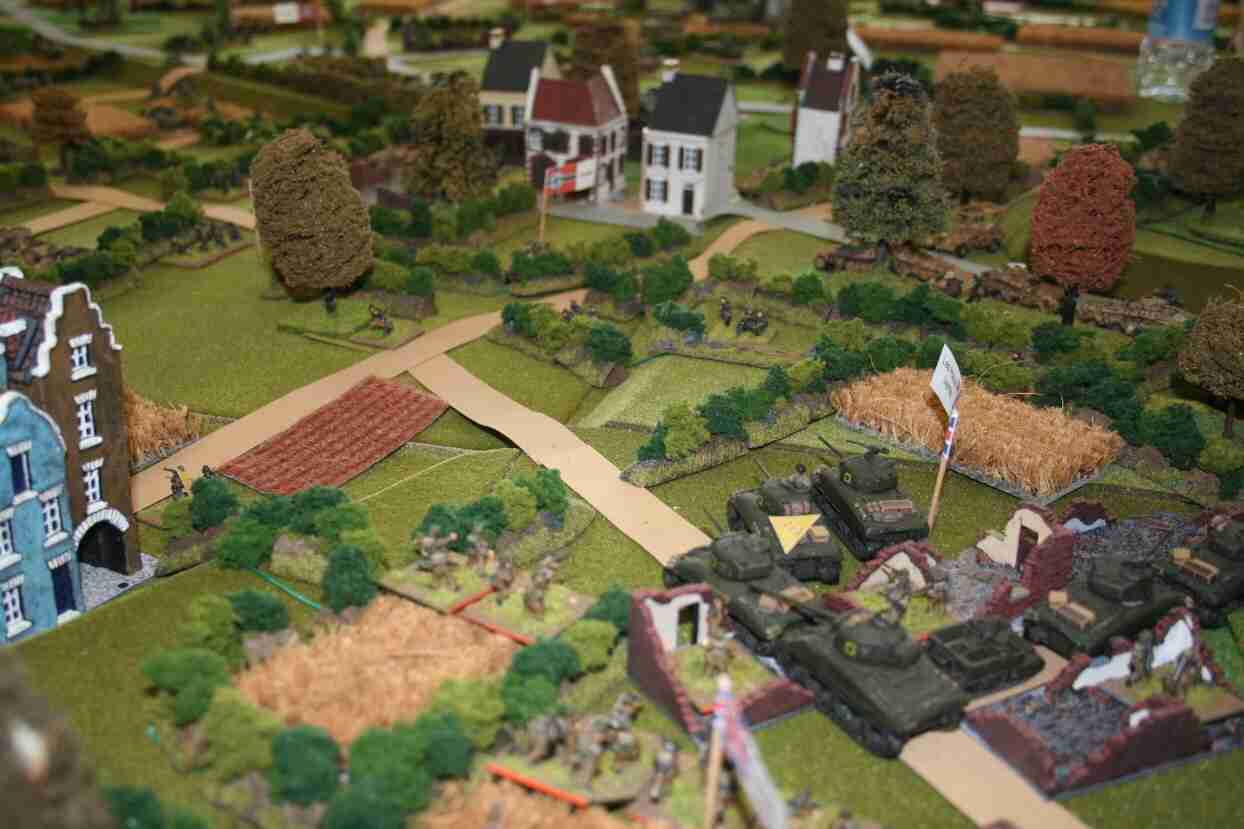
Attack on Cristot Stalls |
Having eliminated the threat from the 250's, the 6th Green Howards push on towards Cristot. With Shermans and AT guns on overwatch, a patrol from Carrier Platoon moves down the road towards the first houses in Cristot. However, Panthers and bocage have taken their toll and the tired 6th Green Howards will get no further |
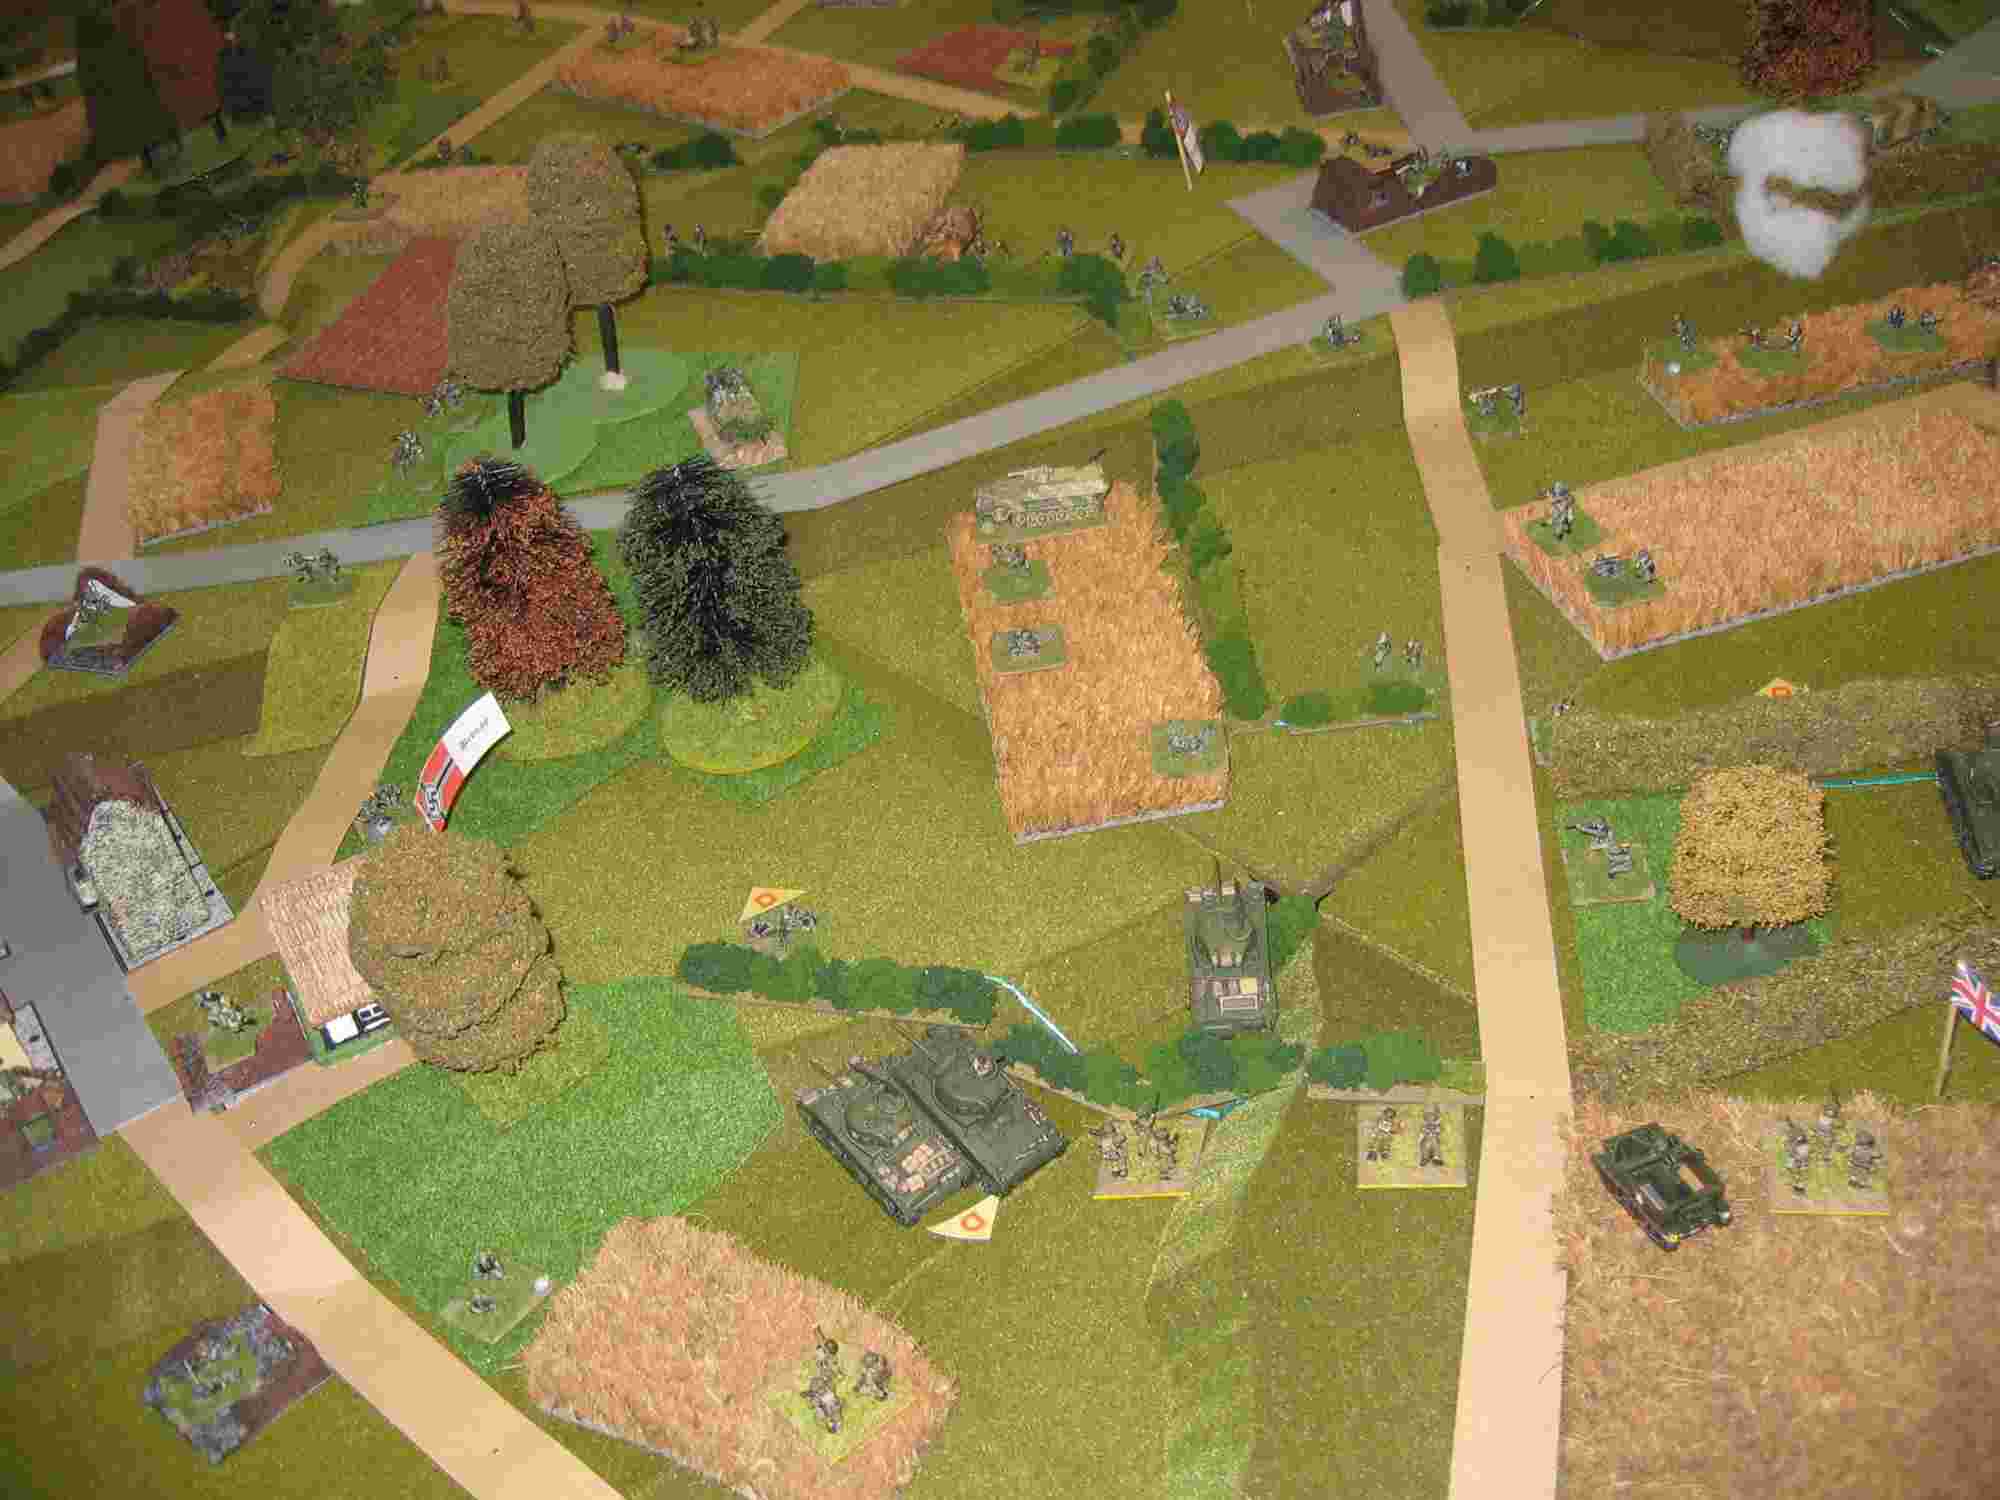
Threatening the center |
The 7th Green Howards maintain steady progress. With Brouay secure (bottom left) and two hedge-lines cleared, they now represent a real threat to the centre of the German line. Cristot, at the top right, beckons. |
Shoring up the Defense |
"Panzers - March!" The Germans are able to respond to the threat on the centre of their line from the 7th Green Howards. 5th Kompanie's Panzer IV's drive past the HQ of Panzergrenadier Regiment 26 to bolster the defences. |
 Fight before Le Mesnil Patry |
Panzer Pioneers continue to fiercely contest every inch of ground and every hedgerow on the road to Le Mesnil Patry. The Queen's own Rifles follow-up companies start to move into position to renew the assault. |
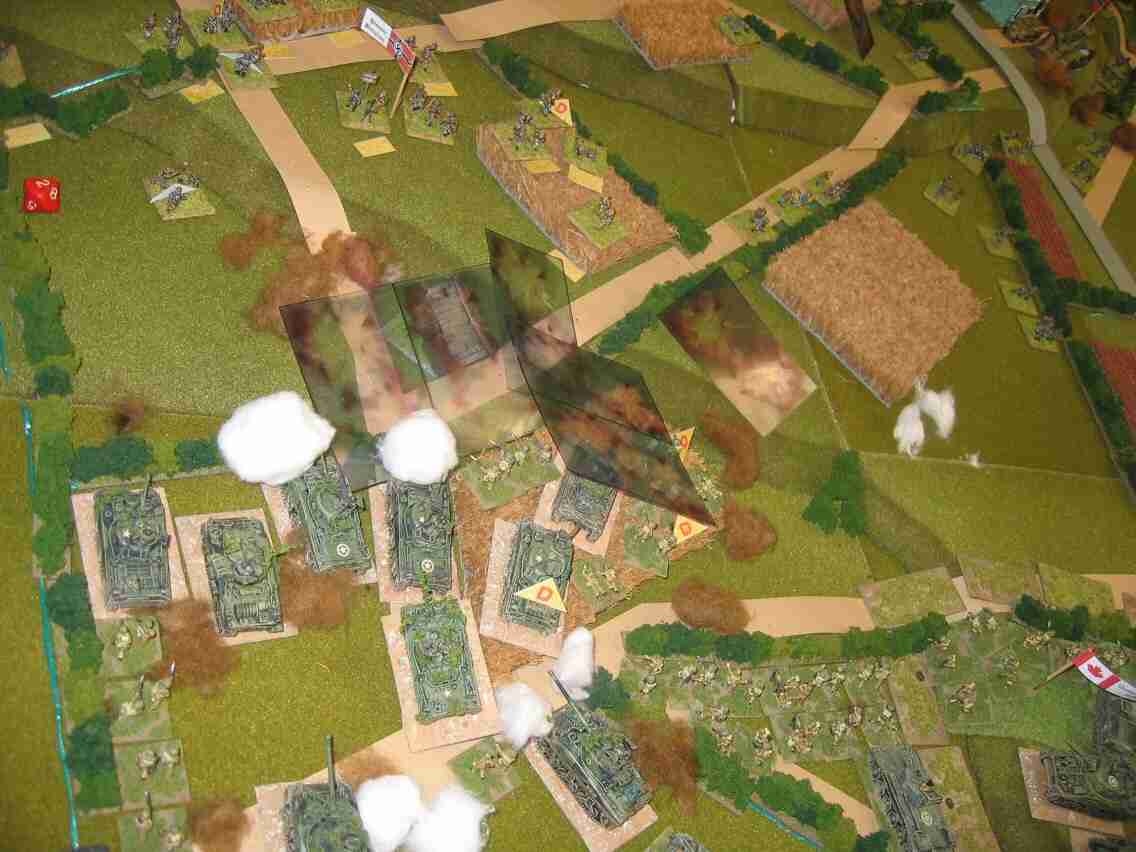 Out of time |
As the shadows lengthen, a powerful and coordinated Canadian attack starts to move up the hill towards Le Mesnil Patry. But the confusion in Norrey has left the Canadians with no time to push the attack home. |
| Click on the Thumbnail for a full-size photo | Description |
|---|---|
The Players |
The cast: Chris Jones, Steve Uden, Mark Davies, Gary Loosen, Chris Ginn, Andy Stenhouse, Andy Parkes, Ken Natt, Mark Middleton. Umpires (off photo!) Paddy Green & Richard de Ferrars |
Copyright 2000-2019 Fire and Fury Games, all rights reserved
Web page maintained by
Webmaster@FireAndFury.com.