| Click on the Thumbnail for a full-size photo | Description |
|---|---|
 bishenpur001 |
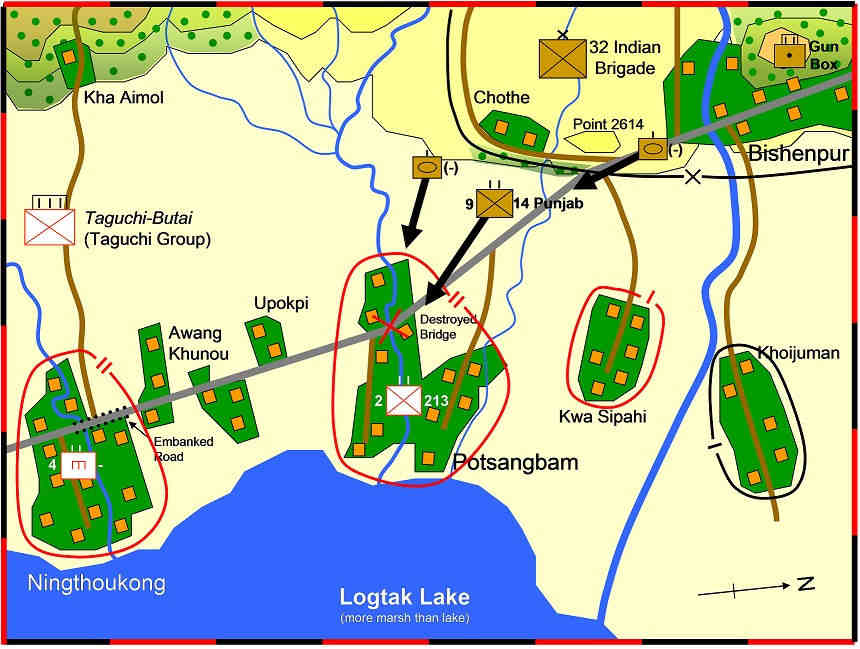
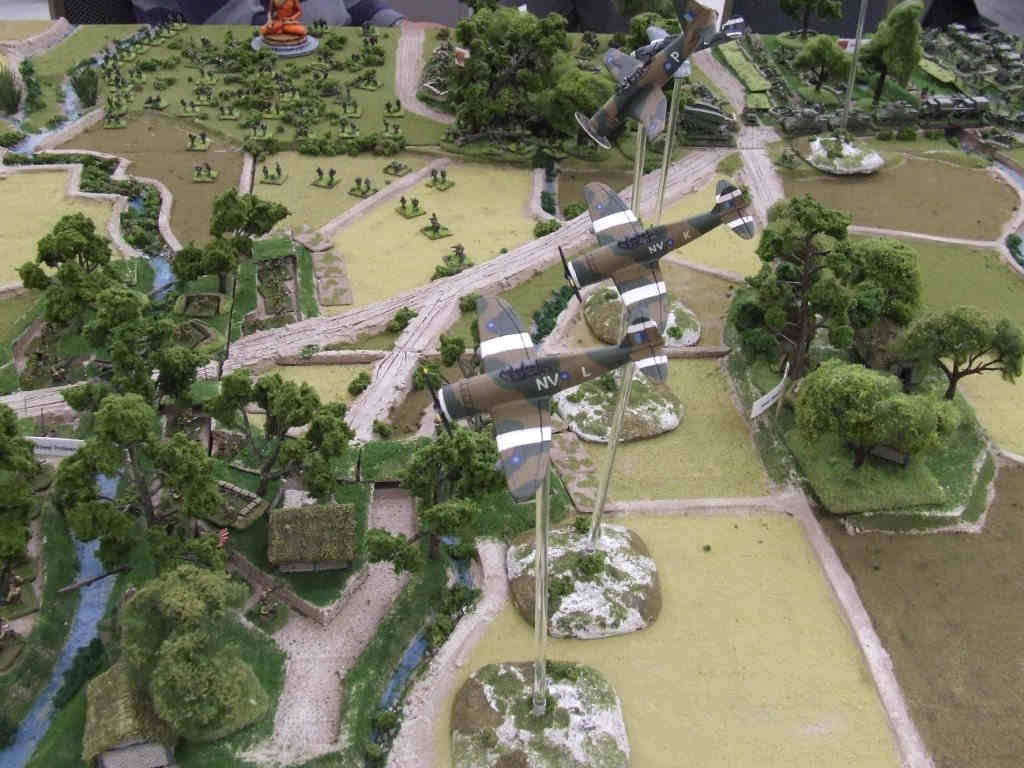
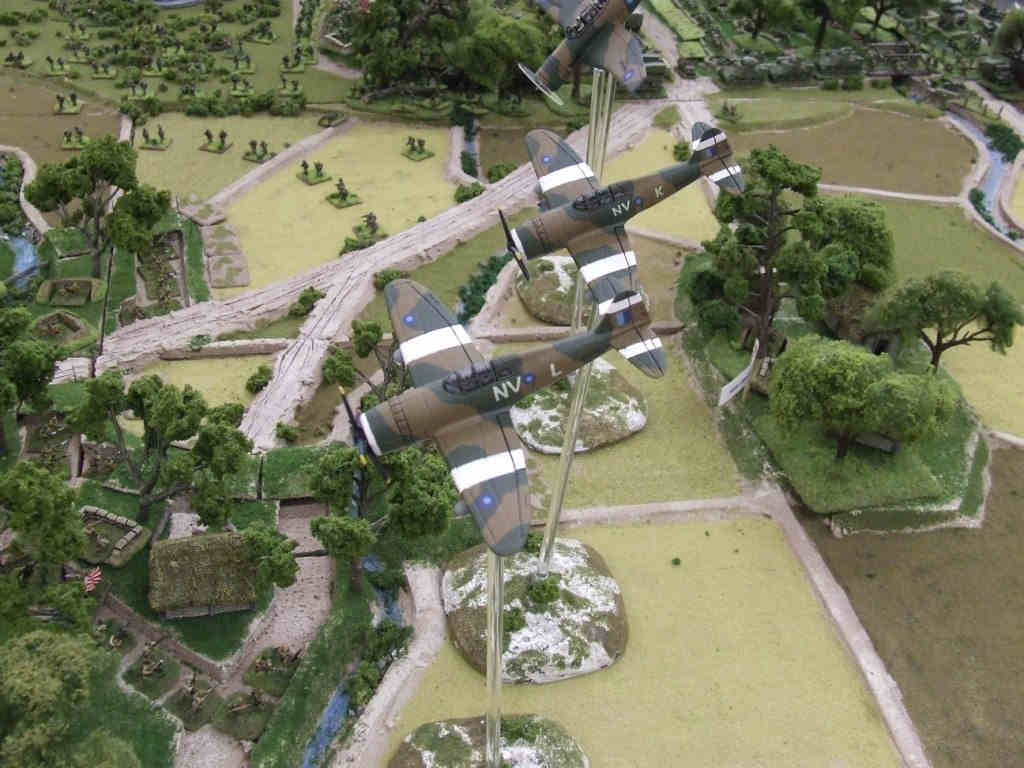
1. As dawn broke on 8th May 1944, the villages of Ningthoukong and Potsangbam, on the western shore of Logtak Lake, a few miles south of Imphal, were subjected to an intense bombardment by B-24 Liberator bombers of the Allied Strategic Air Force, followed up by three squadrons of Indian and RAF Vengeance dive-bombers. In game terms, the Japanese defenders were subjected to three waves of four Vengeance dive-bombers. However, as we only have one Vengeance model, Hurricanes and Thunderbolts acted as 'stand-in' Vengeances. |
 bishenpur002 |
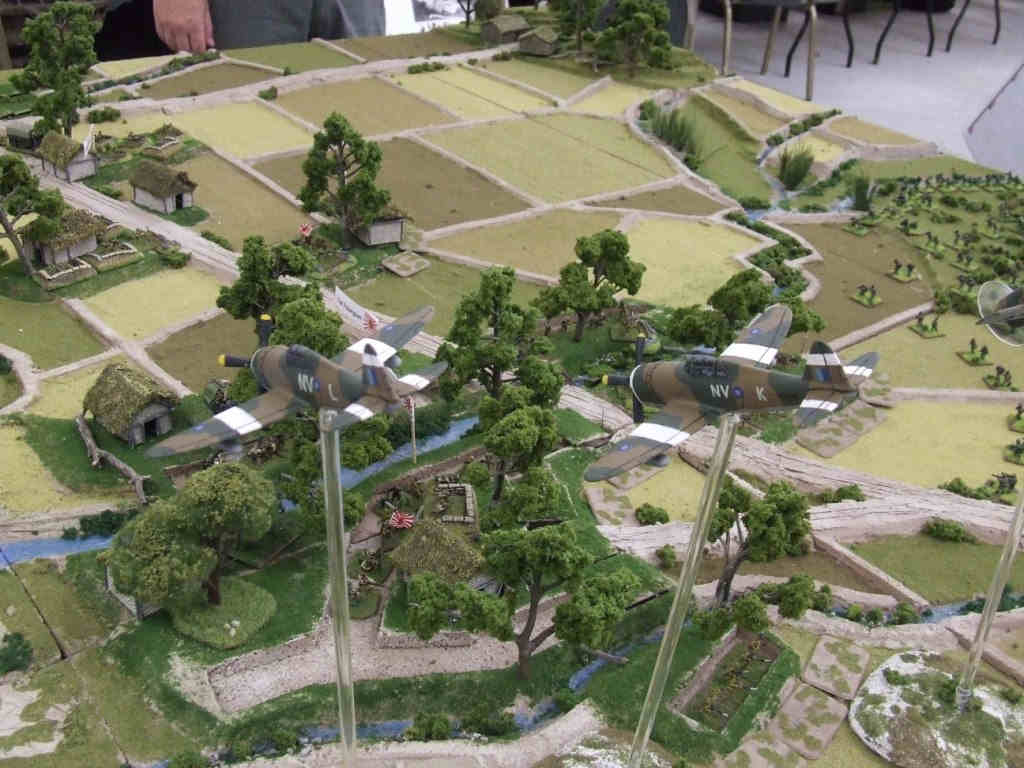
2. The intense air attack goes in on Potsangbam, successfully eliminating several bunkers in the western fringe of the village, plus most of its anti-tank defences and a 105mm artillery FO. However, two Vengeances are shot down by accurate Japanese 13mm AA fire. |
 bishenpur003 |
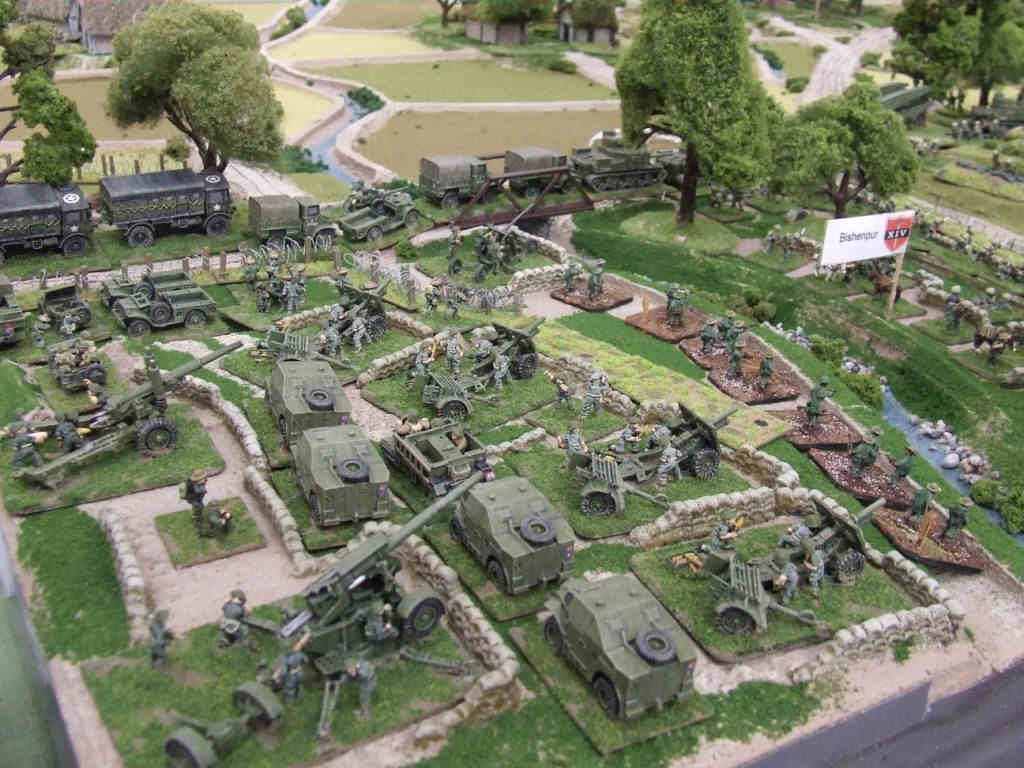
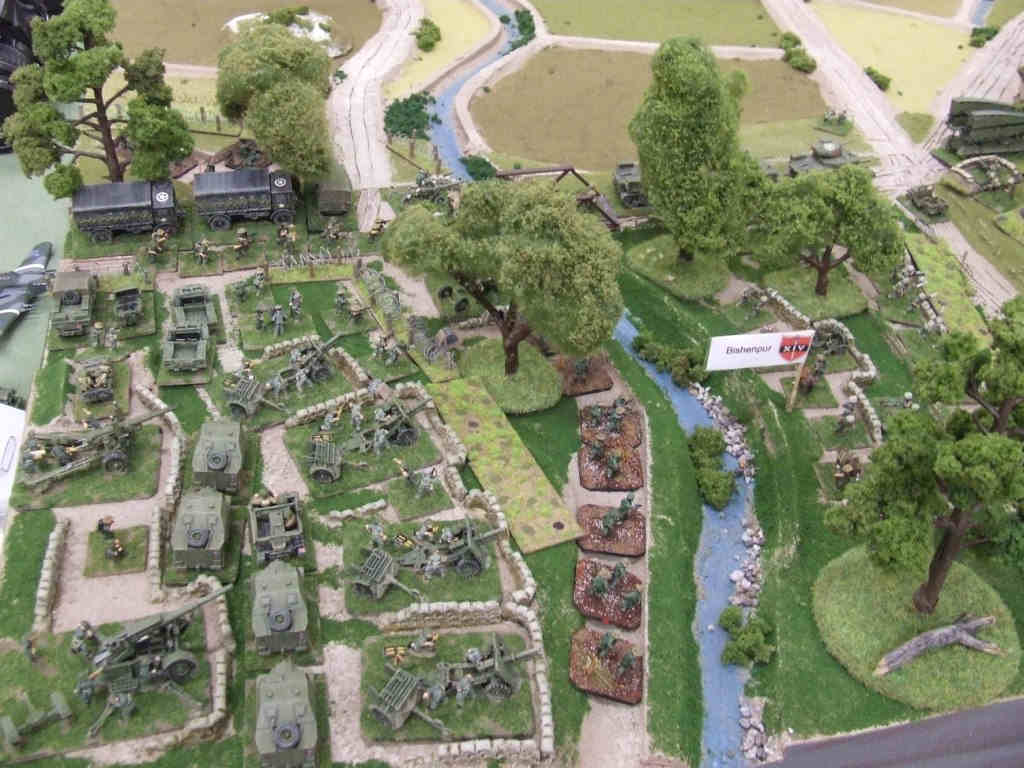
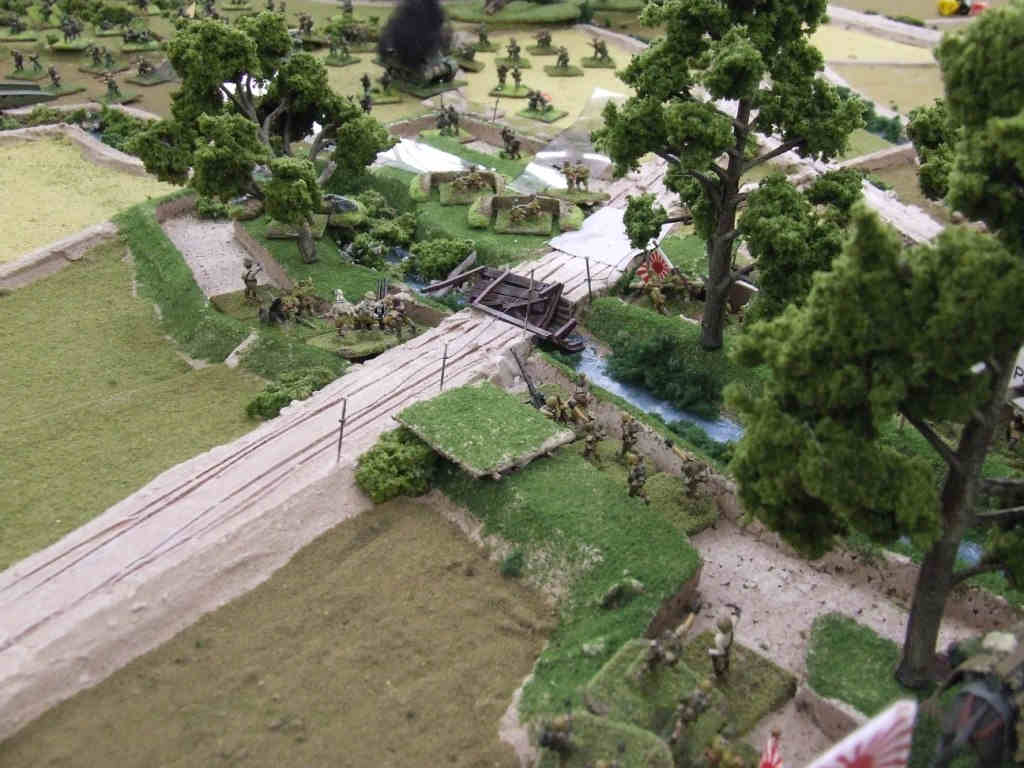
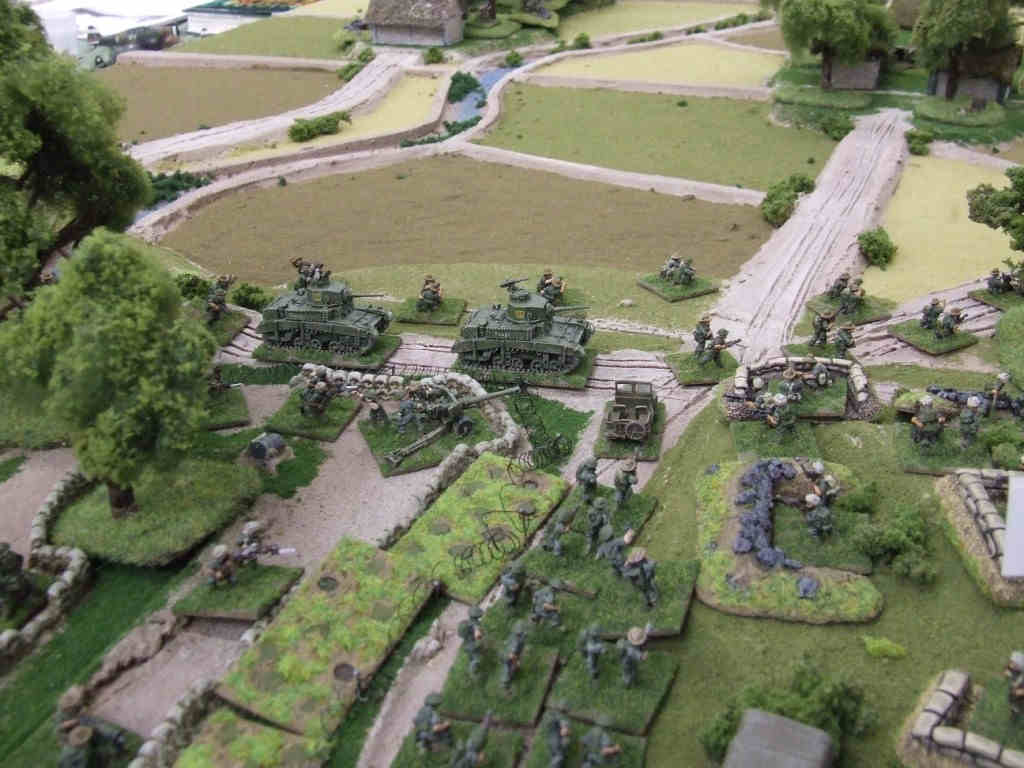
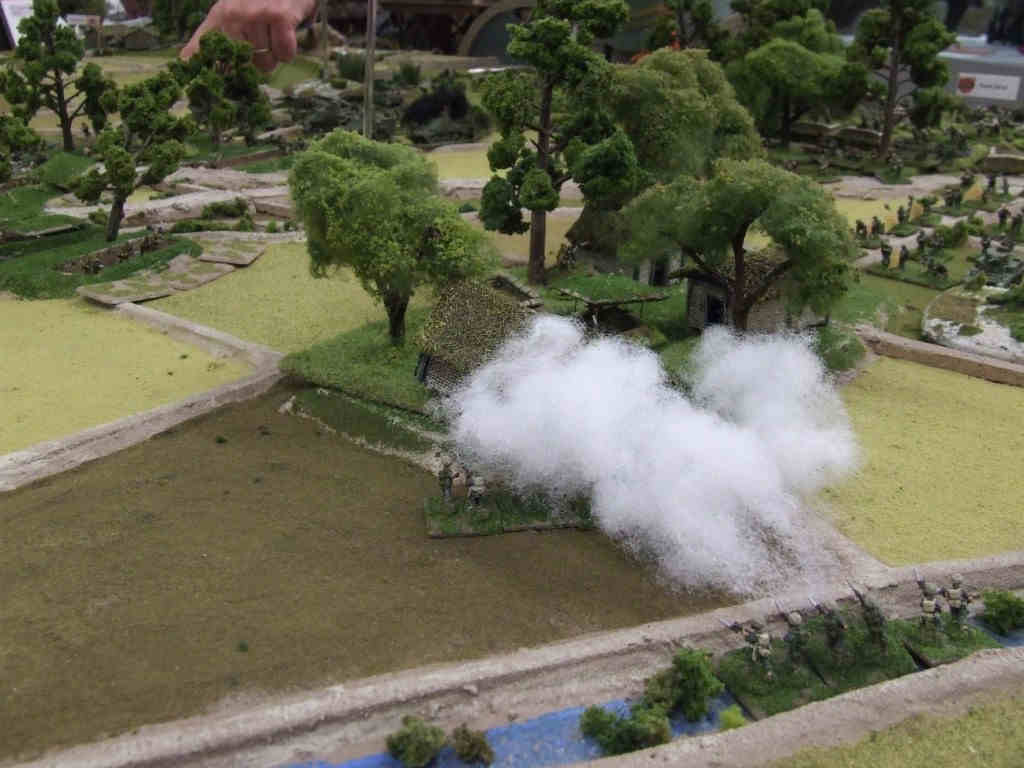
3. With the air attacks nearing completion, the guns of the Bishenpur 'Gun-Box' open up with HE and smoke to support the attack on Potsangbam by the 9/14th Punjab Regiment. |
 bishenpur004 |
4. An RAF Dakota makes a much-needed supply drop to the beleaguered garrison of Bishenpur. |
 bishenpur005 |
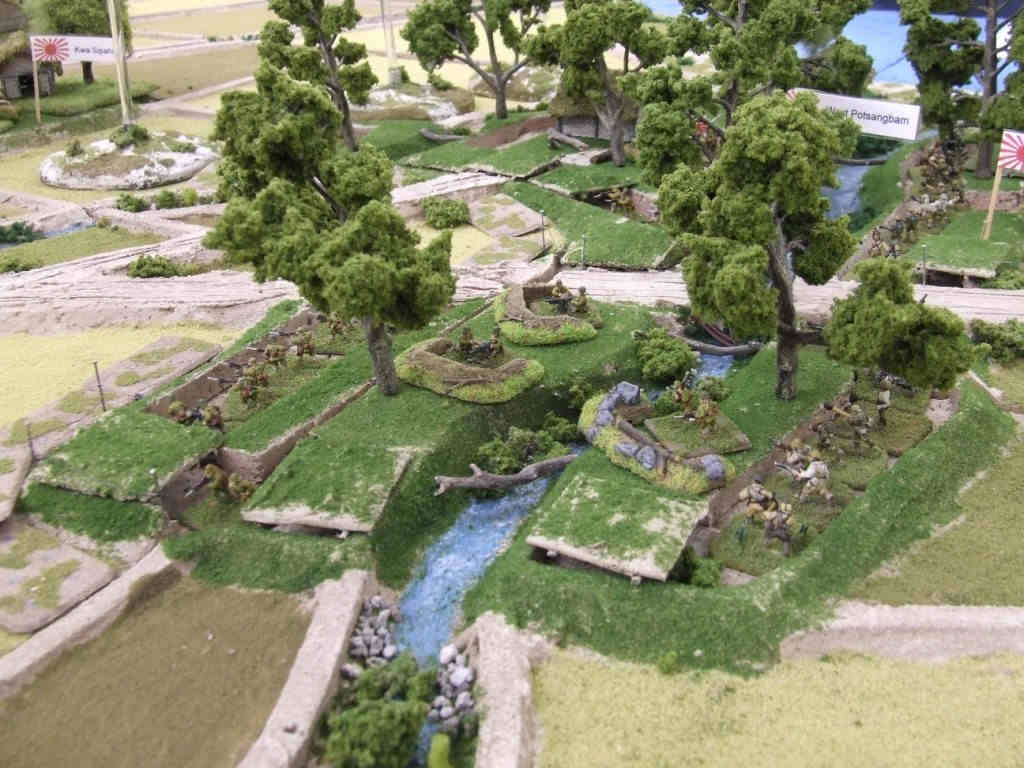
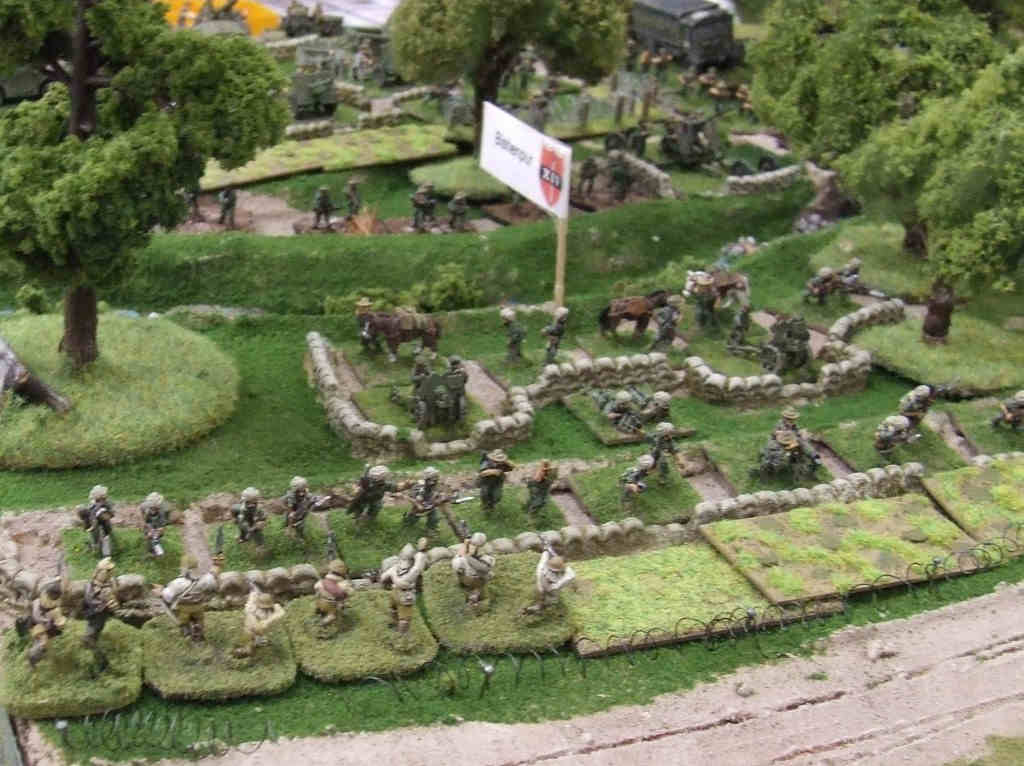
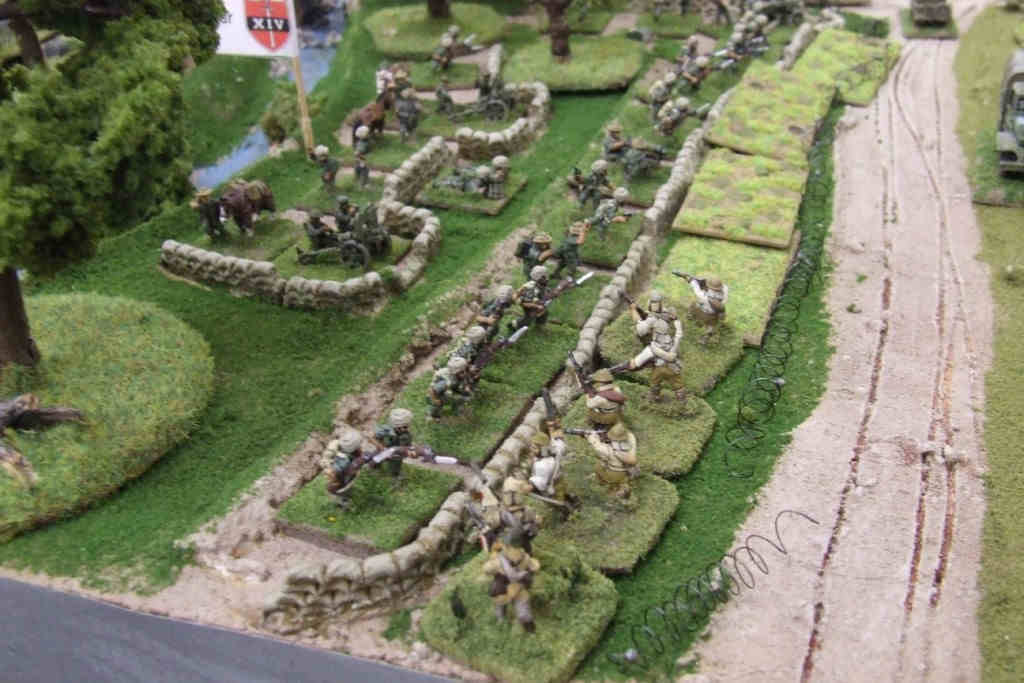
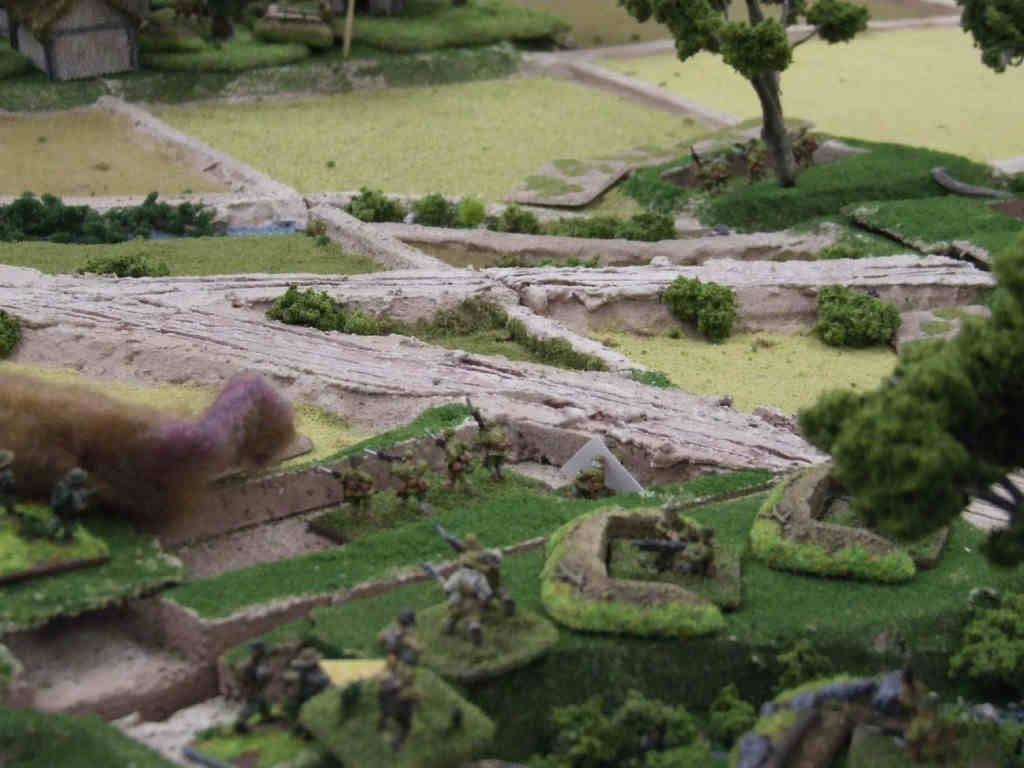
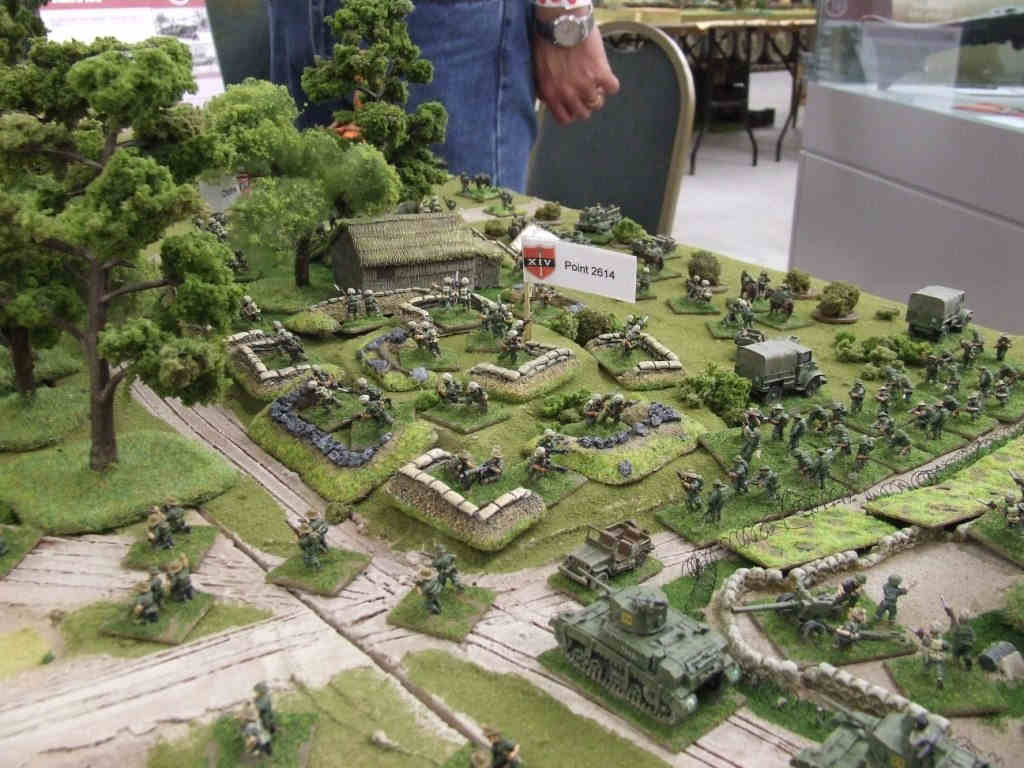
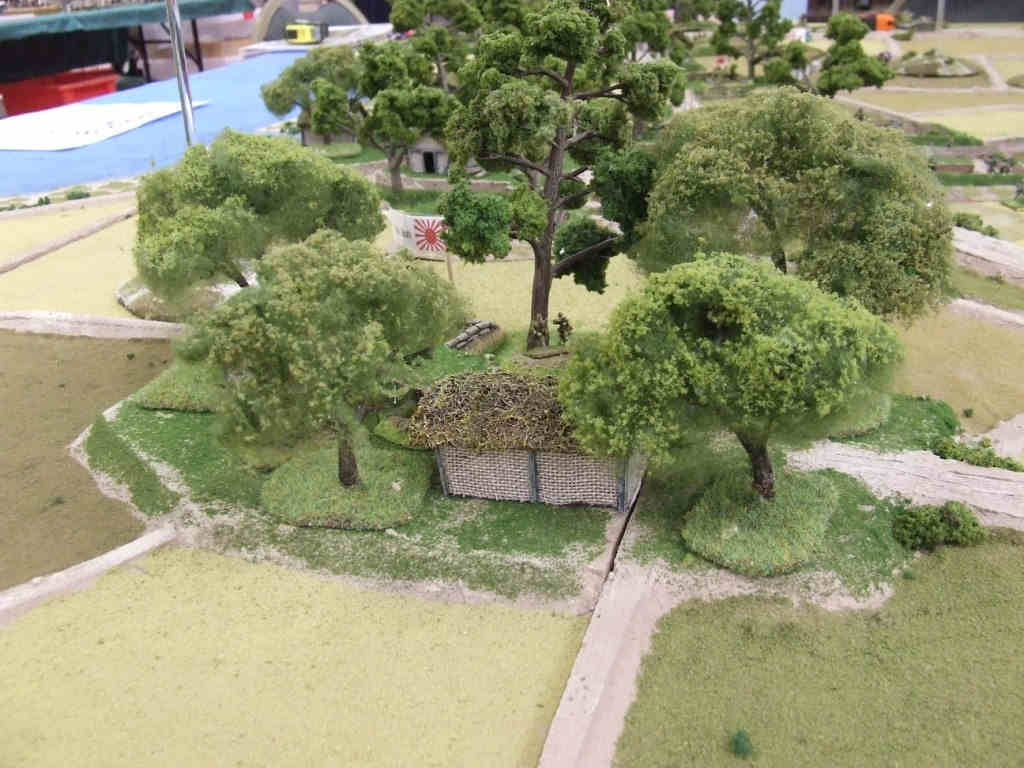
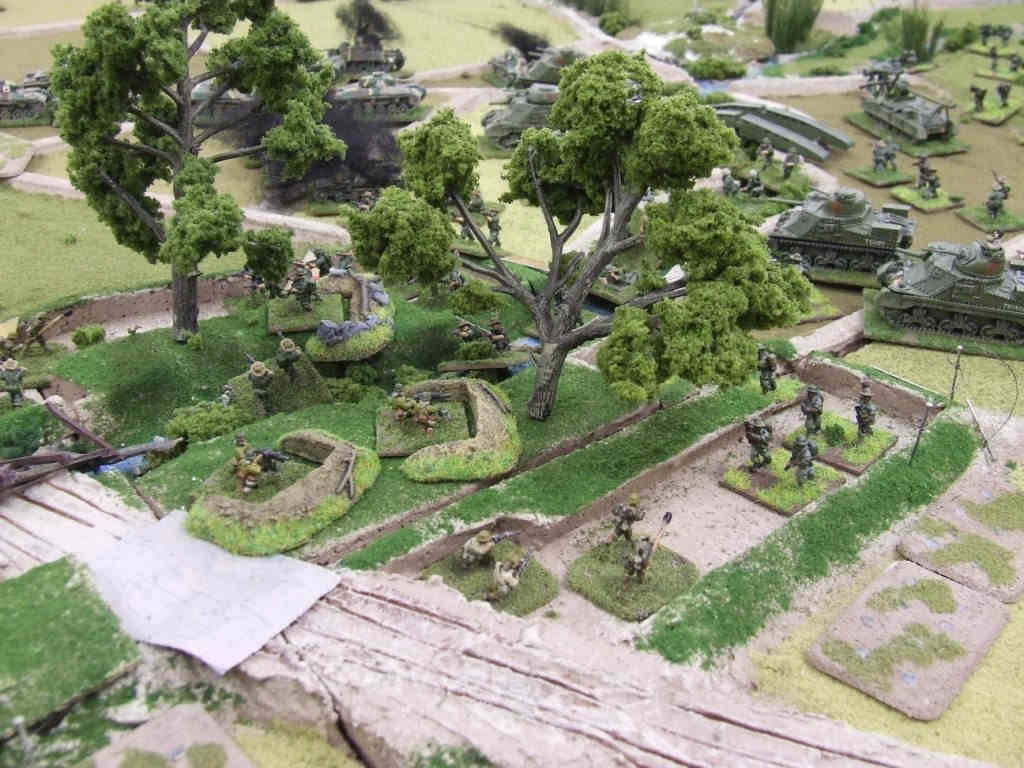
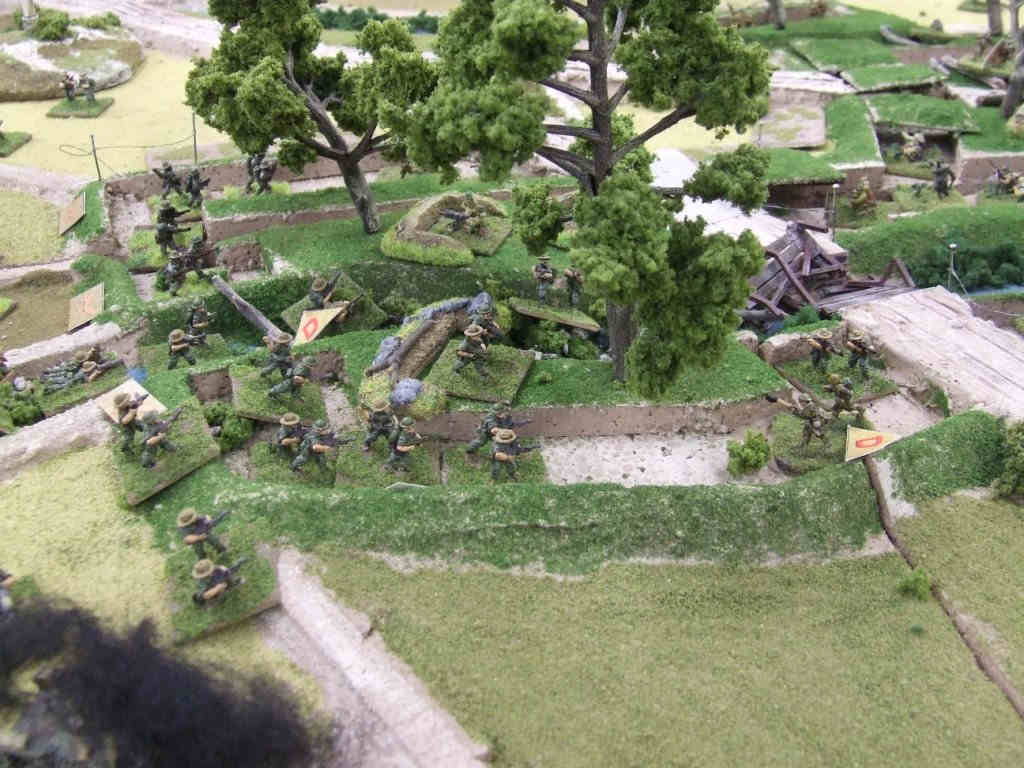
5. Dug in deep behind minefields and barbed wire, the Japanese, stunned by the ferocity of the air and artillery attacks, await the Indian attack. |
 bishenpur006 |
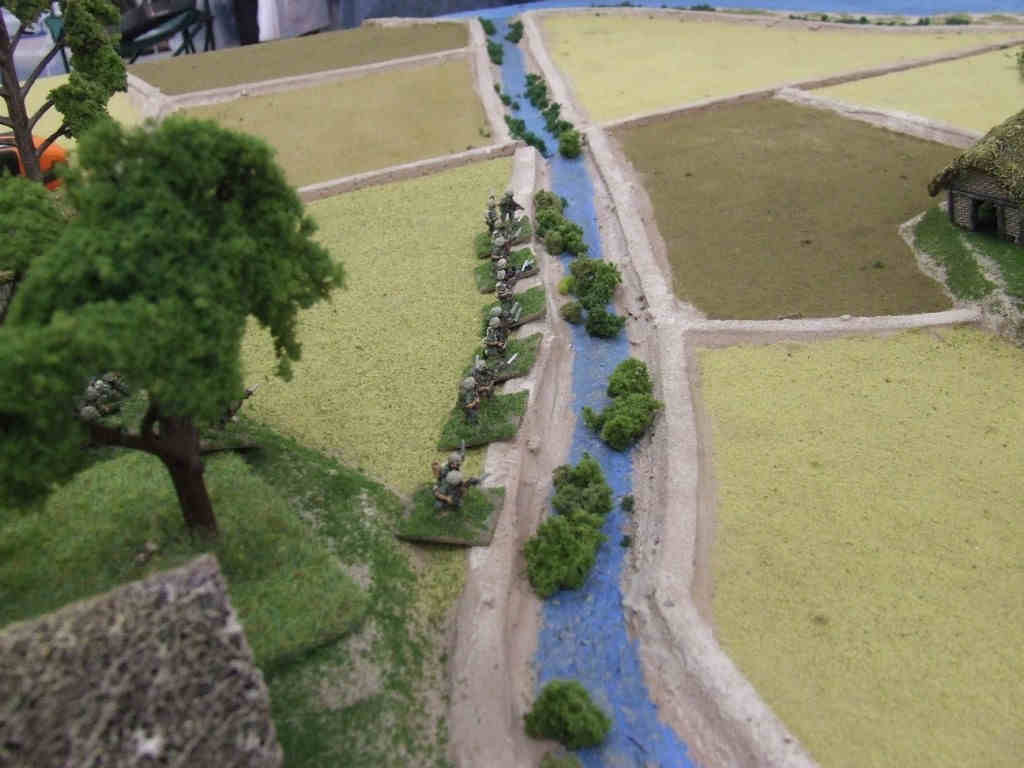
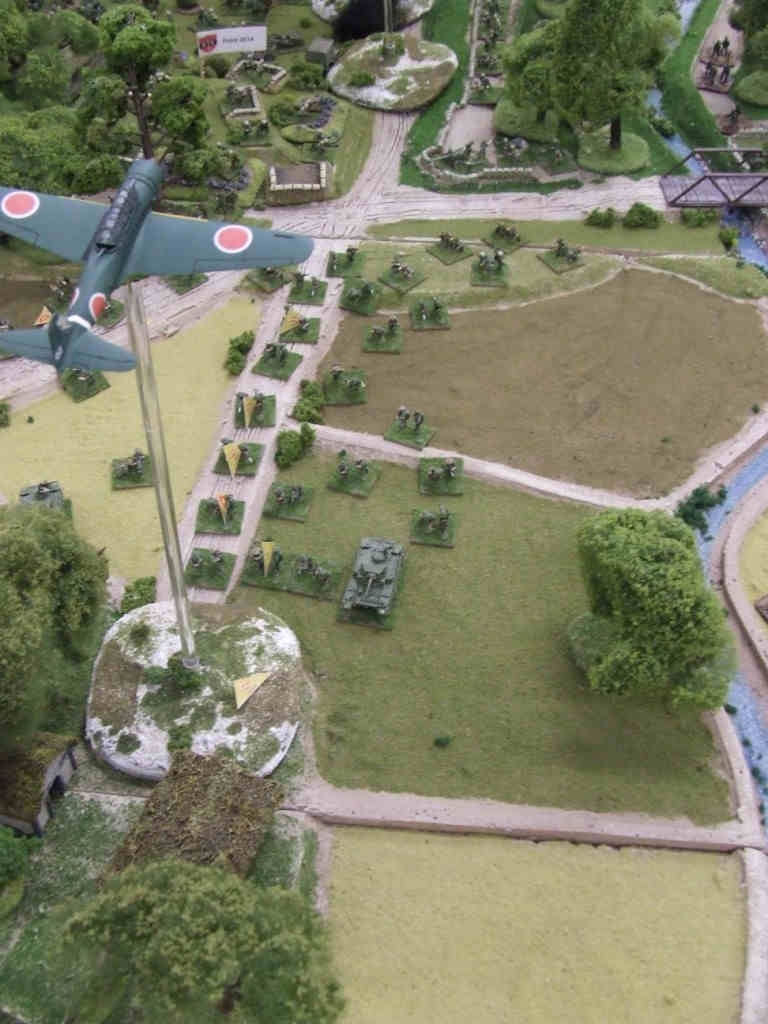
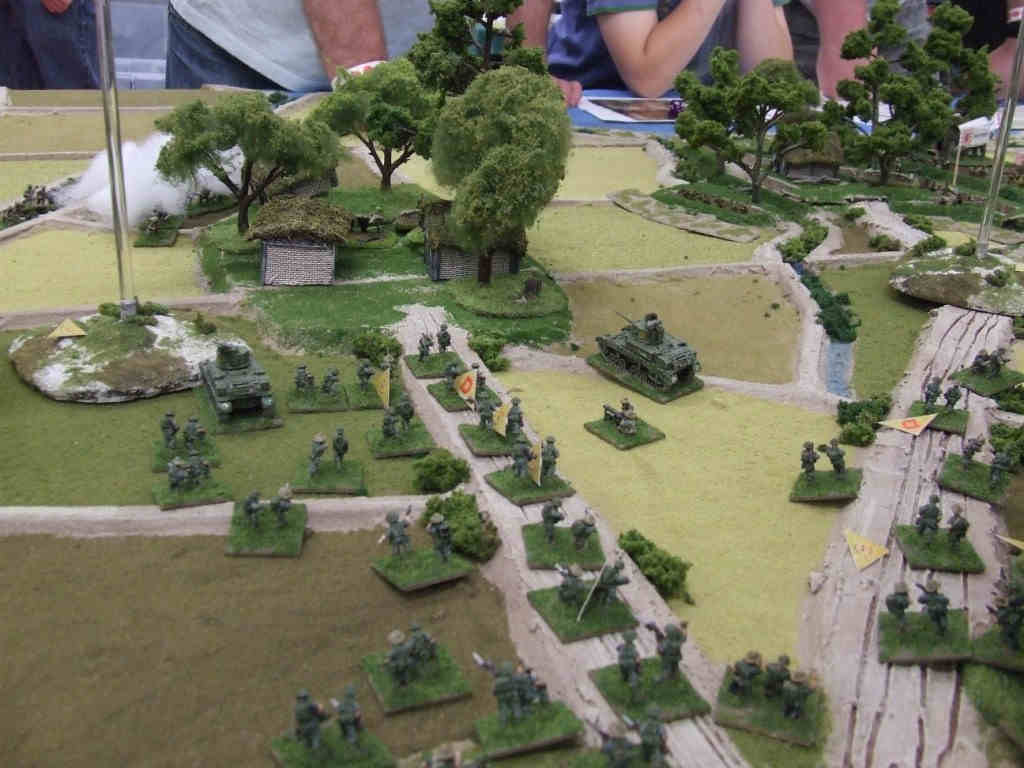
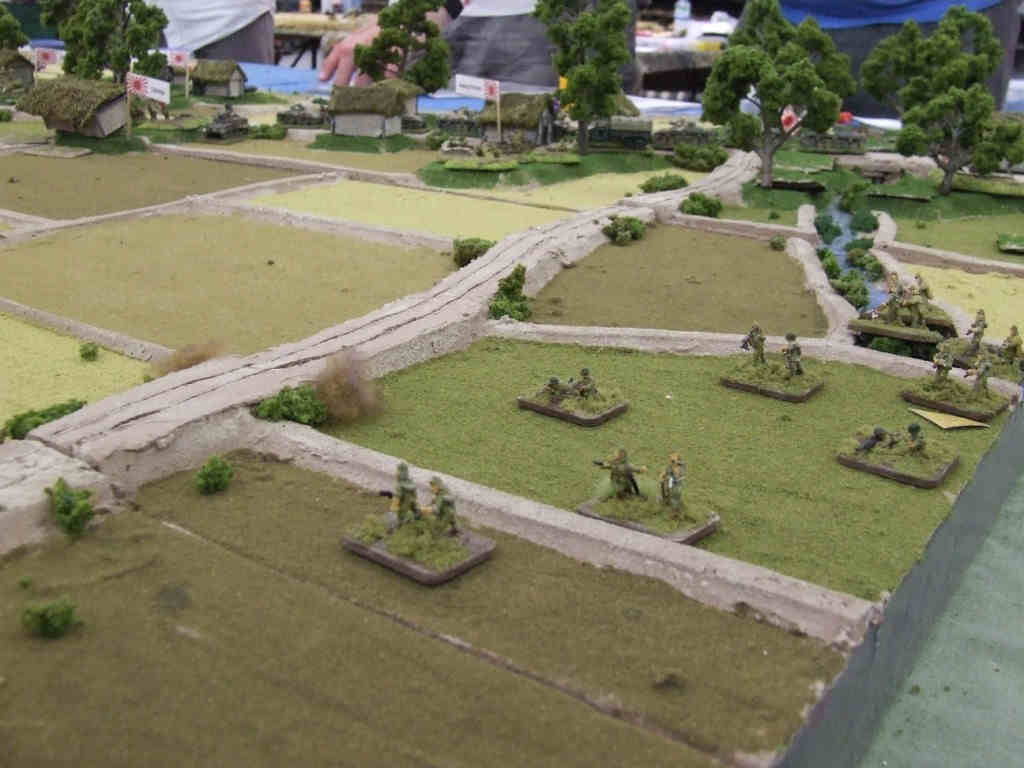
6. Keeping well spread-out to minimise the effects of Japanese artillery, the 9/14th Punjabis advance across the open paddy to Potsangbam. |
 bishenpur007 |
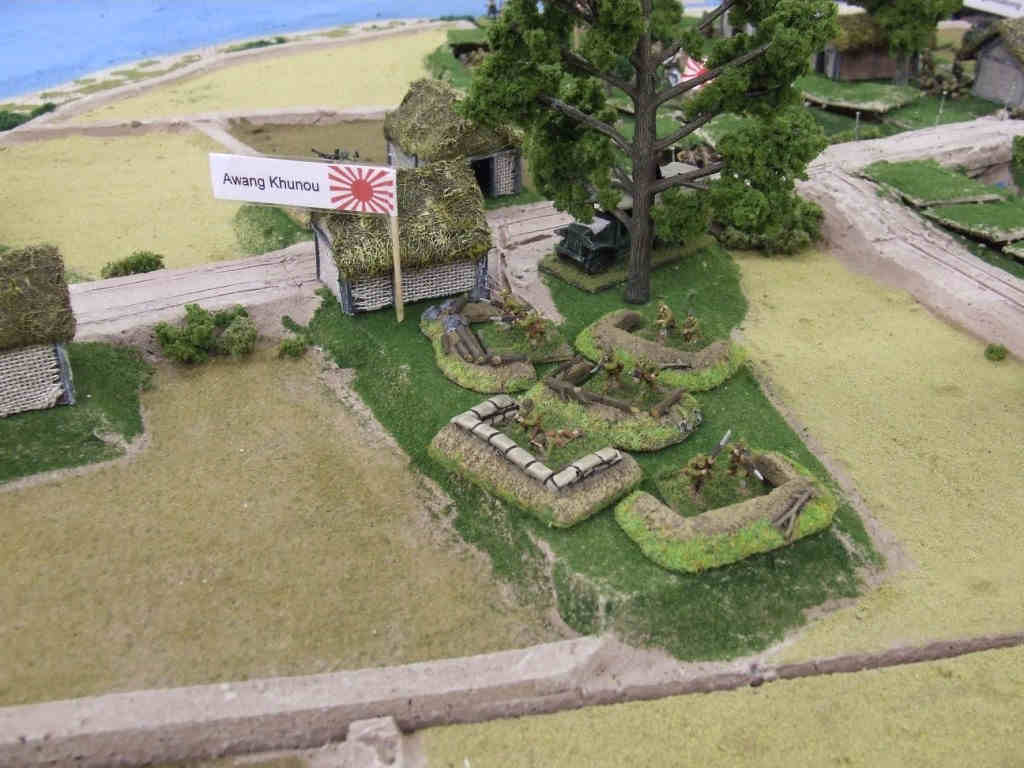
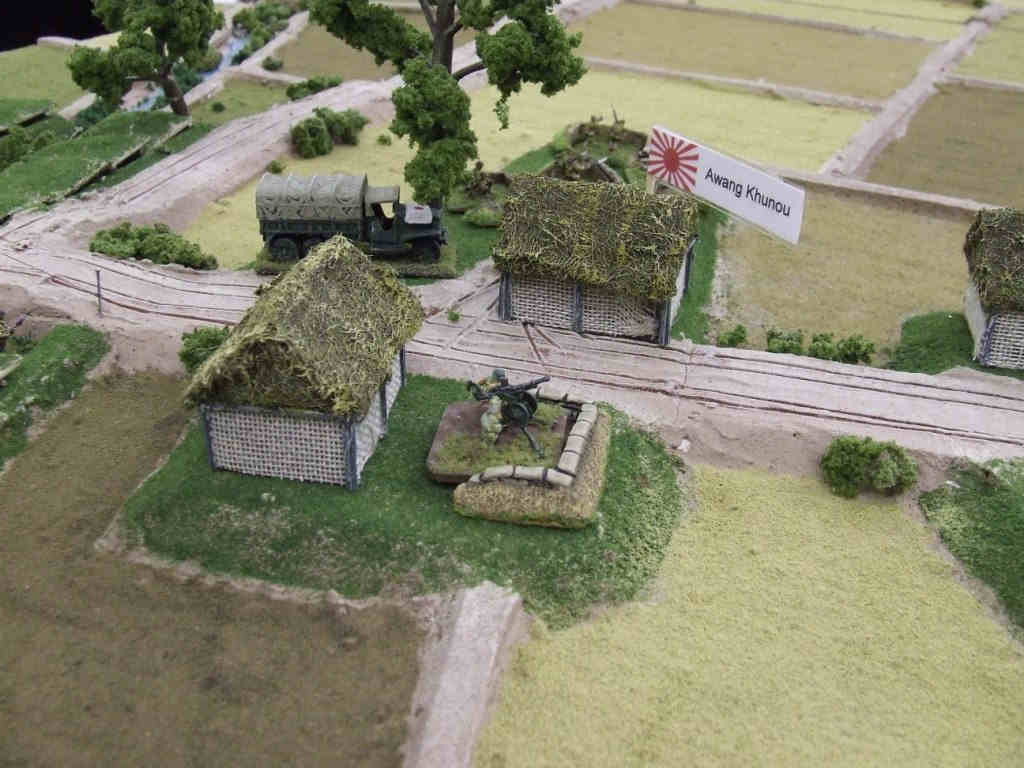
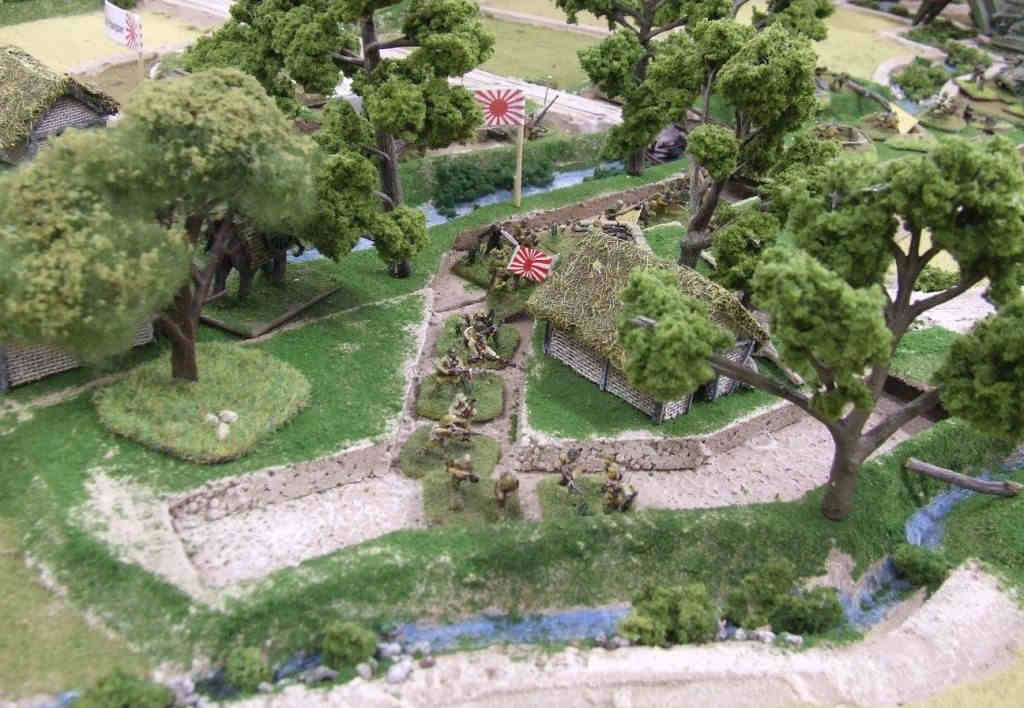
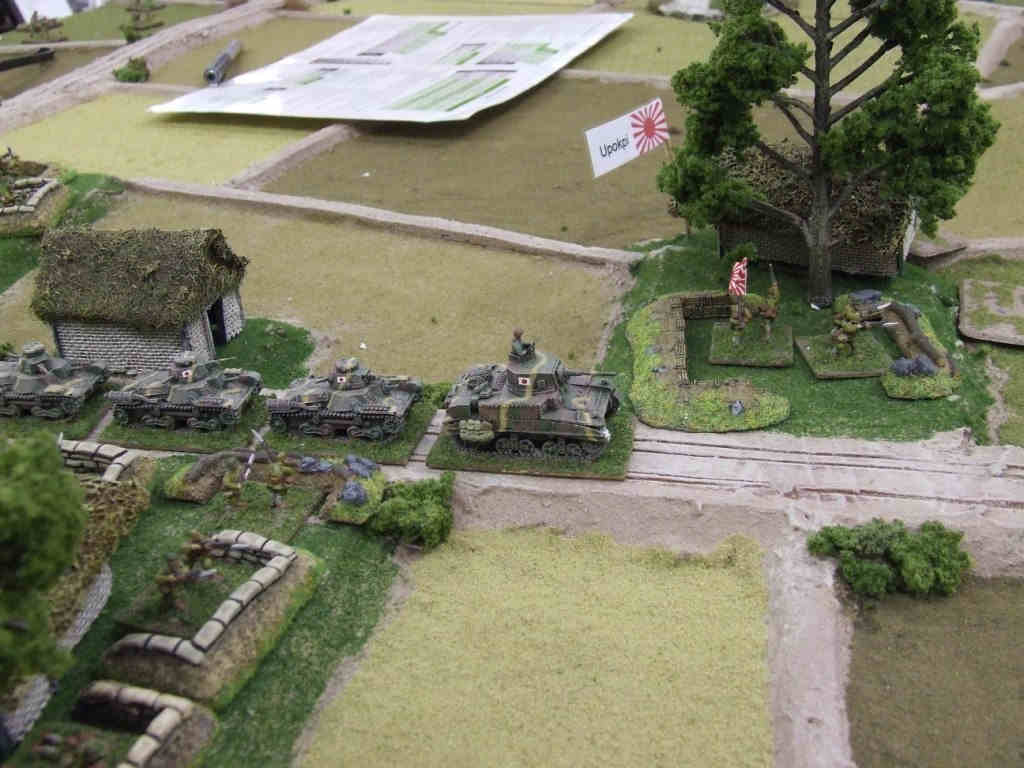
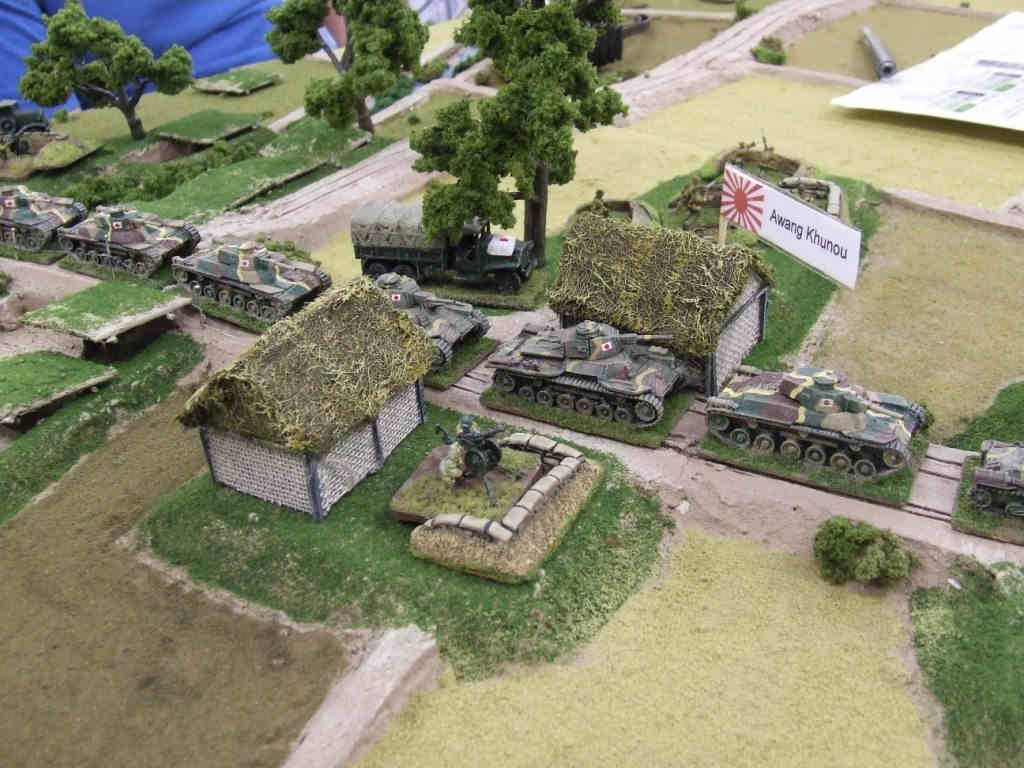
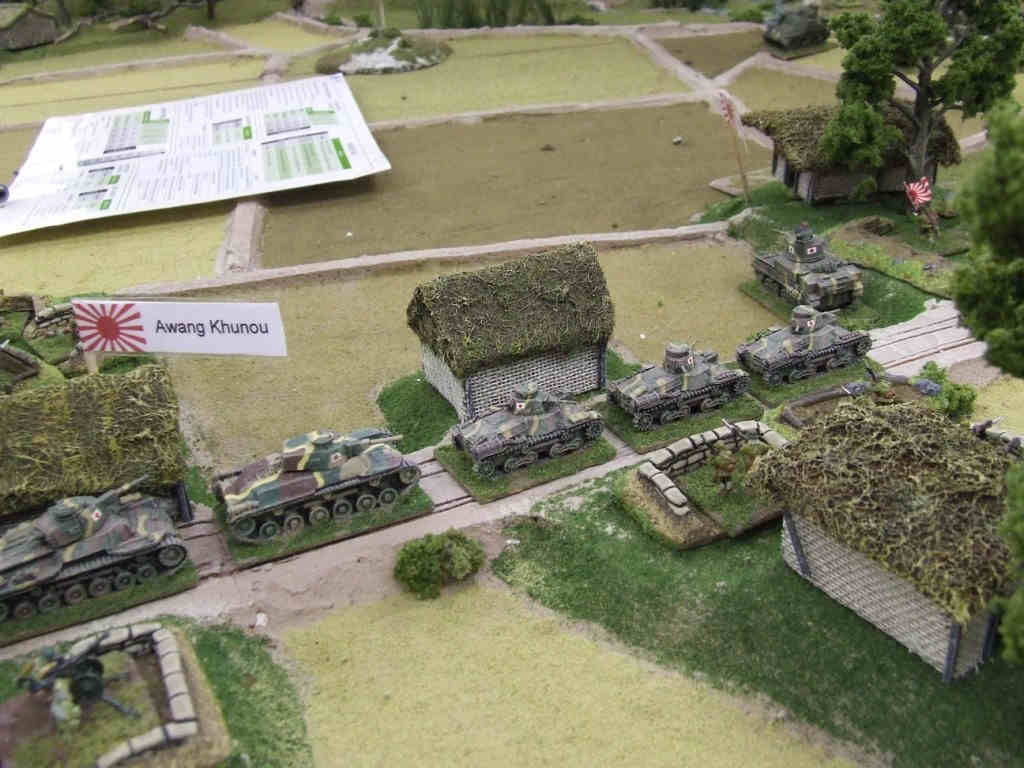
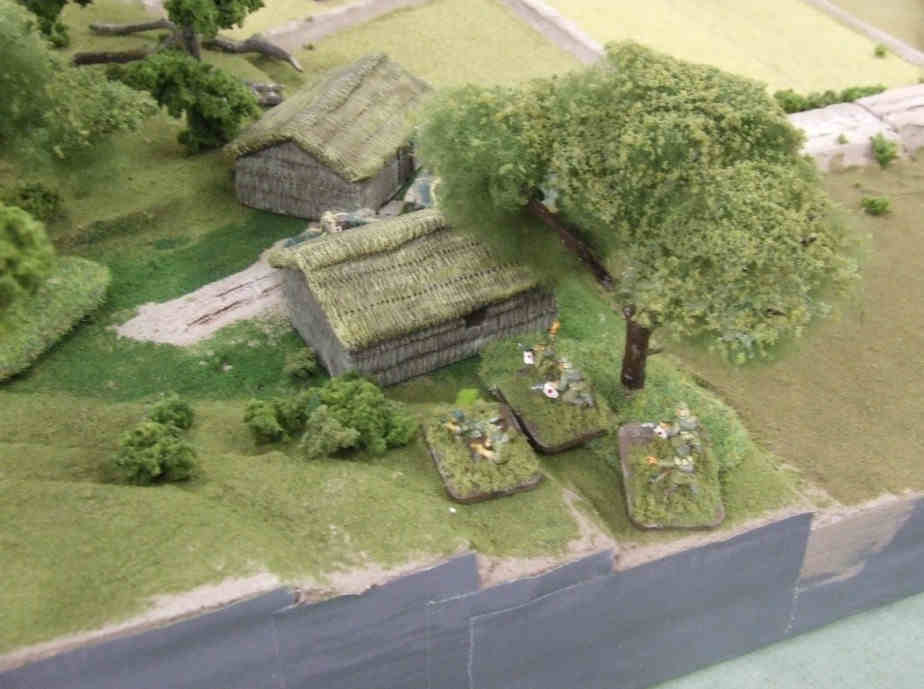
7. The Japanese are defending in great depth and even the smallest hamlets have platoon-sized outposts. Here we see the garrison of Awang Khunou. |
 bishenpur008 |
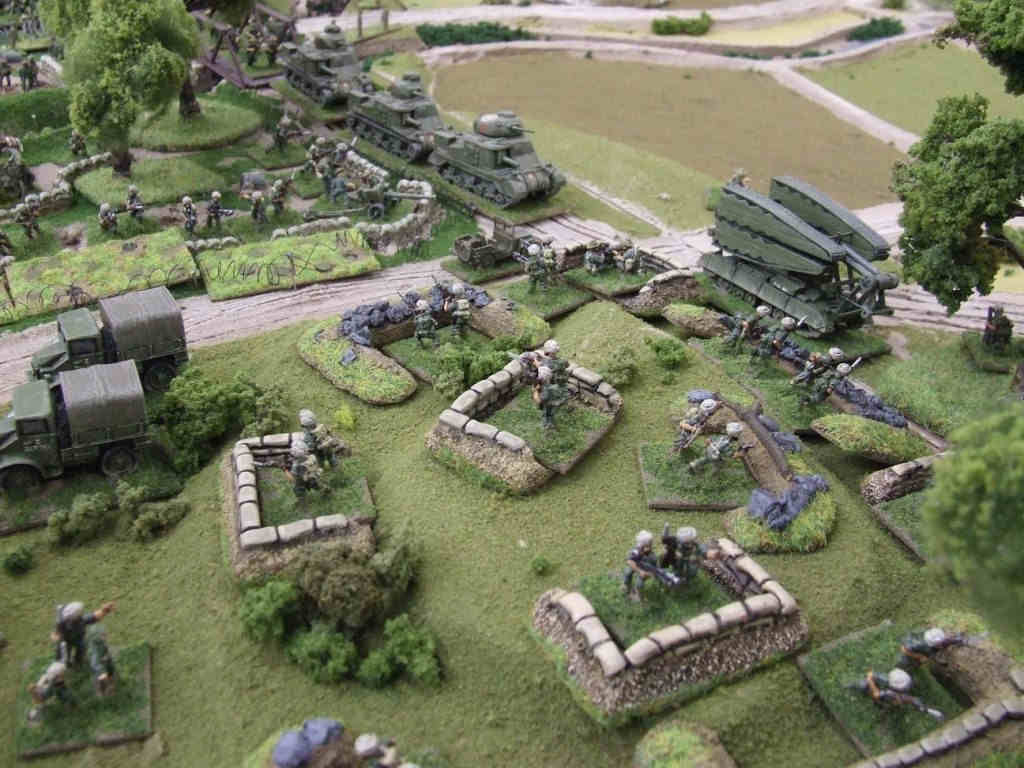
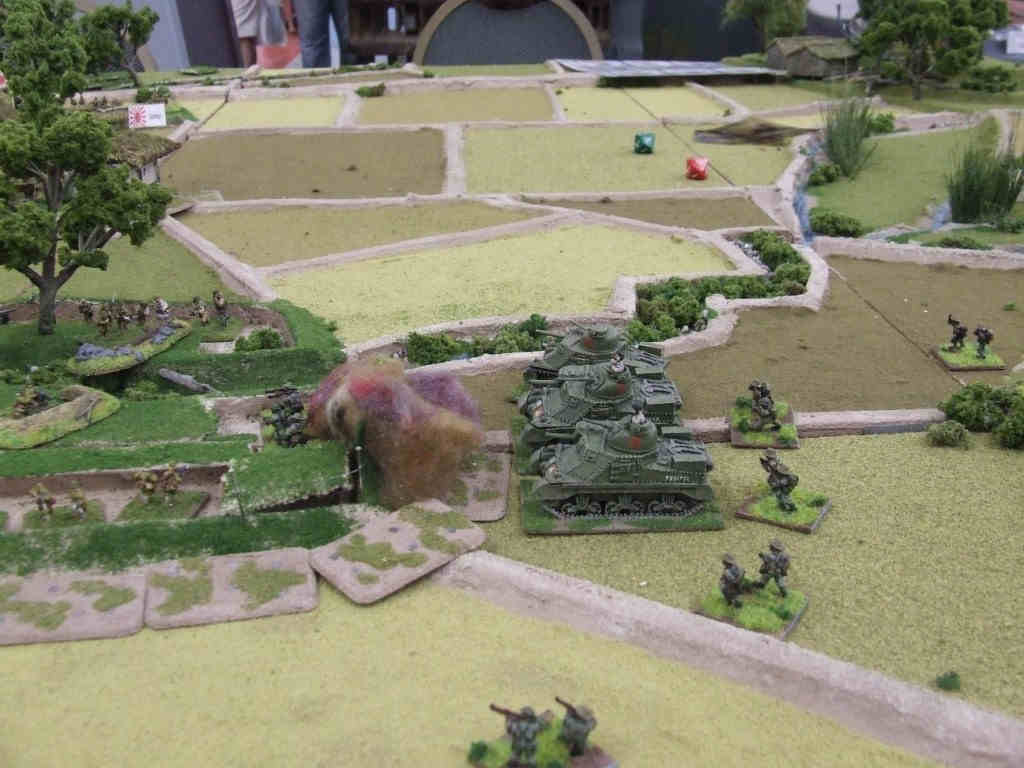
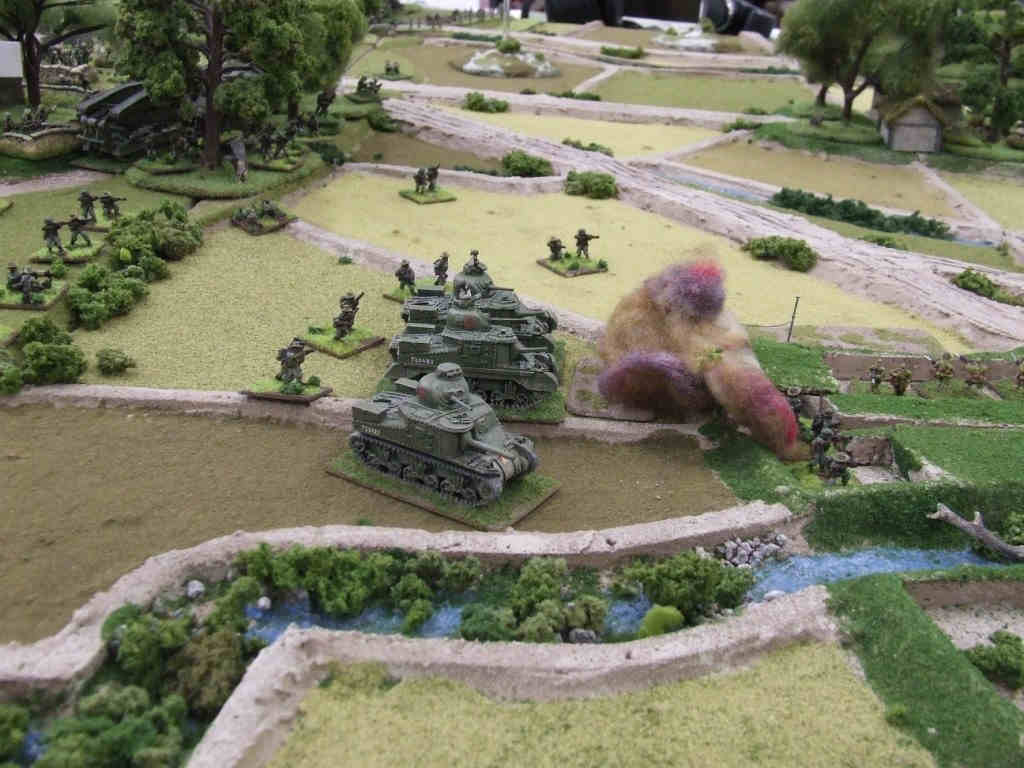
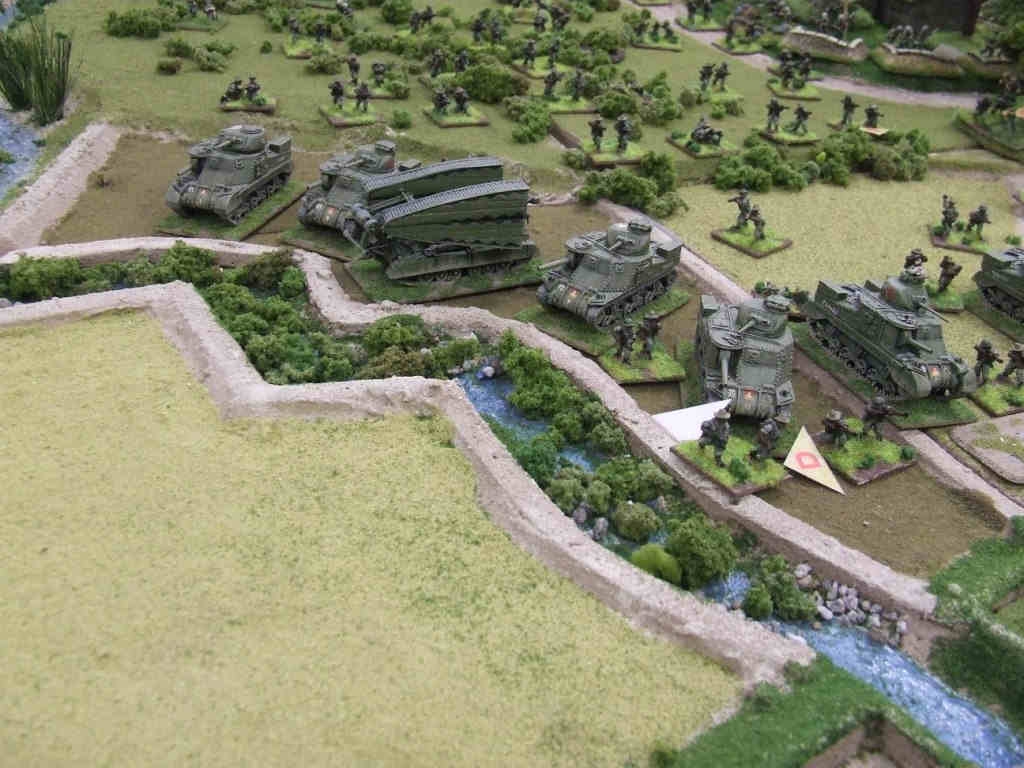
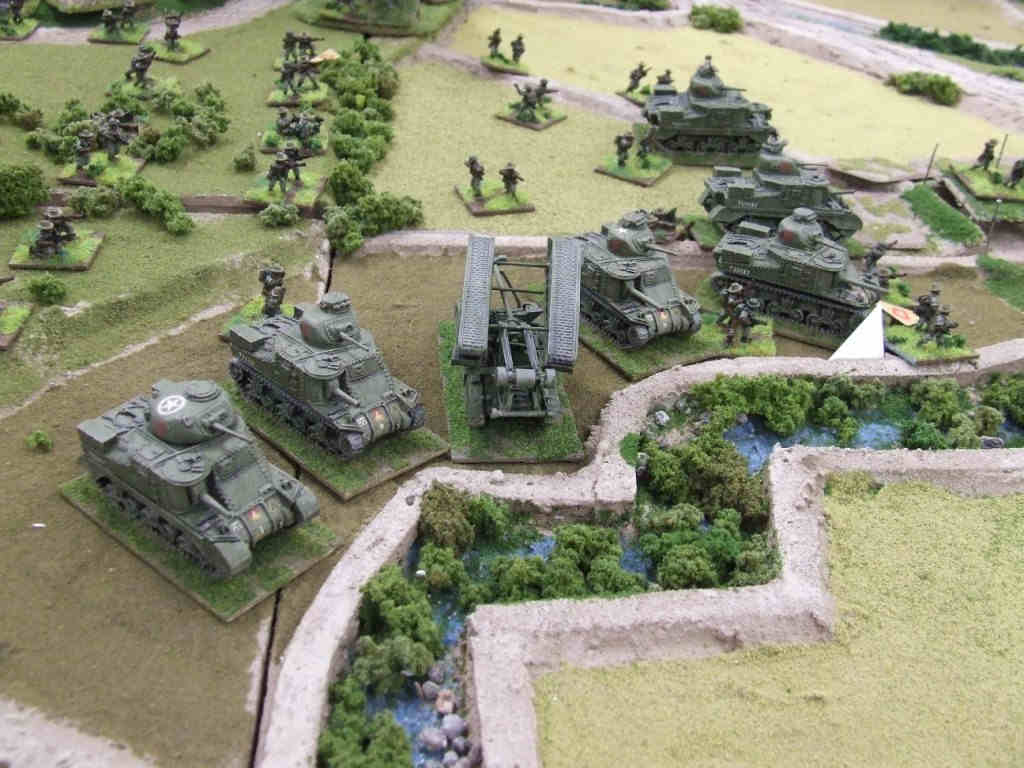
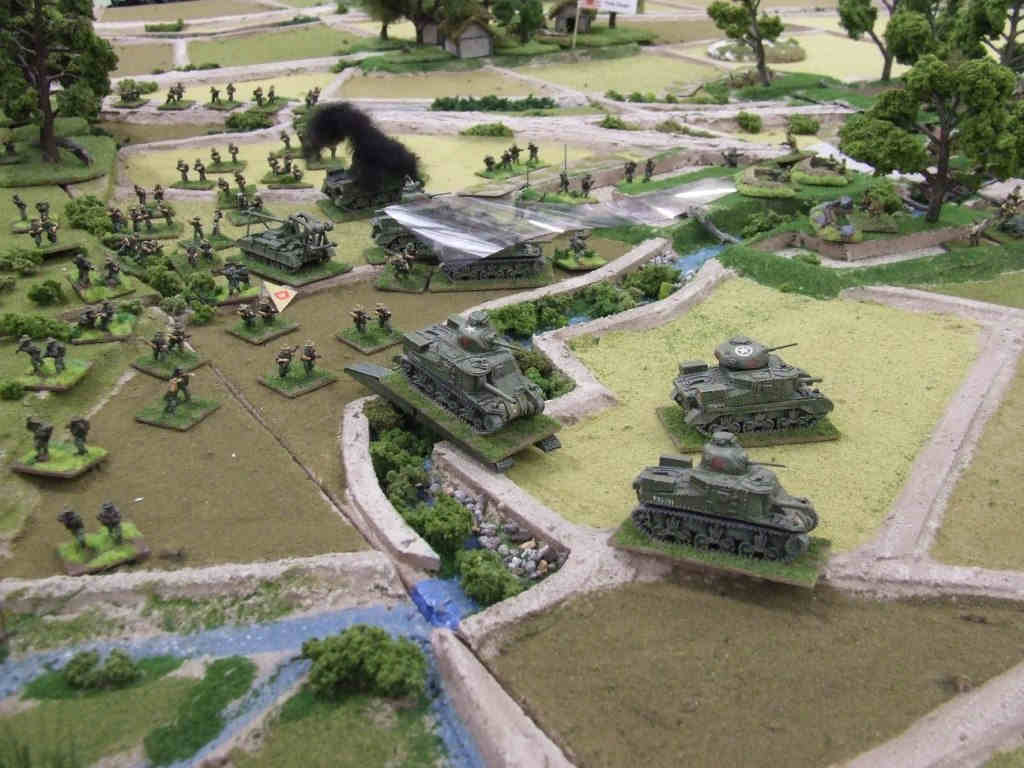
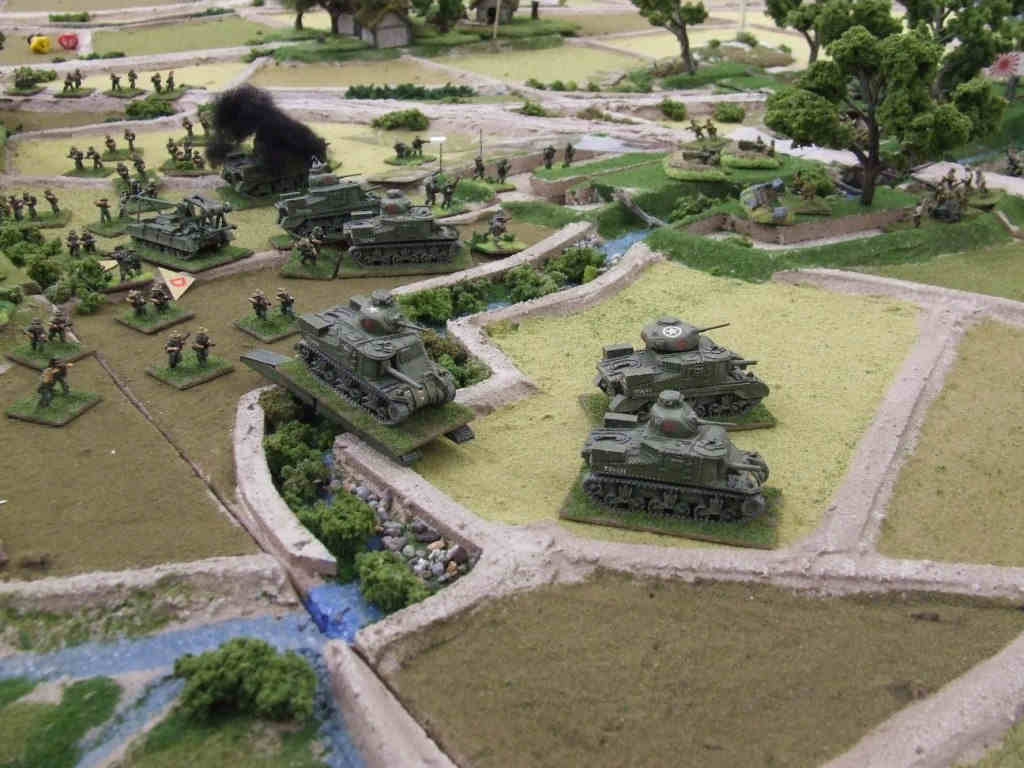
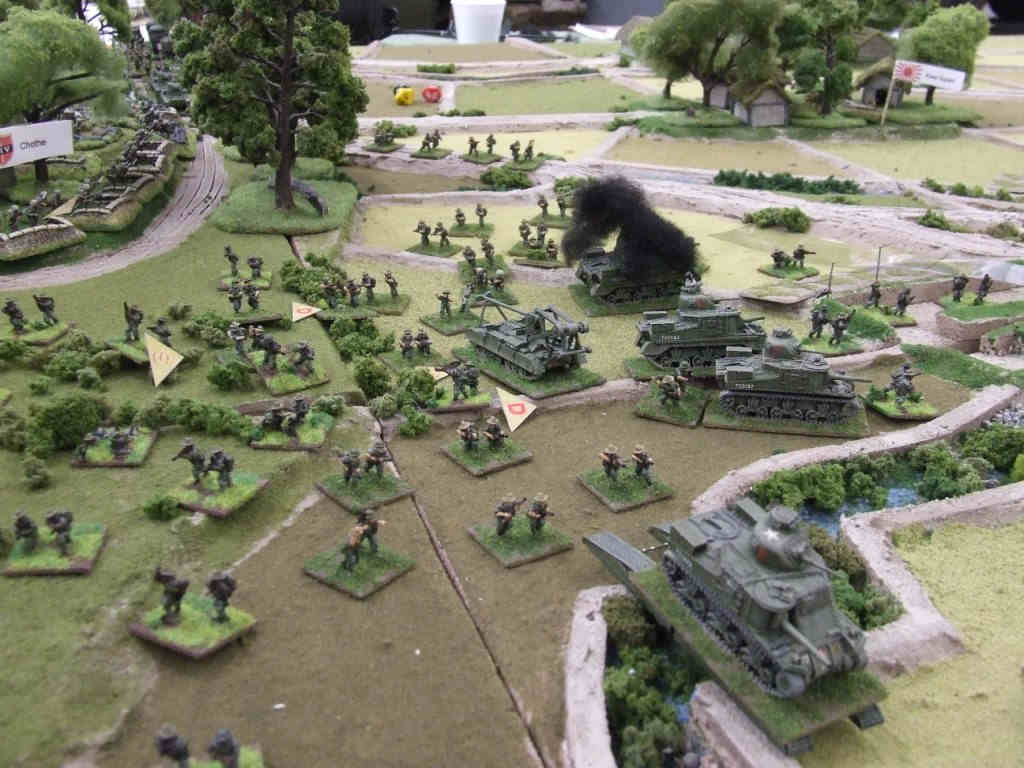
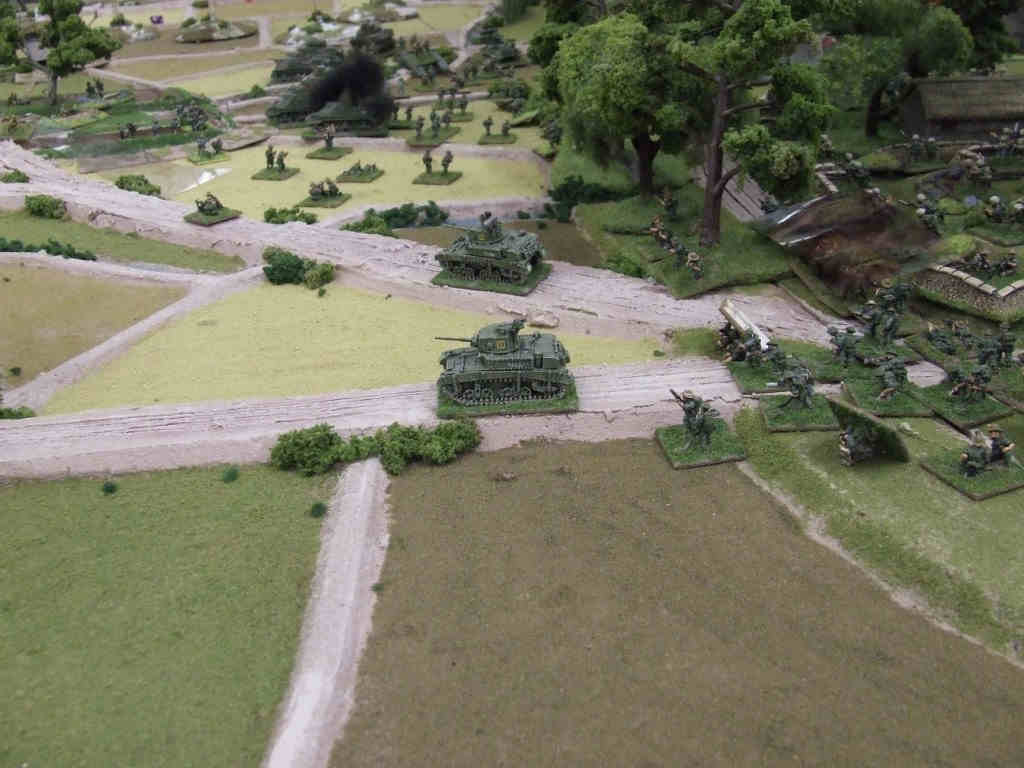
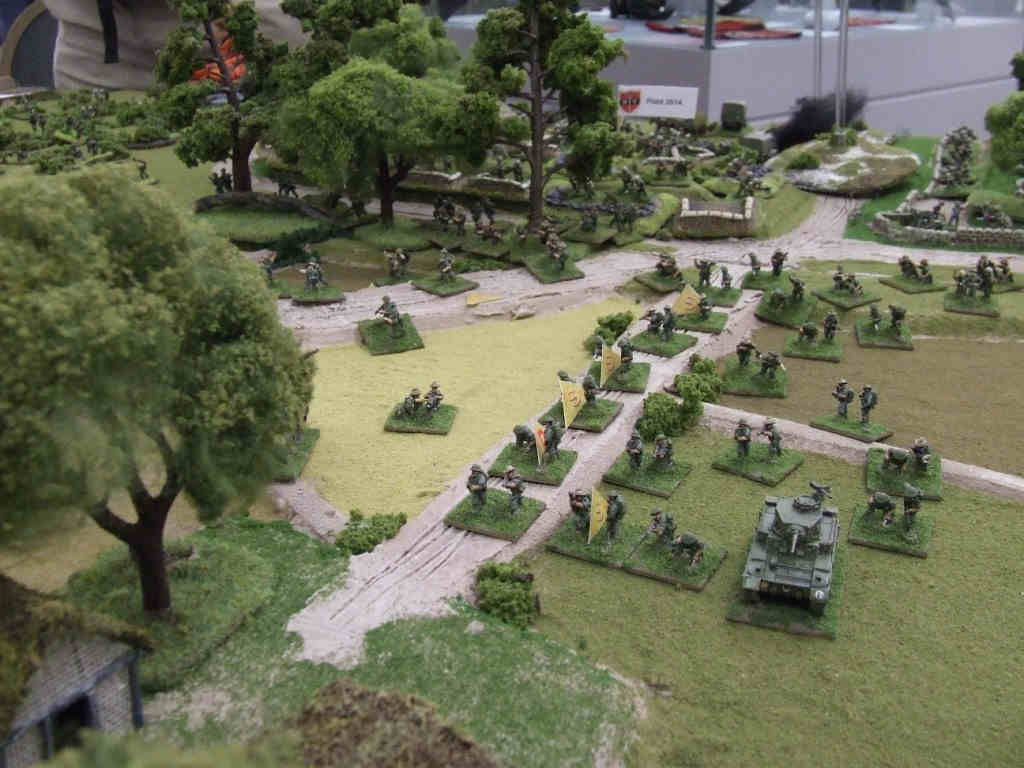
8. The Lee tanks of 3rd Carabiniers move forward to support the Punjabi attack. However, their movement through the village of Chothe attracts Japanese 105mm fire, which causes little damage to the tanks, but smashes down onto the defenders (4th (Sikh) Bn/12th Frontier Fore Regiment) and the Punjabis moving forward through Chothe. |
 bishenpur009 |
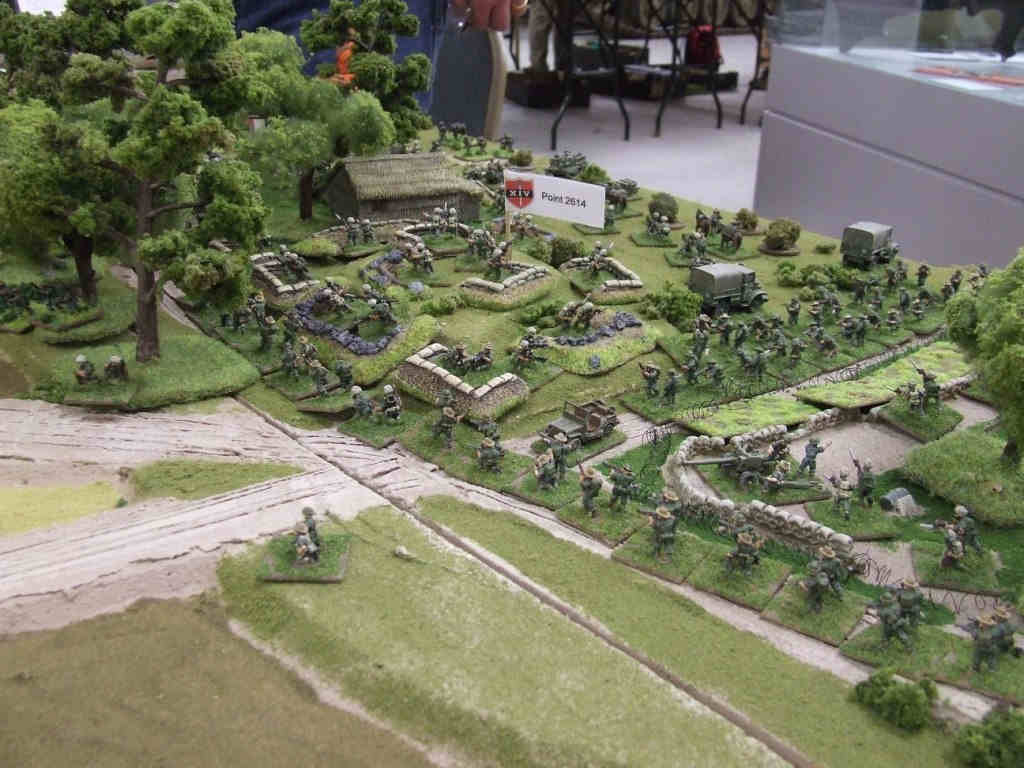
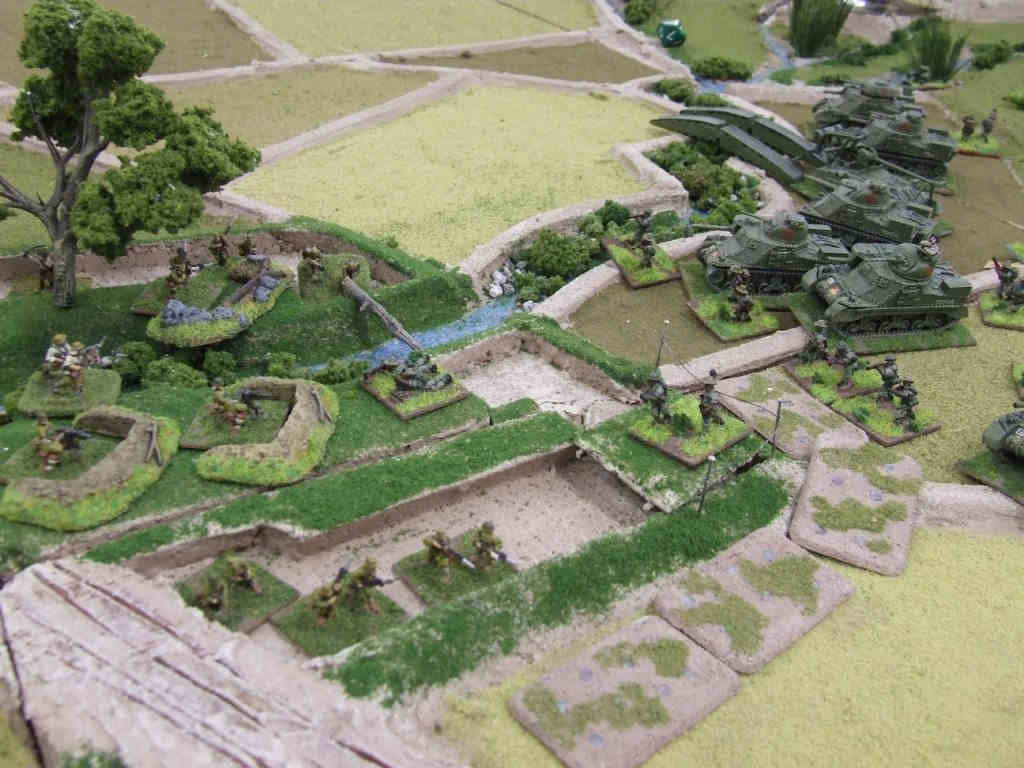
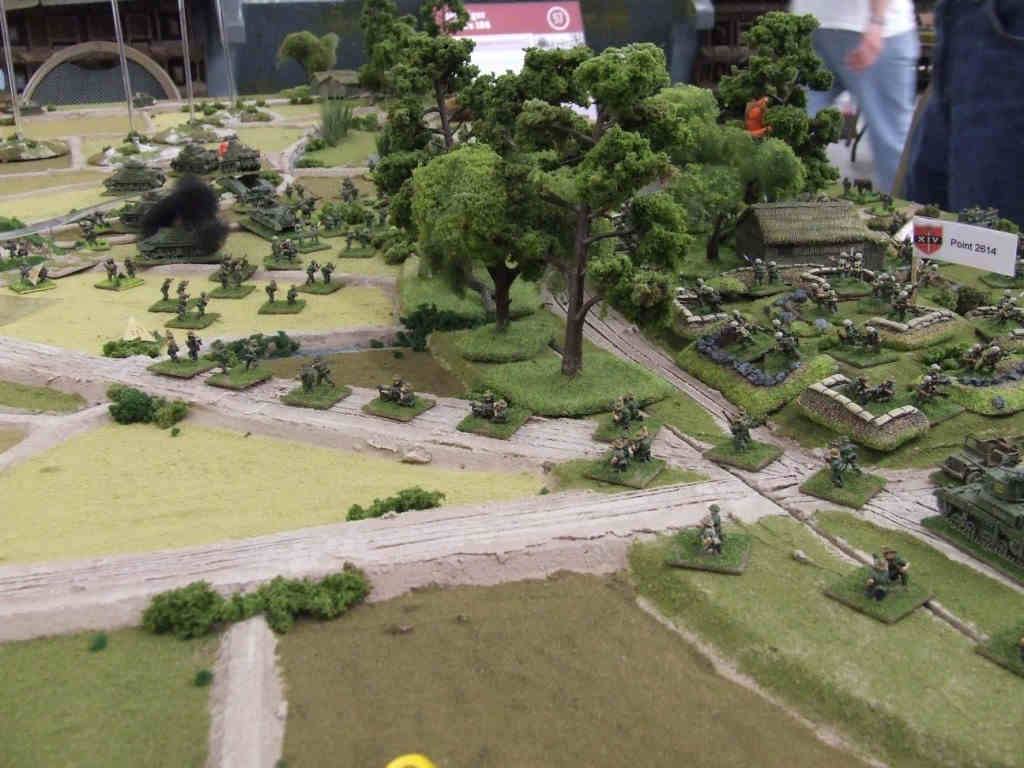
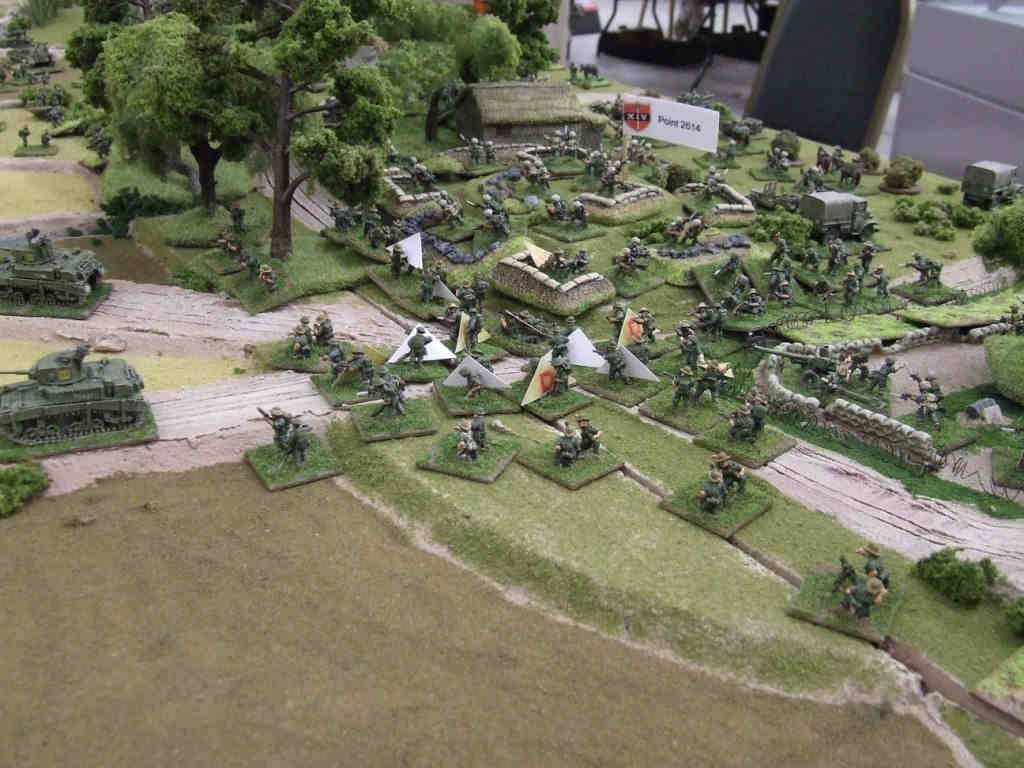
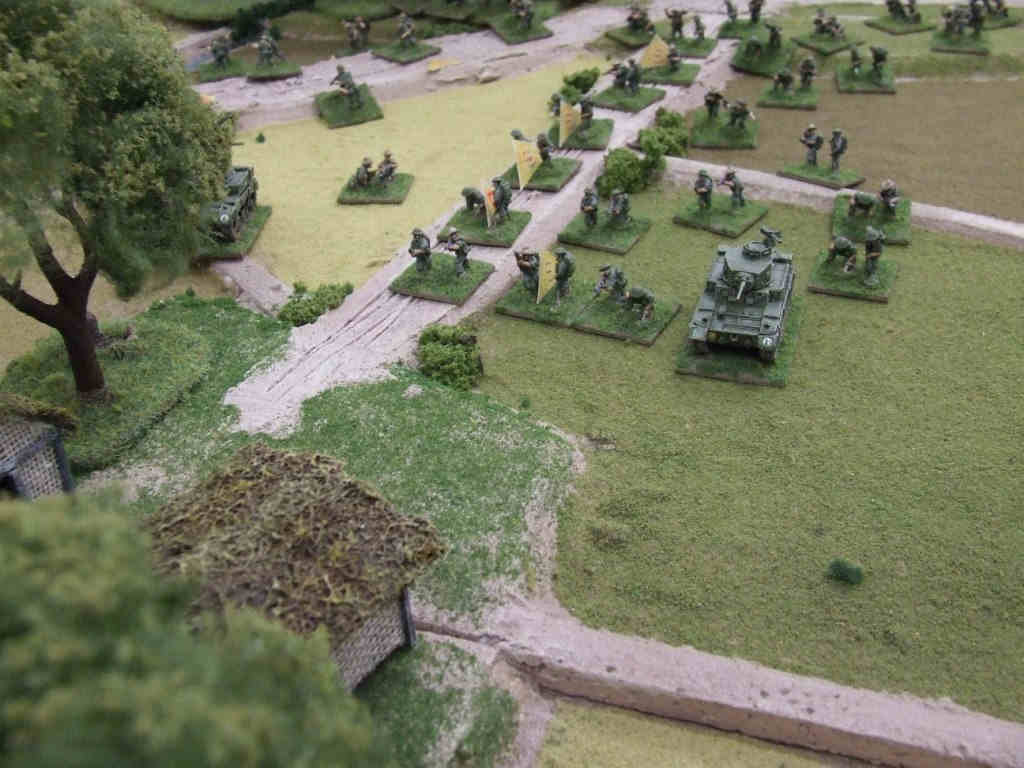
9. The armoured column, including a Valentine Bridgelayer tank, moves past Chothe and the Sikh defenders of Point 2614. |
 bishenpur010 |
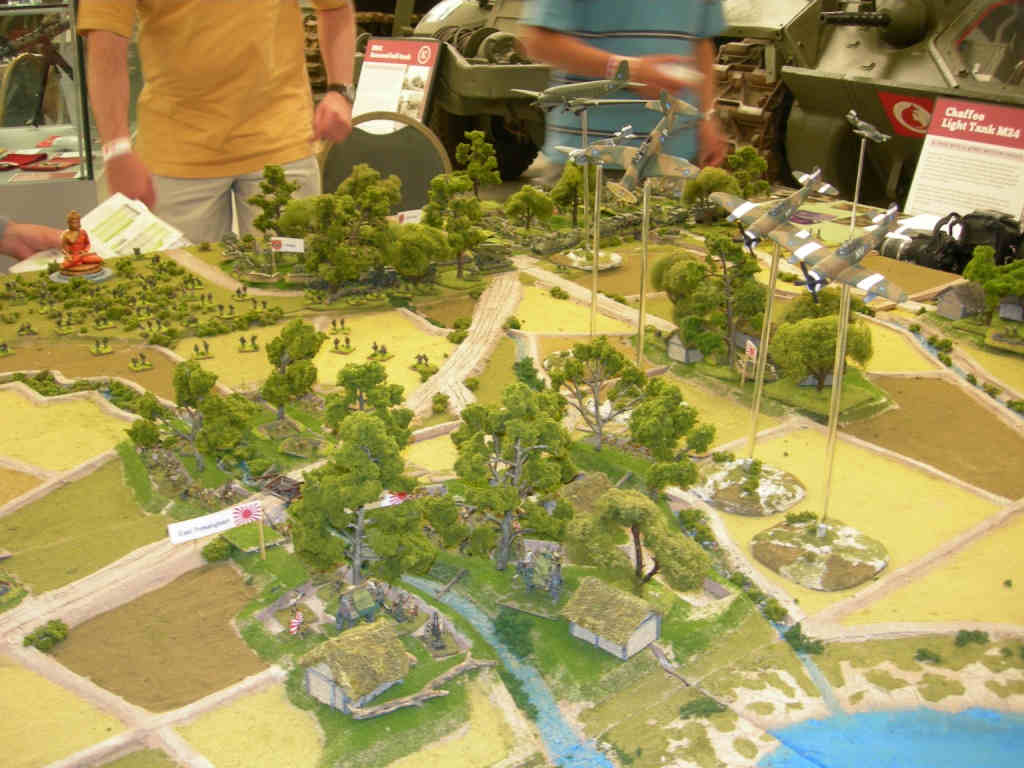
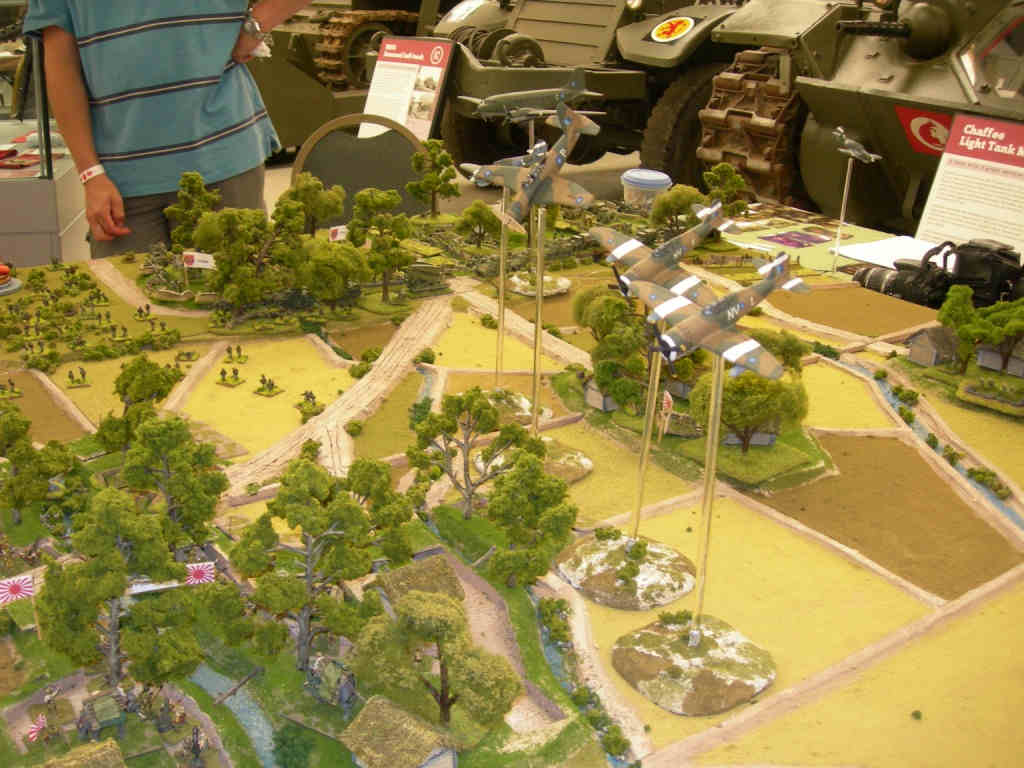
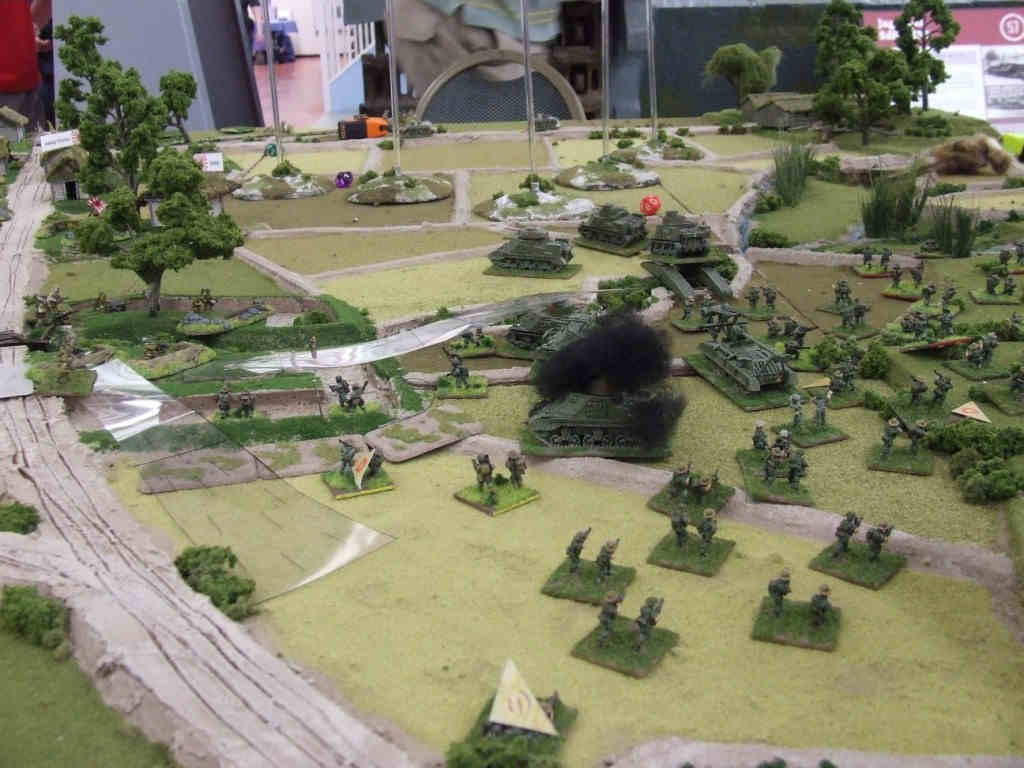
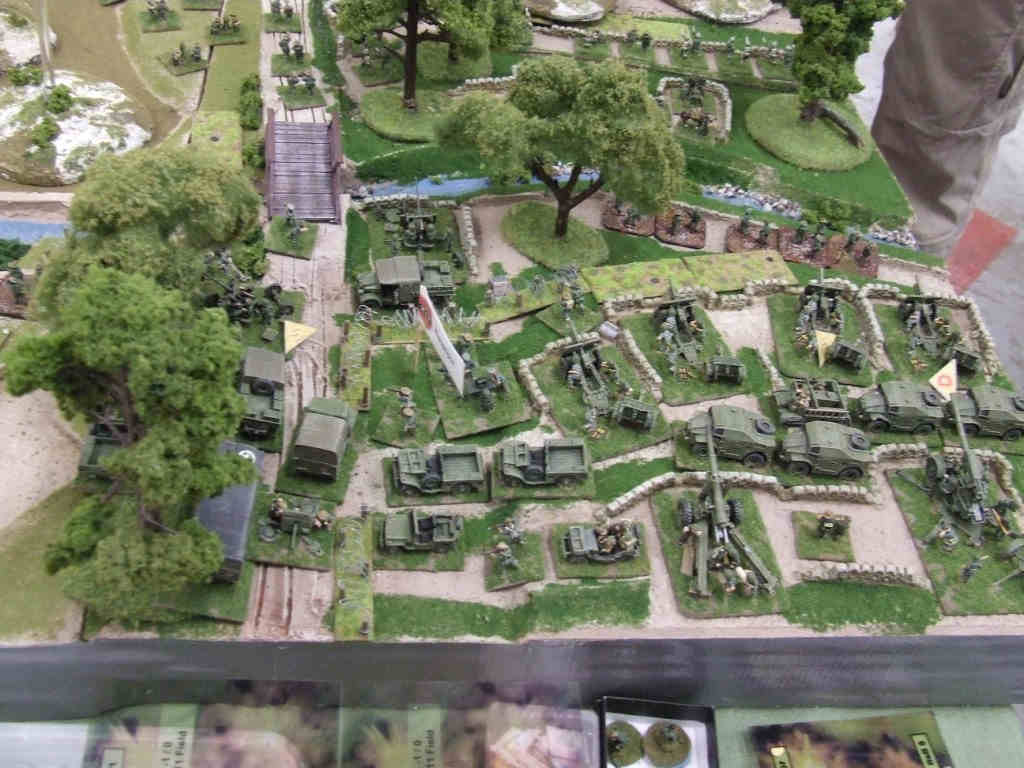
10. Overall view of the opening stages of the battle. |
 bishenpur011 |
11. The second battlegroup involved in the attack - The 1st West Yorkshire Regiment, marches up through the Bishenpur Box. |
 bishenpur012 |
12. Another air-strike goes in on Potsangbam. The Japanese defence is disrupted even further, but a third Vengeance goes down in flames. |
 bishenpur013 |
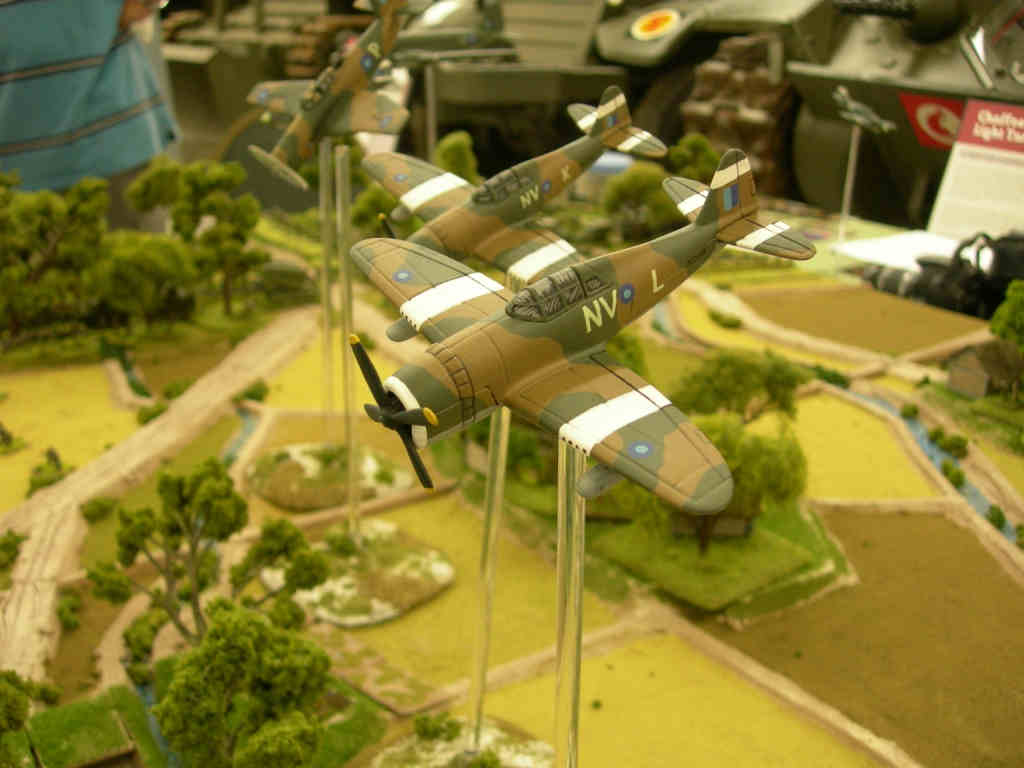
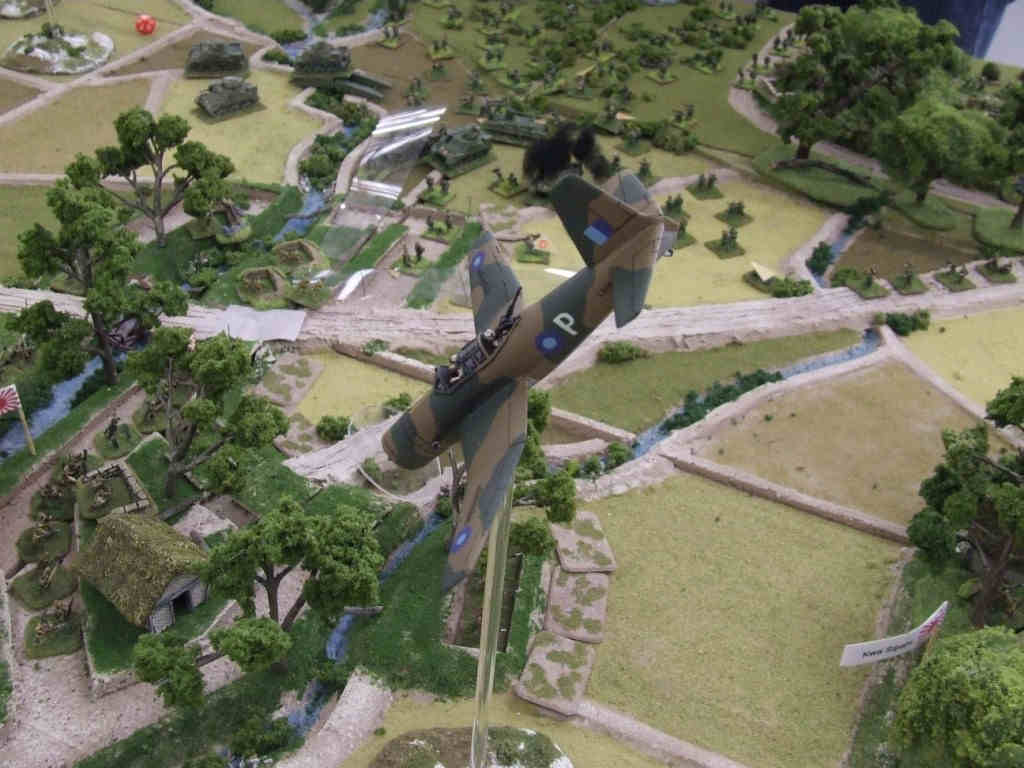
13. Another view of the air-strikes. |
 bishenpur013a |
13a.Thunderbolts (stand-ins for Vengeances) in close-up. |
 bishenpur014 |
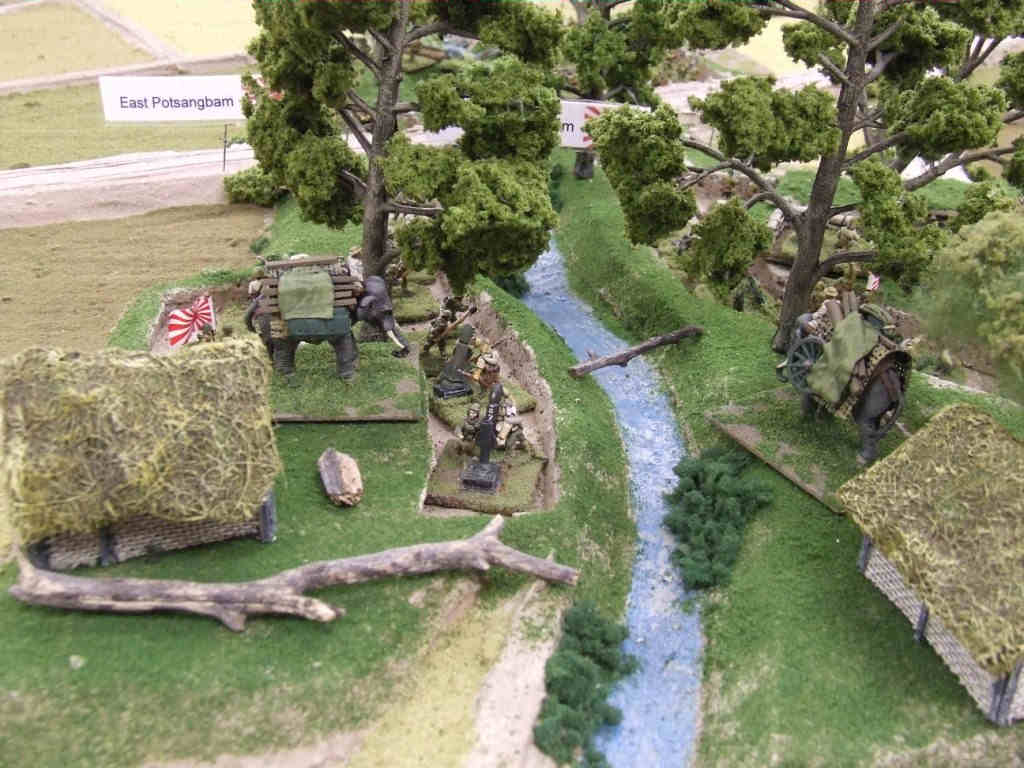
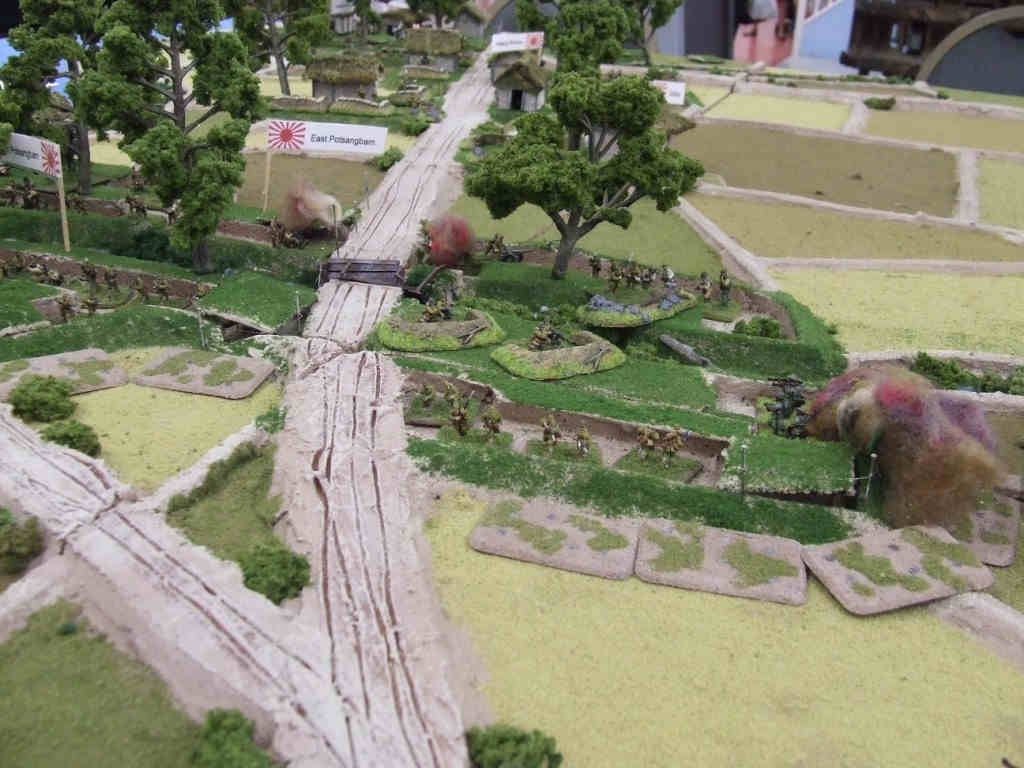
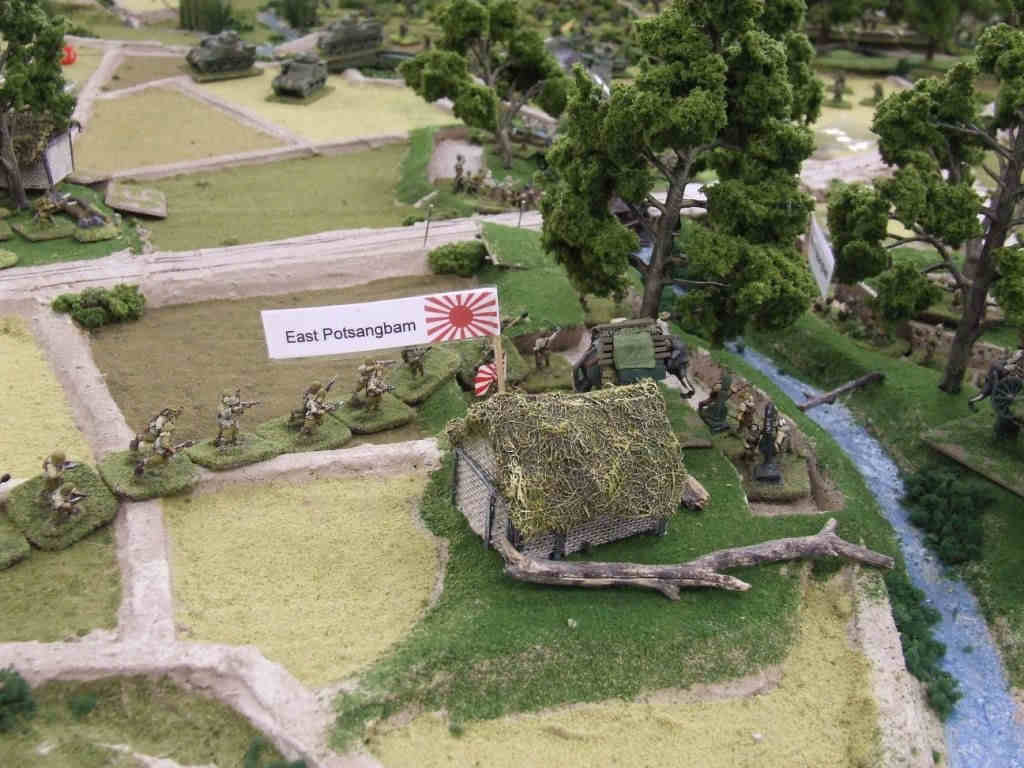
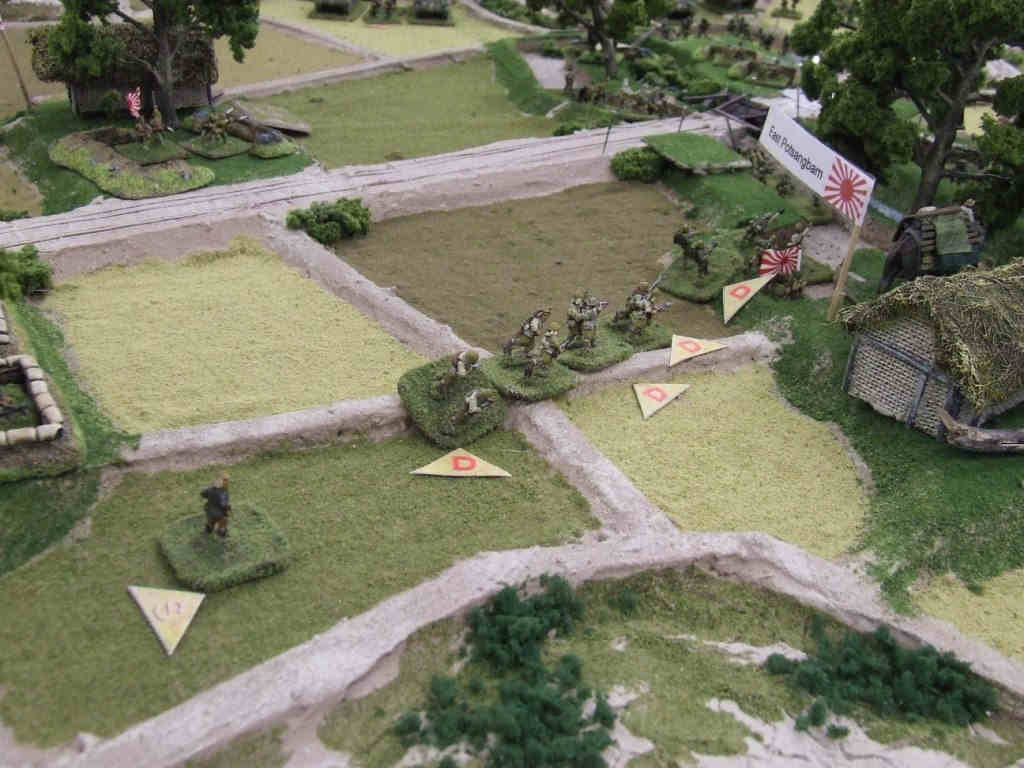
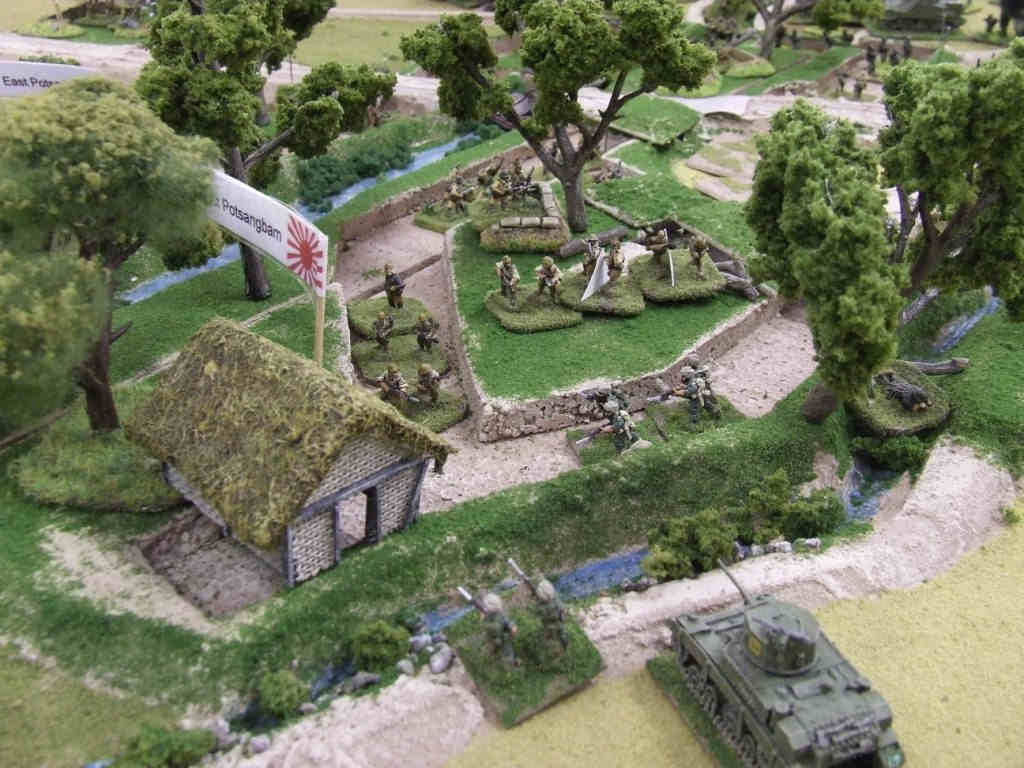
14. As his forward positions come under attack, Major Isagoda, commanding the 2nd Bn, 213th Infantry Regiment, orders his supporting battery of 320mm Spigot Mortars to open fire. The battery's transport elephants look on, seemingly nonplussed by either the bombing or the spigot mortars! Please note that due to an administrative cock-up, the flags indicating the objective location 'East Potsangbam' should read 'South Potsangbam' similarly, 'West Potsangbam' should read 'North Potsangbam. The same error occurred with the objective flags for Ningthoukong. |
 bishenpur015 |
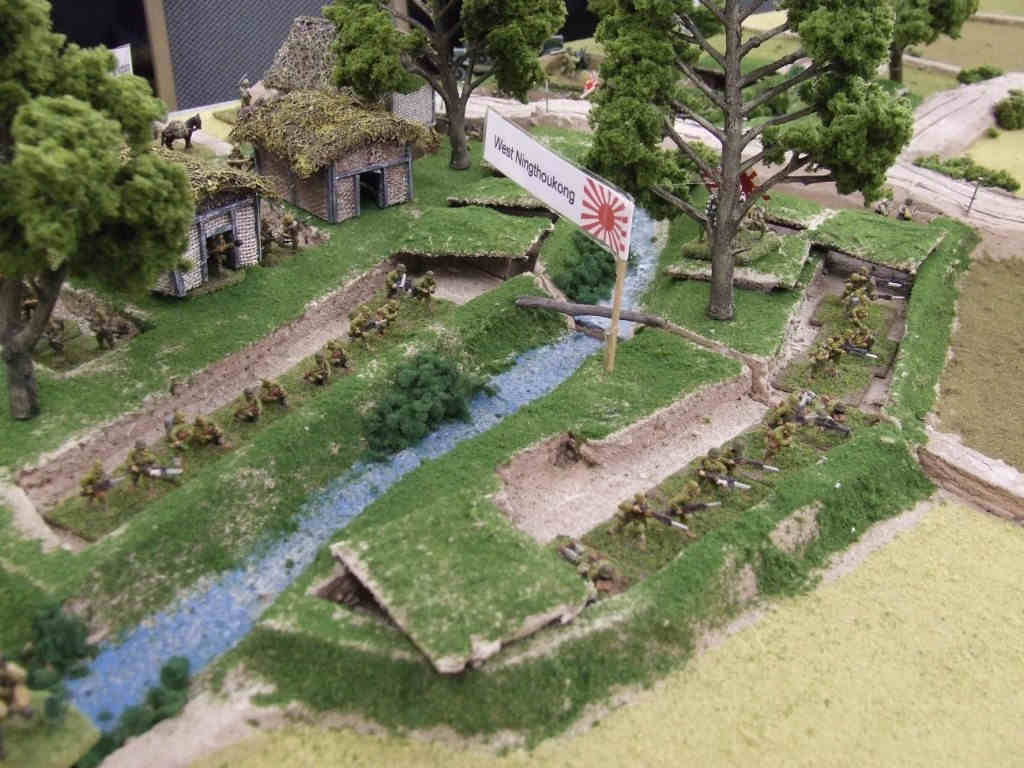
15. In Ningthoukong, the unengaged reserves wait in their trenches and bunkers, along with Colonel Taguchi. |
 bishenpur016 |
16. In Awang Khunou, a Japanese 20mm AA gun scans the sky for Allied aircraft. |
 bishenpur017 |
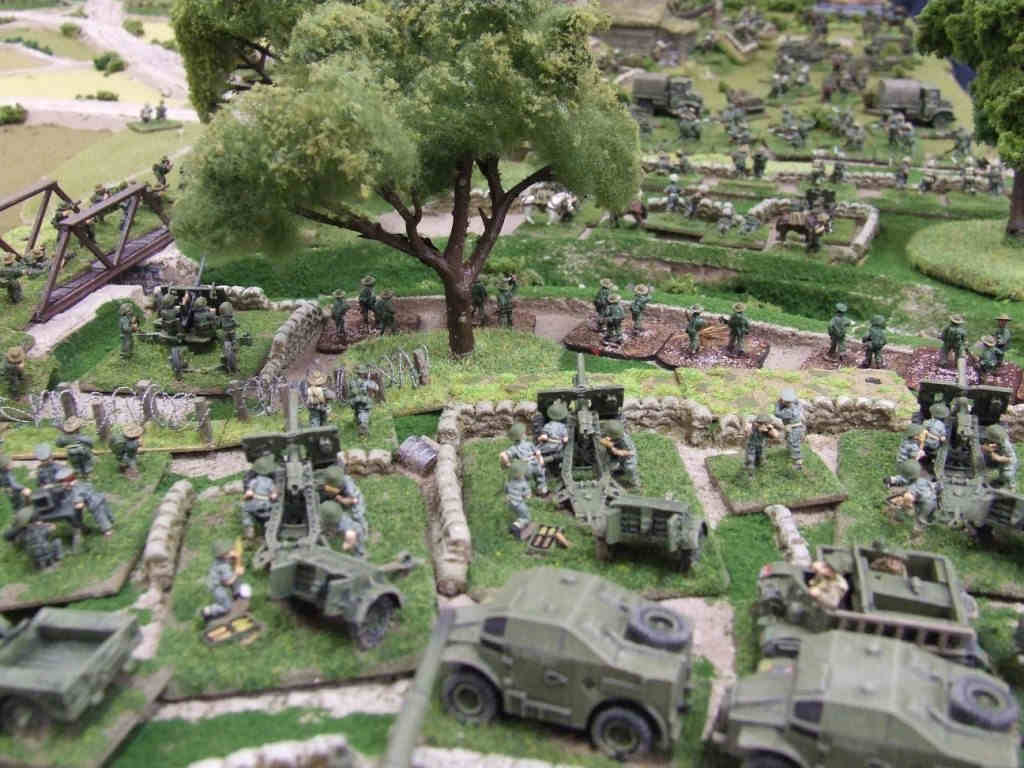
17. Meanwhile, back in Bishenpur, the gunners of an Indian Mountain Battery and their supporting Sikh infantry receive a nasty surprise! A 'gun-busting' party of Japanese engineers has infiltrated through the wire and minefield under cover of darkness and is already on top of the sleepy defenders. In game terms, there was no defensive fire for the Sikhs - we went straight to close combat. |
 bishenpur018 |
18. In the first clash, two of the three Sikh infantry sections defending the perimeter were wiped out by the Japanese sappers. The third Sikh section beat off their assailants, but the supporting FO team was wiped out in a concussive detonation, as the attacking sappers blew themselves up along with the observation post. As the surviving sappers drove on to the guns, they cut down a further two Sikh infantry sections and the Sikh company command post. Two charges were then made against the gun positions themselves, but the Indian gunners valiantly beat them off in hand to hand combat, before finally finishing them with point-blank 3.7-inch HE fire. Havildar Ferrore Singh was nominated for the VC for defending his gun in the finest traditions of the Indian Artillery. |
 bishenpur019 |
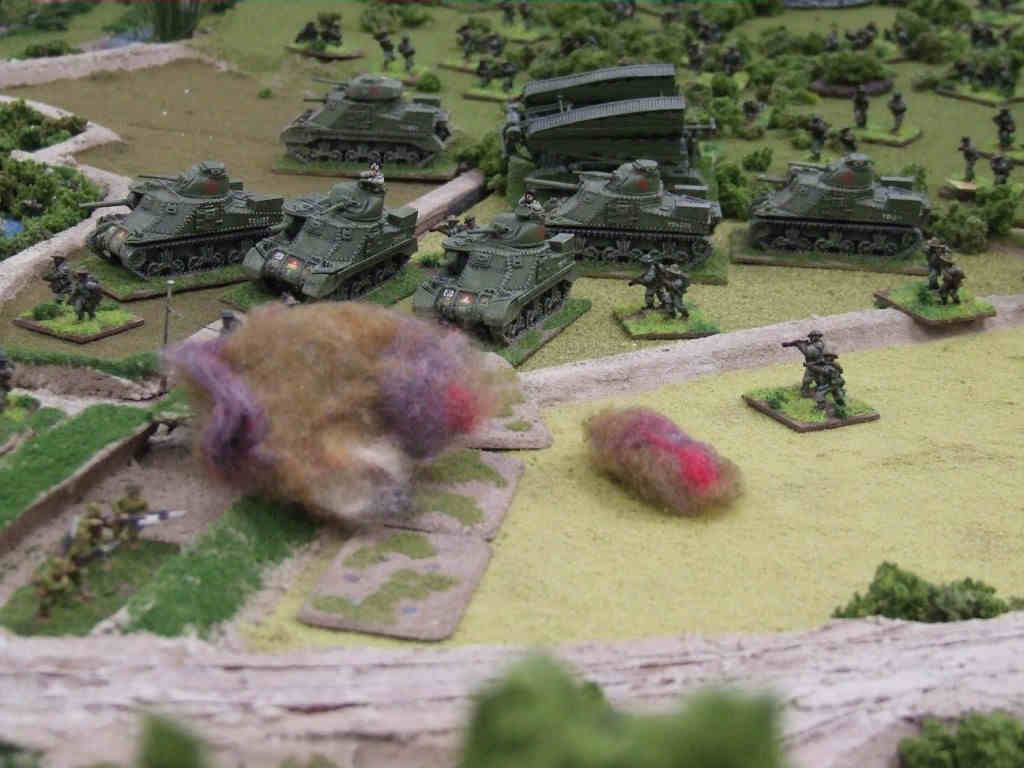
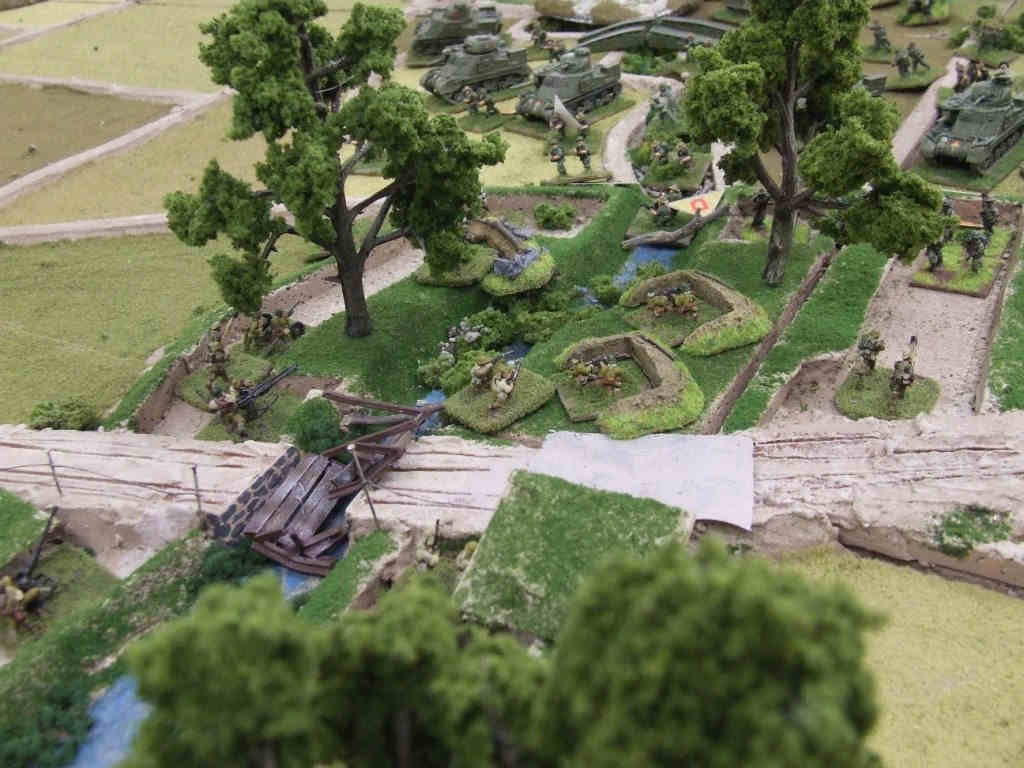
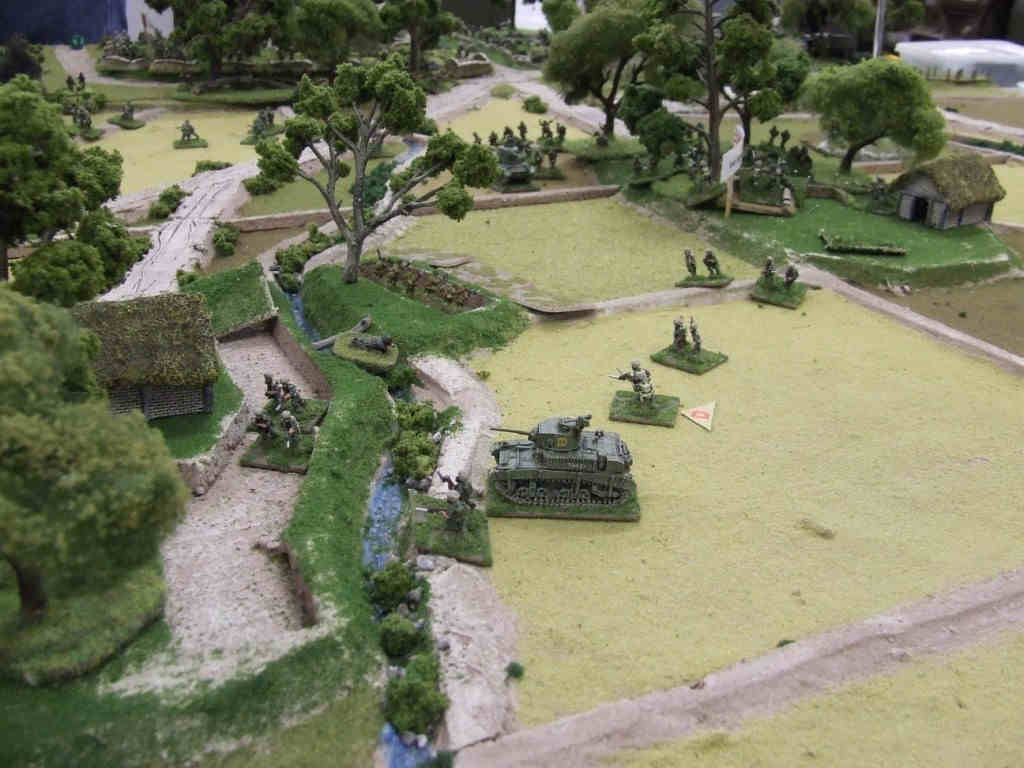
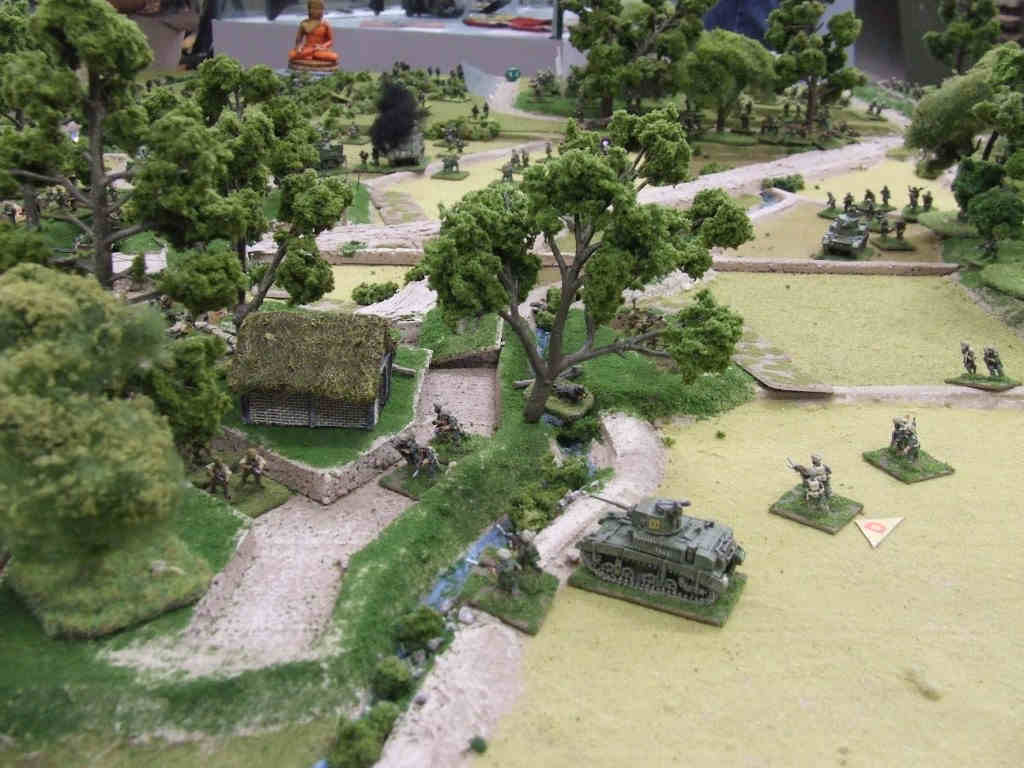
19. Closely supported by a half-squadron of the 3rd Carabiniers and preceded by smoke, the first Punjabi troops break into the Potsangbam position. |
 bishenpur021 |
21. However, two heavy machine guns are dug in to the rear of the forward trenches and these guns take a heavy toll of the Indian attackers. |
 bishenpur022 |
22. Another view of the initial Punjabi attack. |
 bishenpur023 |
23. As more Punjabi troops are fed into the attack, the Japanese artillery fire intensifies, thinning out the ranks of the reinforcements. Meanwhile, the second half-squadron of the Carabiniers moves forward with the Valentine bridgelayer, with the intention of bridging the Potsangbam nullah and opening up a route for the tanks and the 1st West Yorks to work around the western flank of the village. |
 bishenpur024 |
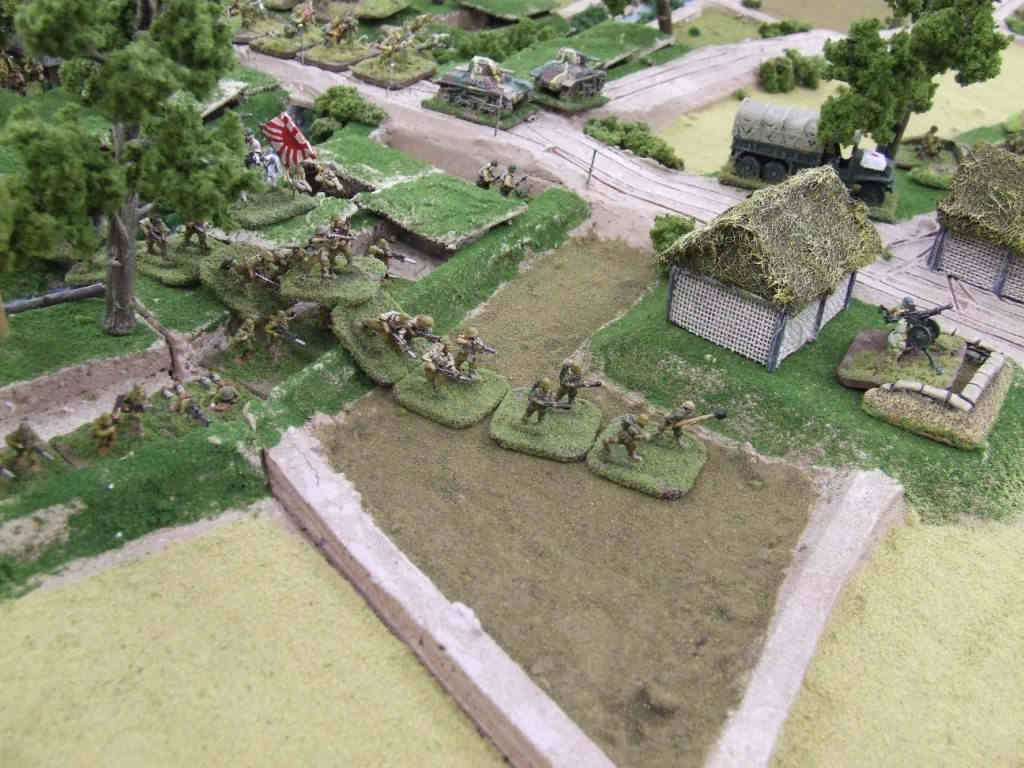
24. As the HMGs keep the Punjabis pinned in the outer trenches, Major Isagoda organises a counter-atatck with his attached company of engineers and pushes the Punjabis back out of the village. |
 bishenpur025 |
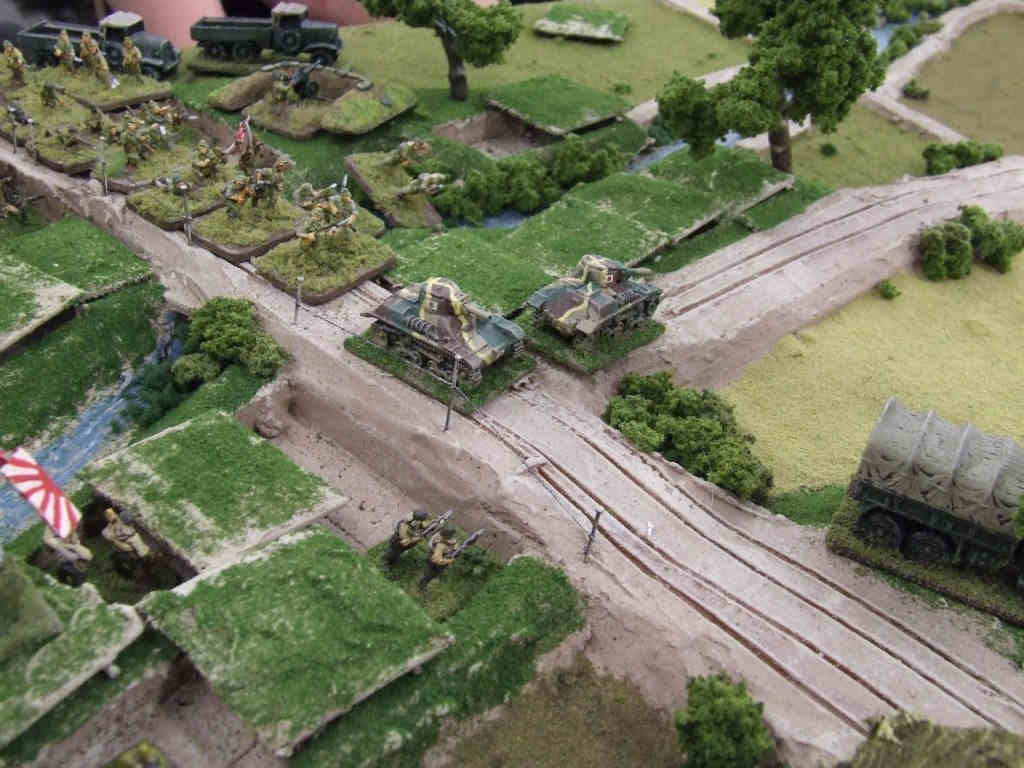
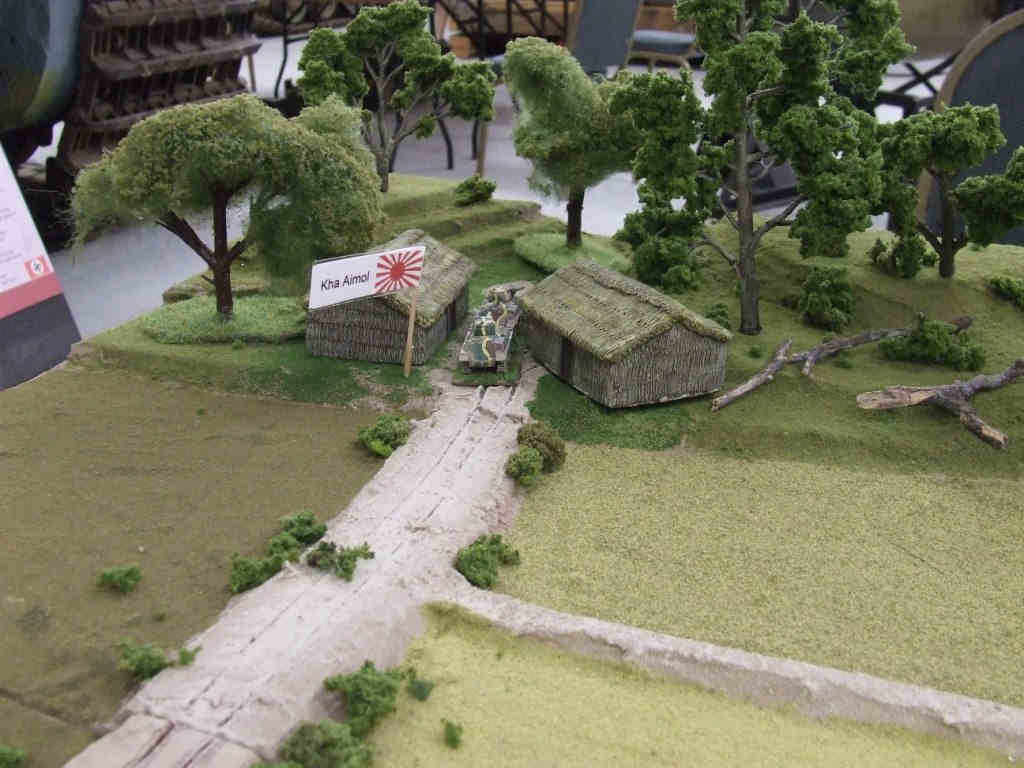
25. Japanese reserves begin to move up. The 33rd Division Tankette Company leads the 11th Company of 3/214th Infantry Regiment through Ningthoukong. Their mission is to take the village of Kha Aimol, in the foothills of the western mountains, and to hold it as a western bastion of their defence line in the plain (it's also worth 1 VP!). |
 bishenpur026 |
26. Colonel Taguchi also orders a second engineer company forward from Ningthoukong, to reinforce Isagoda's beleaguered position at Potsangbam. |
 bishenpur027 |
27. As the battle for Potsangbam intensifies, the Carabiniers, with the bridgelayer, reach the nullah and prepare to drop the bridge across it. However, to their rear the 1st West Yorks are suffering casualties as they attempt to follow up through Chothe, which is still under artillery fire. |
 bishenpur028 |
28. The Valentine prepares to lay its bridge. |
 bishenpur029 |
29. The Japanese tankettes turn off the Imphal-Tiddim road and head west towards Kha Aimol. |
 bishenpur031 |
31. As the Punjabis suffer in the trenches, the Carabiniers are reluctant to get embroiled in the closely-vegetated and fortified terrain of the village. |
 bishenpur032 |
32. The Royal and Indian Artillery Batteries renew their efforts in response to the increasingly desperate Punjabi calls for support. |
 bishenpur033 |
33. A traffic-jam of truly monumental (indeed, military) proportions begins to emerge as the 1st West Yorks attempt to march south, but are blocked by the delayed Punjabis to their front, exacerbated by sporadic artillery fire at the head of the column, around Chothe. The 92nd Field Company of the Bombay Sappers & Miners also approaches the Bishenpur crossroads from the Silchar Track, creating a huge concentration of Allied infantry. But it's ok, as there is absolutely no way that the Japanese could possible spot them. |
 bishenpur034 |
34. Covered by the Lees, the Valentine extends its scissors bridge across the nullah. |
 bishenpur035 |
35. Yet another Vengeance dive-bomber screams down out of the sky, to exact revenge upon the Japanese AA gunners. |
 bishenpur036 |
36. Reassured by the promises of reinforcements, Major Isagoda masses his remaining infantry and engineers for another counter-attack on the Punjabis in western Potsangbam. |
 bishenpur037 |
37. As a Punjabi assault pioneer team enters the fight, a 2-inch mortar team launches a desperate assault on one of the troublesome HMG positions! |
 bishenpur039 |
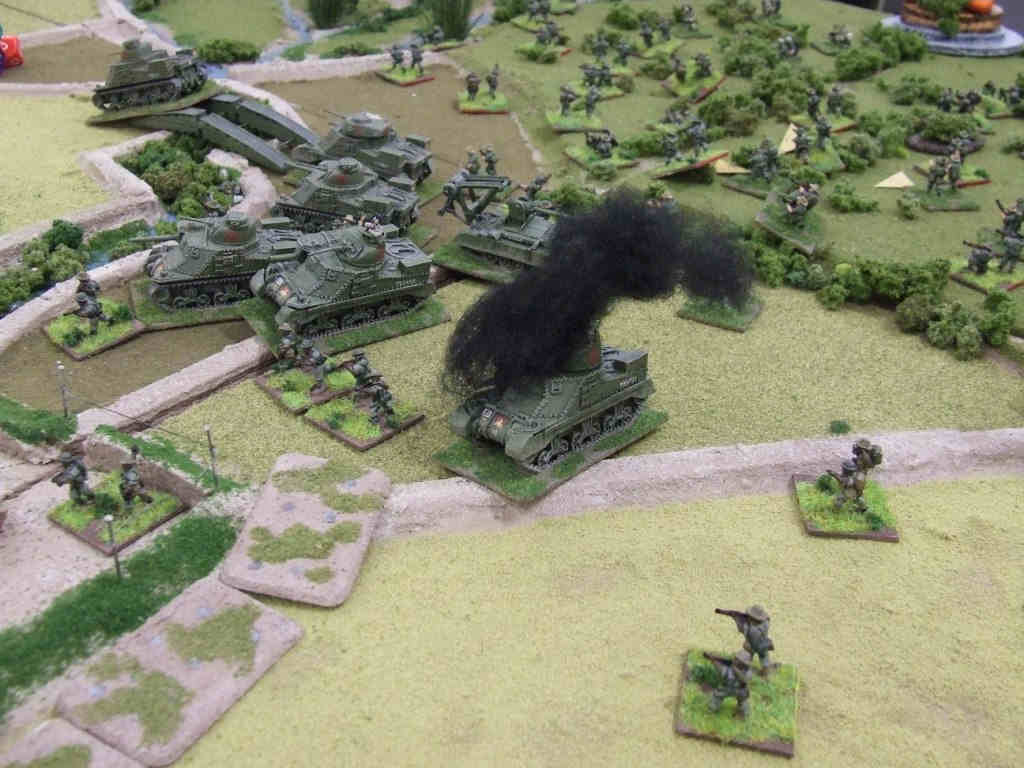
39. A fiendish new weapon of war makes its presence known! A Lee tank is blown to smithereens by a direct hit from a 320mm spigot round. |
 bishenpur040 |
40. The RAF radar detachment at Imphal reports hostiles approaching. |
 bishenpur041 |
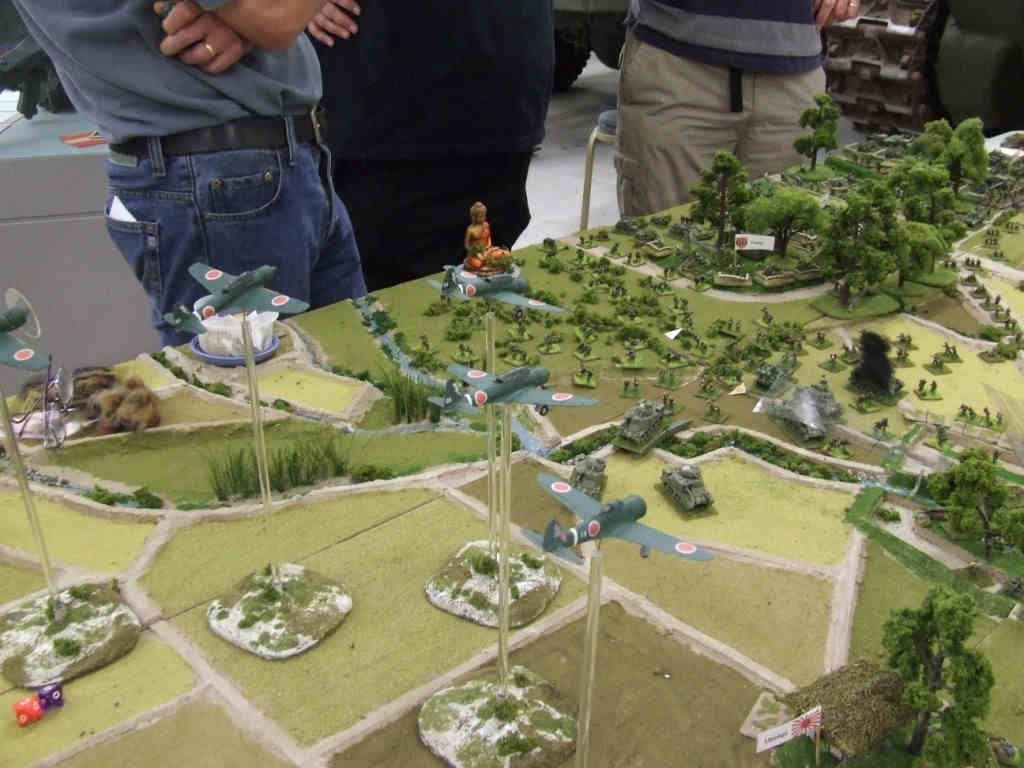
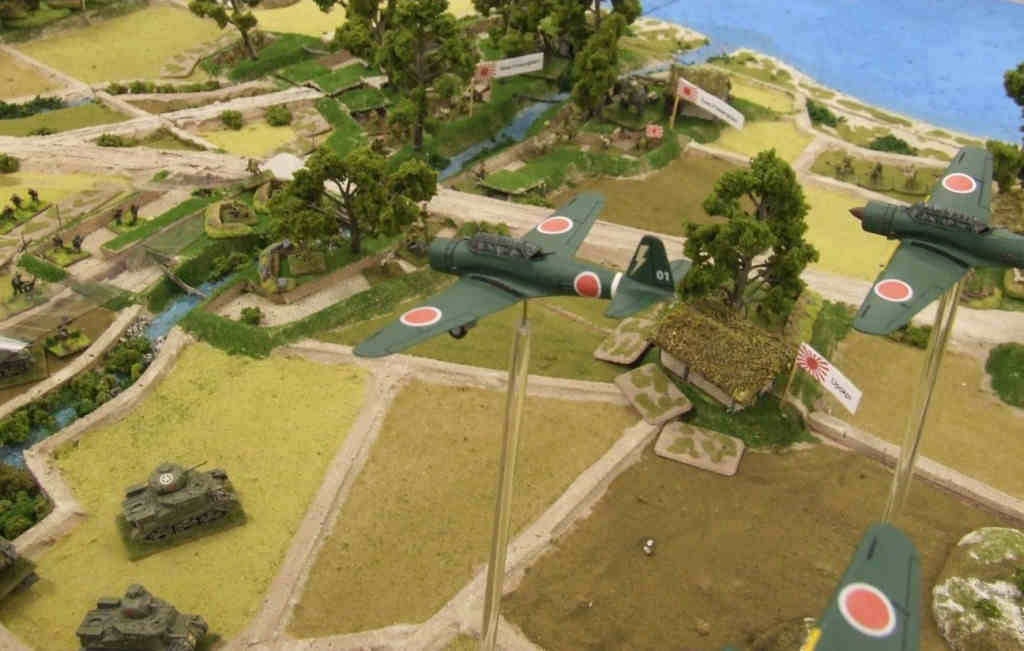
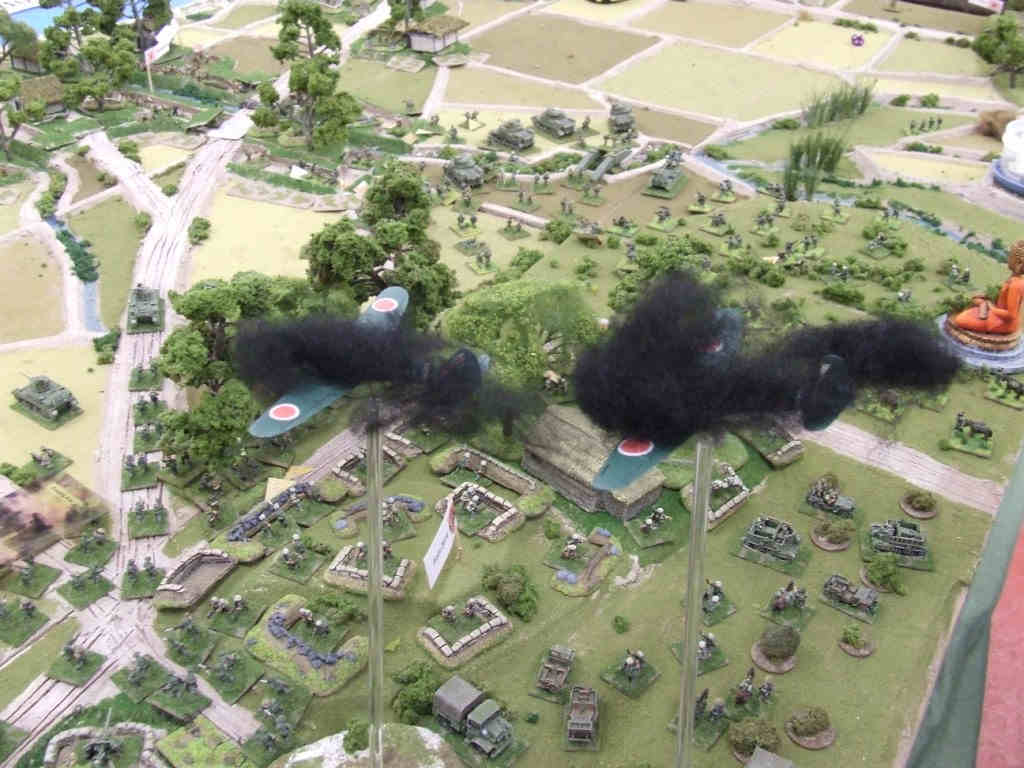
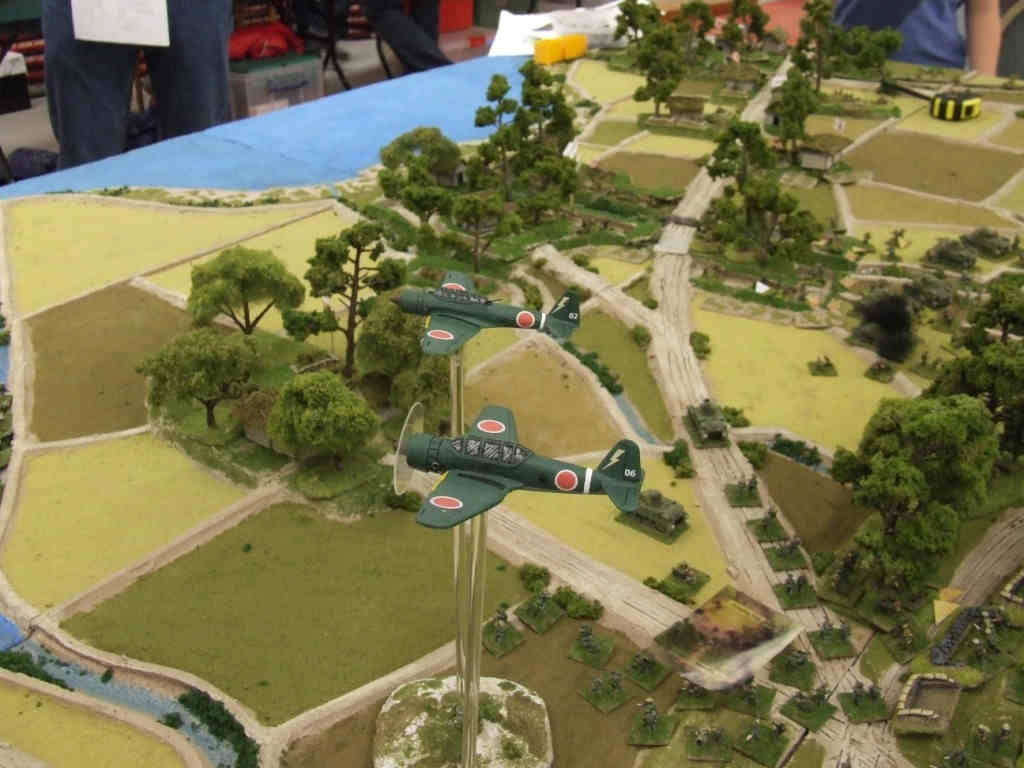
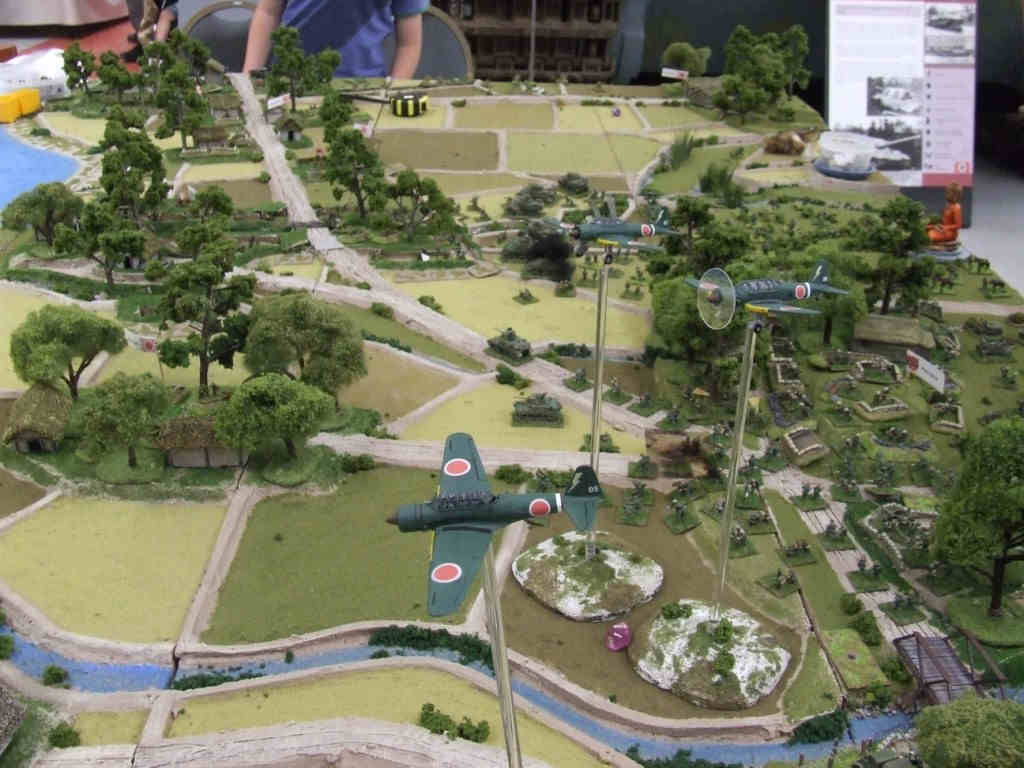
41. The Japanese Army Air Force in Burma is throwing everything into one last roll of the dice: as Ki-43 'Oscar' fighters engage the Spitfires high above the plain (and are cut to pieces), the remaining force of Ki-51 'Sonia' light attack bombers make a run down the Manipur Valley. Their objective is the Bishenpur Gun-Box. |
 bishenpur042 |
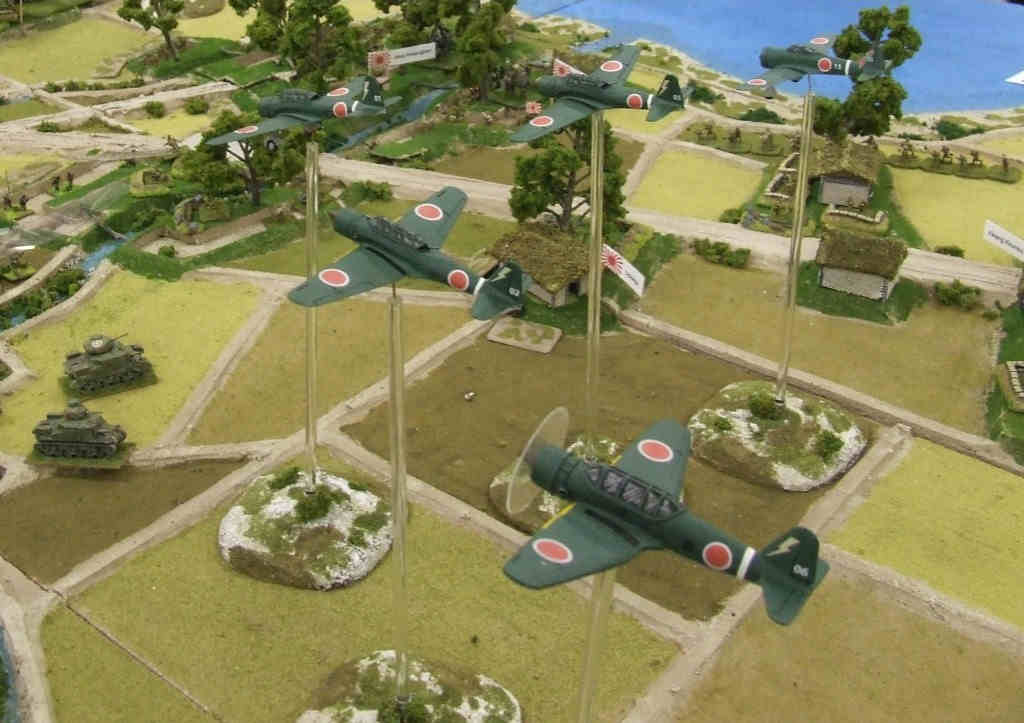
42. Close-up of the formation leader. |
 bishenpur043 |
43. As the Carabiners' tanks cross the new bridge, the leading elements of the 1st West Yorks fight their way through traffic jams, artillery and Punjabis to follow them. |
 bishenpur044 |
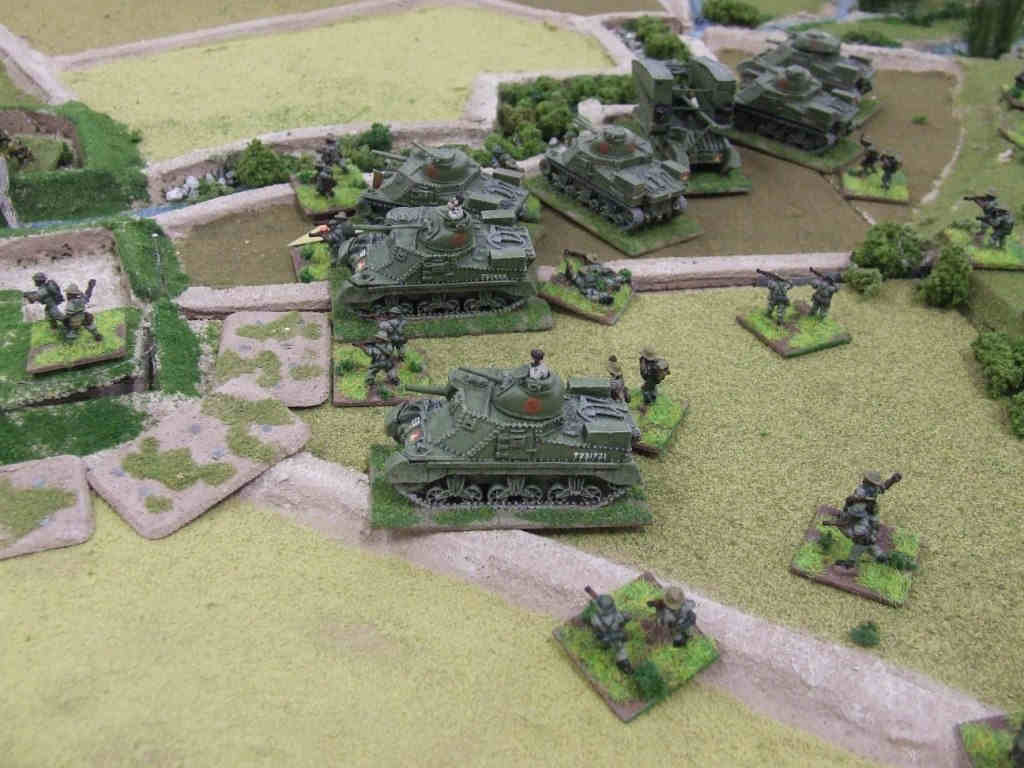
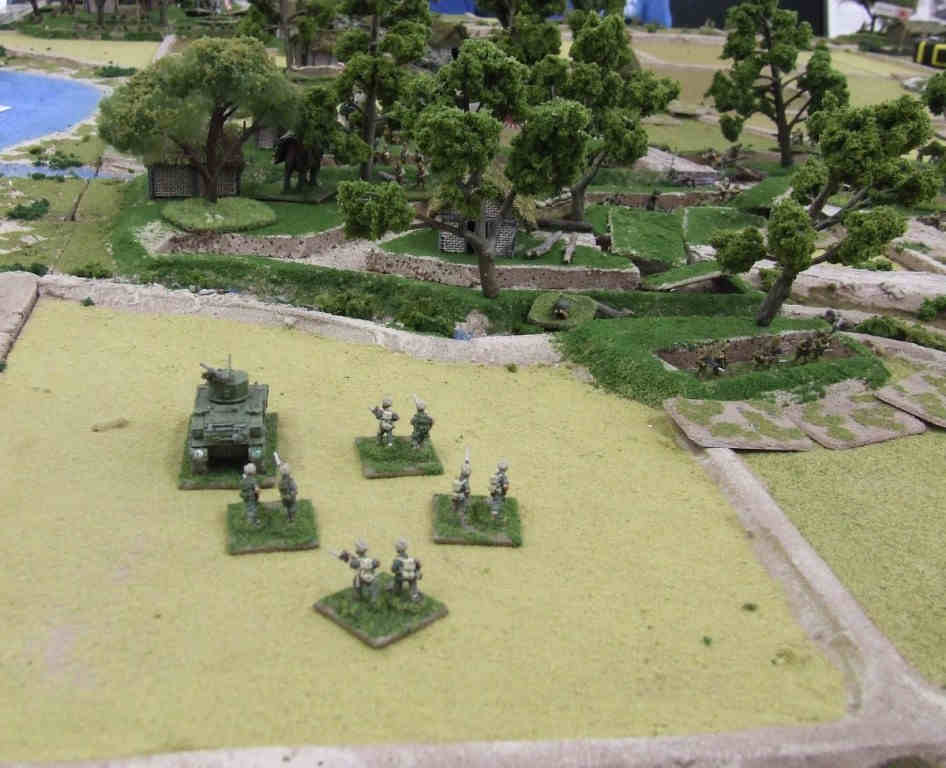
44. Stuart tanks of the Indian 7th Light Cavalry also now arrive to add their weight to the attack. |
 bishenpur045 |
45. Elements of the 1st West Yorks avoid the chaos of Chothe altogether as they attempt to comply with their orders. |
 bishenpur046 |
46. The Bishenpur crossroads is still looking no less crowded as 92 Field Company waits patiently for orders. |
 bishenpur047 |
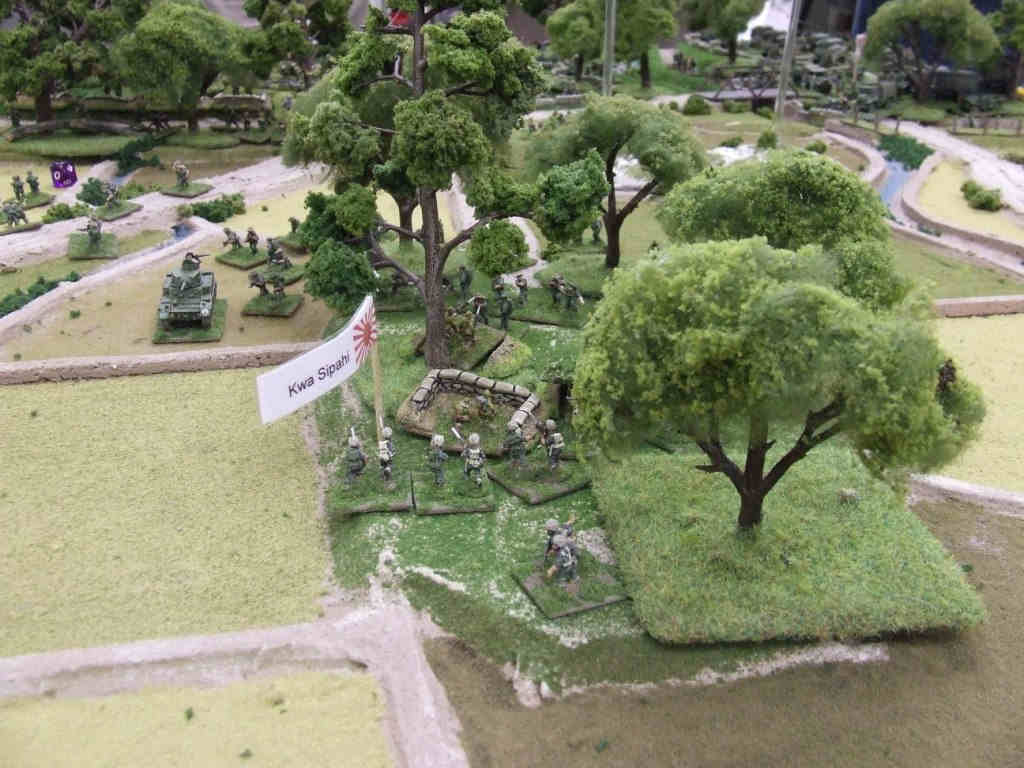
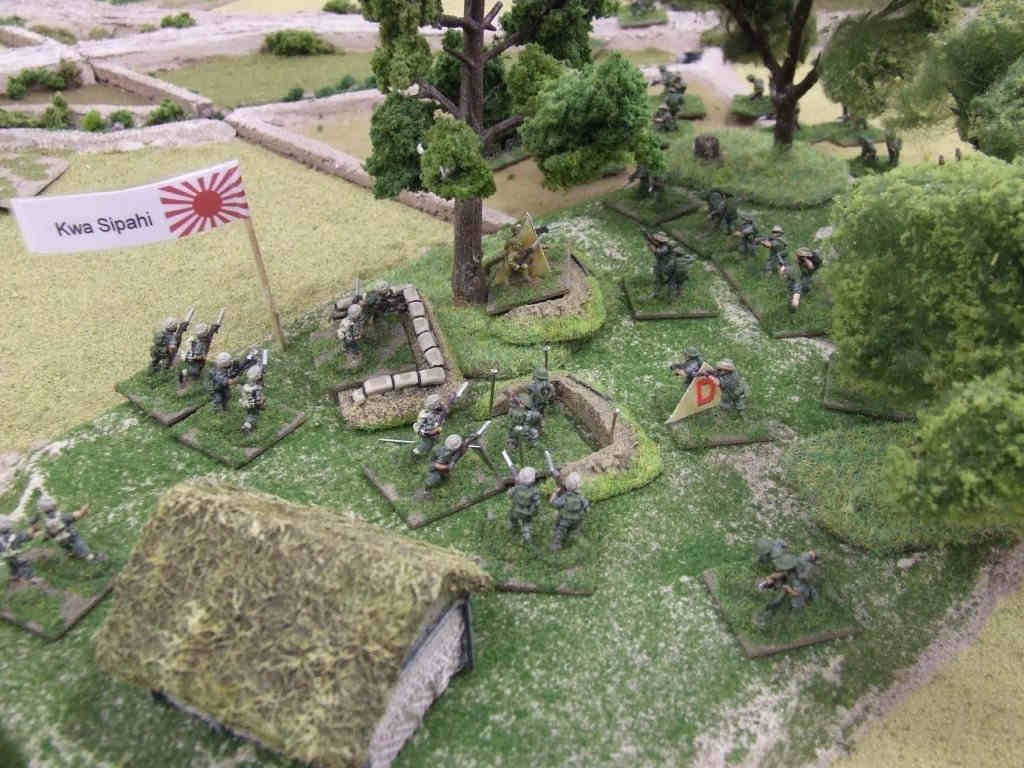
47. The tiny Japanese garrison of Kwa Sipahi meanwhile, wonders why they're being ignored. Was it something they said.? |
 bishenpur048 |
48. In Potsangbam, the Punjabis continue to grind forward, inch by painful inch. |
 bishenpur049 |
49. Vengeance dive-bombers and Hurricane IIc fighter-bombers, flying from airfields in India, as well as tactical airfields only a few miles away at Imphal, continue to keep on the pressure. |
 bishenpur050 |
50. The reinforcement company of engineers reaches Major Isagoda's command post. However, their march has not gone un-noticed. |
 bishenpur051 |
51. A FO situated on the high ground just beyond the tanks in the distance, is already calling for every gun in the Bishenpur Gun-Box to engage massed Japanese infantry in the open. |
 bishenpur052 |
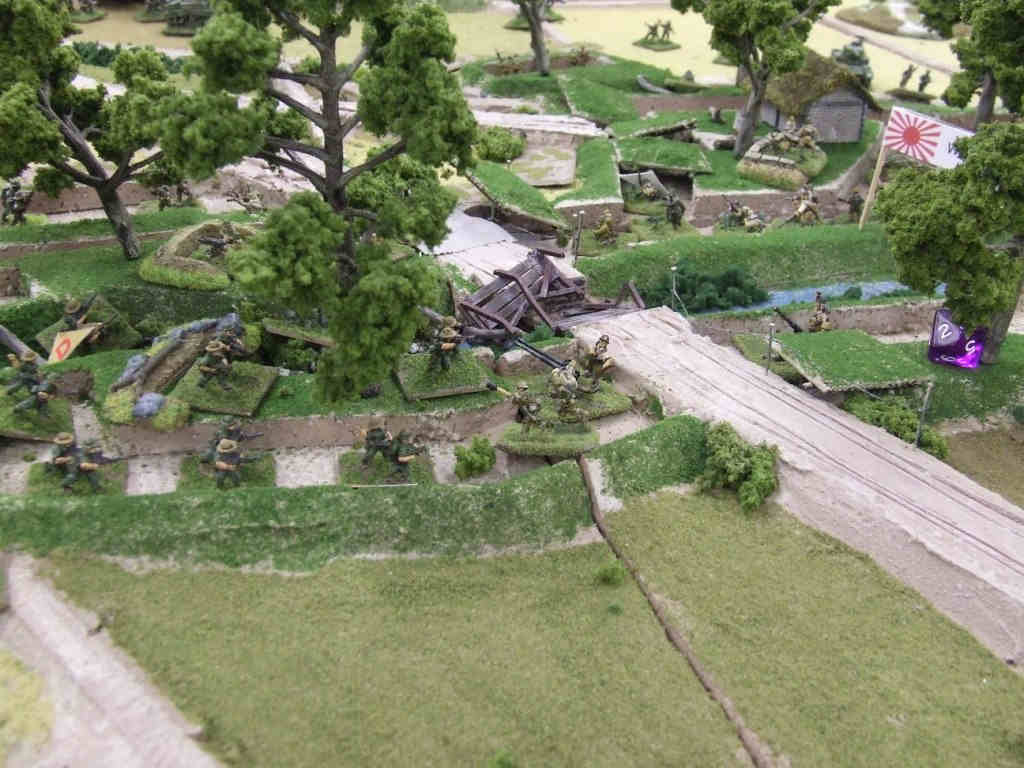
52. The wrecked bridge at Potsangbam. Just in front of it is the 13mm AA gun that during the early stages of the battle, claimed three Vengeance dive-bombers. |
 bishenpur054 |
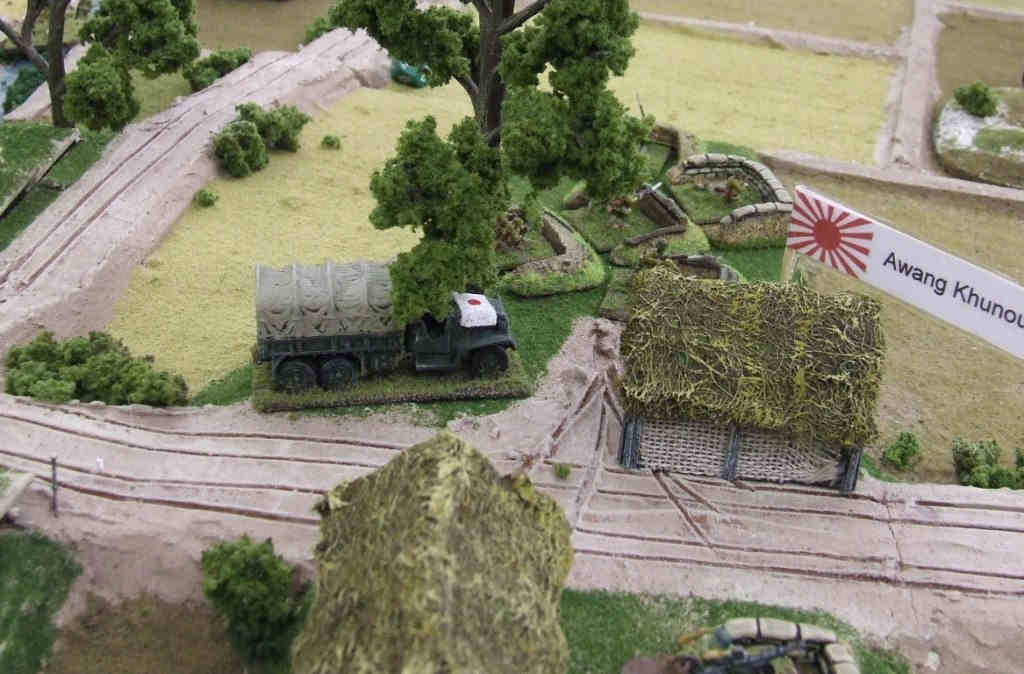
53. At Awang Khunou, a Japanese truck (a captured GMC 2.5-tonner) hides from the marauding Allied aircraft. |
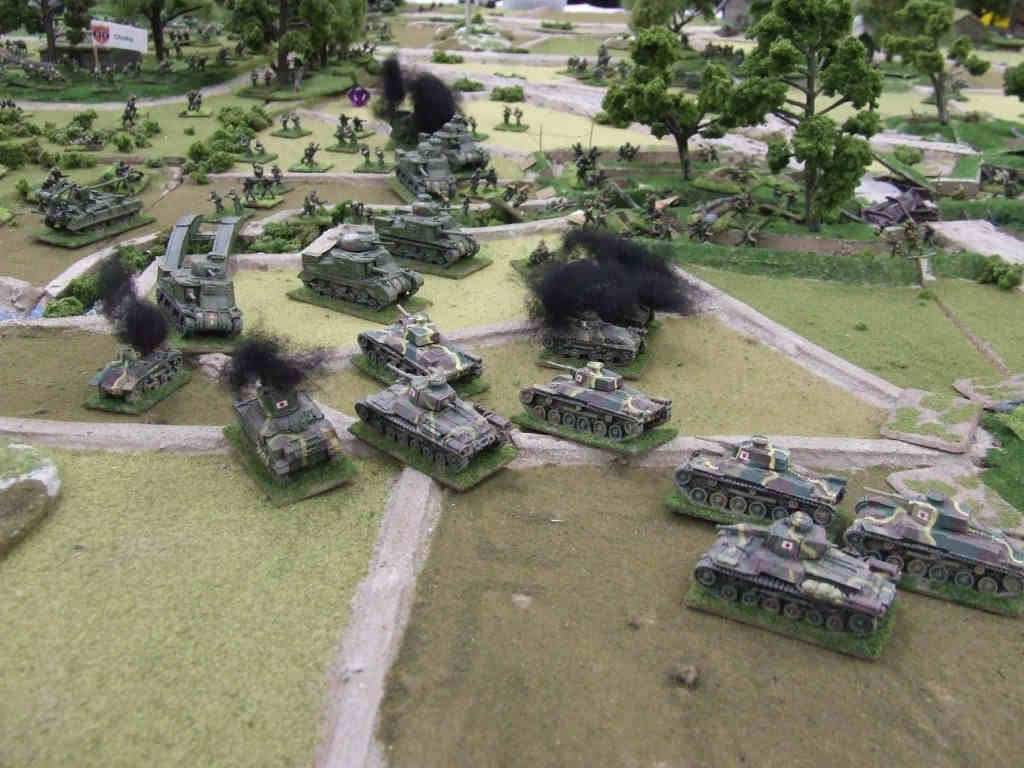
 bishenpur054 |
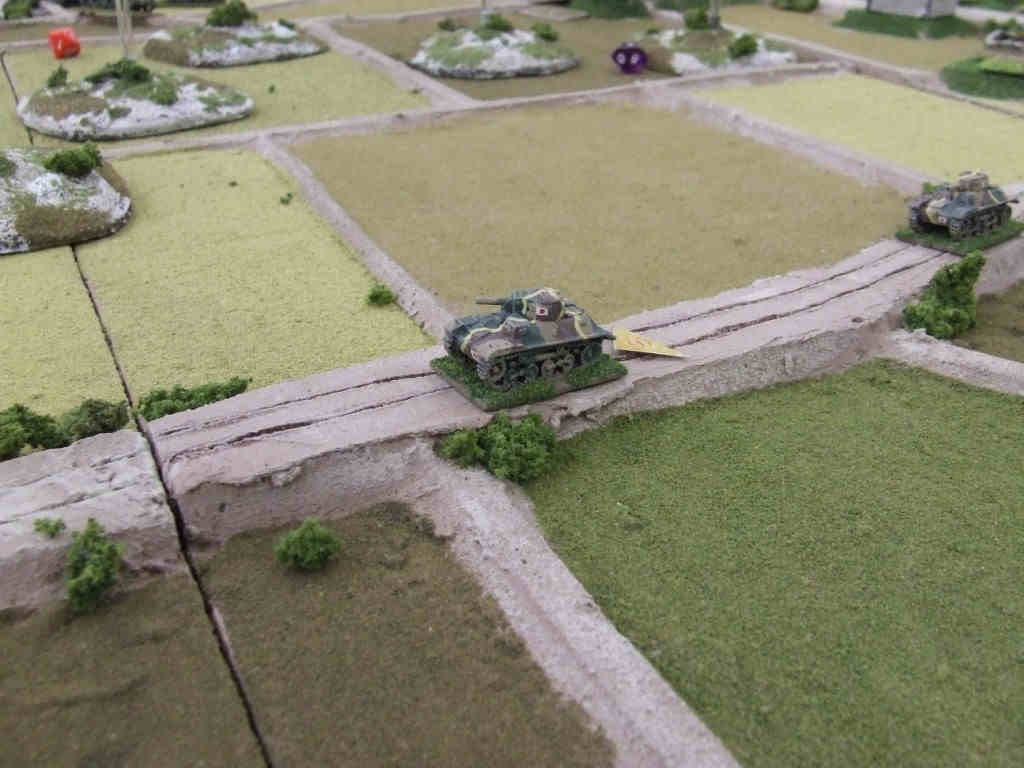
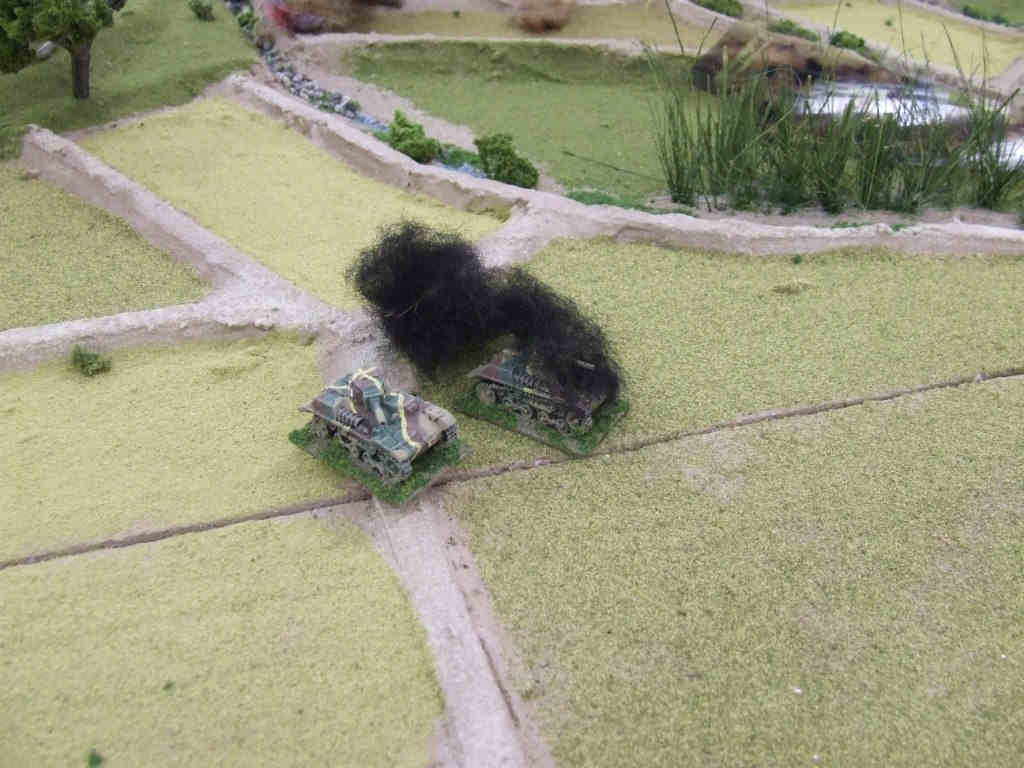
54. Having been spotted by the Carabiniers while making their dash to Kha Aimol, the Japanese tankettes are subjected to long-range fire from the Lees. |
 bishenpur055 |
55. The leading tankette is suppressed, but the second tankette continues its dash unmolested. |
 bishenpur056 |
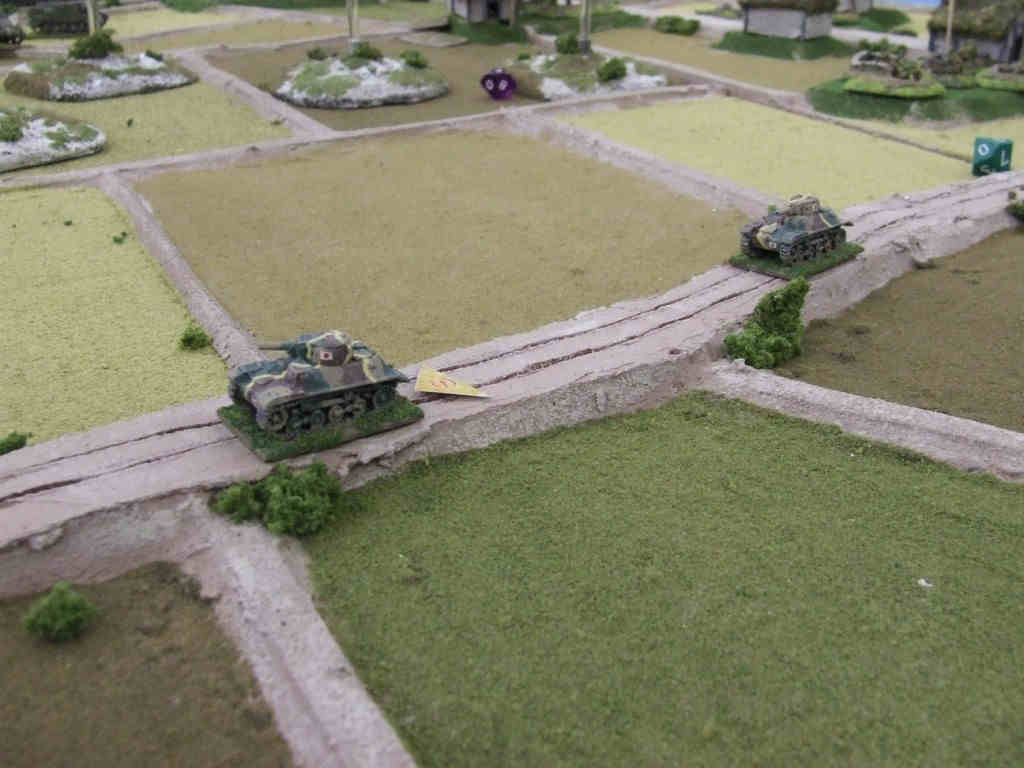
56. The Lee gunners correct their aim and try again. |
 bishenpur058 |
58. Chaos reigns as the Punjabis attempt to continue their attack and the 1st West Yorks attempt to pass through them. all under Japanese shellfire. |
 bishenpur059 |
59. A Hurribomber also has a crack at the tankettes, but has little more success than the tanks. Going almost unnoticed, the infantry of 11th Company, who have been ordered to support the tankettes, decide not follow the example of the tankettes in presenting themselves as sky-lined targets. Instead, they sneak up the Ningthoukong nullah. |
 bishenpur060 |
60. The Bombay Sappers & Miners continue to wait patiently for orders to move forward. Surely the Brigadier hasn't forgotten about them?! |
 bishenpur061 |
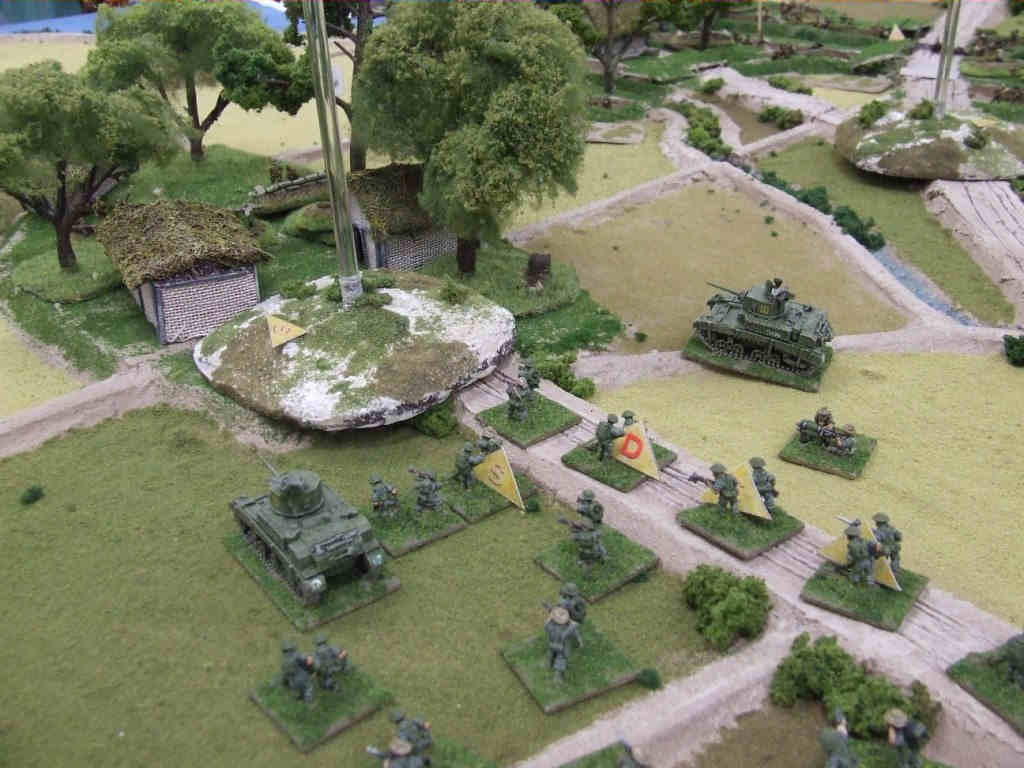
61. In a desperate attempt to regain the initiative, given the stagnation of the battle in Potsangbam, Brigadier MacKenzie orders a two-pronged assault on the Japanese outpost at Kwa Sipahi. The Sikhs of 'D' Company, 4/12th Frontier Force Regiment form the northern pincer of the attack. They are to move forward from their defensive positions at Khoijuman at once. Their positions at Khojuman will be occupied by two platoons of 1/4th Gurkhas, transferred from the Gun Box. |
 bishenpur062 |
62. Covered by smoke from the 2-inch mortar section, the leading two platoons of 'D' Company break cover and dash forward to the Bishenpur nullah. |
 bishenpur063 |
63. The western pincer of the attack will be formed by 92 Field Company, supported by the tanks of 7th Light Cavalry and the battalion mortars of 4/12th FFR. However, as they move through the crossroads, they form the greatest concentration of targets seen by the Japanese to date and instantly attract the attention of a battery of 105mm howitzers. However, despite much disruption, no casualties are actually caused and the Indian sappers press on to Kwa Sipahi. |
 bishenpur064 |
64. At Potsangbam, the lead elements of 1st West Yorks are finally across the nullah and begin to work down the southern bank. More West Yorks troops work their way up the nullah itself and infiltrate into the position that way. |
 bishenpur065 |
65. Major Taguchi, initially jubilant in seeing the column of reinforcements marching towards him is horrified to see it cut to ribbons in front of him by the massed British and Indian artillery! Only half of those badly-needed men make it into the Potsangbam perimeter. |
 bishenpur066 |
66. Another view of the shelling of Bishenpur crossroads. |
 bishenpur067 |
67. Air raid sirens suddenly sound around Bishenpur! The formation of Japanese aircraft finally appears over the Gun-Box and is immediately subjected to intense AA fire from two sections of Bofors guns and a section of 3.7-inch Heavy AA Guns, as well as anyone else who can point a rifle into the air! In a phenomenal display of dice-rolling, Richard rolls four 10s in six dice; shooting down two of the five raiders and Disordering a third. |
 bishenpur068 |
68. To the cheers of British, Indian and Gurkha soldiers, two Sonias come crashing down in flames. |
 bishenpur069 |
69. The survivors press home their attack, but do little damage beyond disrupting the activities of the 25-Pounder battery present in the Gun Box. |
 bishenpur070 |
70. The surviving aircraft, one of them trailing smoke and oil, turn away from the target area. They would return. |
 bishenpur071 |
71. The Gunners climb out of their air-raid shelters and breathe a sigh of relief as they clean up the mess left by the Japanese aircraft. |
 bishenpur072 |
72. The tankettes, having run the gauntlet along the paddy-dyke road, finally reach the safety of Kha Aimol and gloriously seize 1 VP for the Emperor! |
 bishenpur074 |
74. They said they'd be back. The Bombay Sappers & Miners foolishly let themselves be caught in column as the Japanese aircraft return. Amazingly, no serious casualties are suffered! |
 bishenpur075 |
75. The Bombay Sappers & Miners in close-up. The .30 Cal AAMGs mounted on the supporting Stuart tanks managed to throw off the aim of the Japanese pilot sufficiently to reduce the effectiveness of his attack. |
 bishenpur076 |
76. On the right of the Sappers, a company of the 1st West Yorks was also strafed by the returning Japanese aircraft. However, this again caused no serious damage. |
 bishenpur078 |
78. Screened by smoke from the battalion 3-inch mortars, the Sikh 'D' Company presses home its attack on the north-eastern corner of Kwa Sipahi. |
 bishenpur079 |
79. The Sappers lick their wounds and press on against the western side of Kwa Sipahi. |
 bishenpur080 |
80. Another view of the Sappers. |
 bishenpur081 |
81. In Potsangbam, the Punjabis continue to grind forward in the continuing, desperate battle of attrition. The Japanese defenders are now seriously thinned out, but the MG Company (now lacking their company commander, who died leading a counter-attack) continues to hammer the Punjabi attackers. Hidden by the tree, the AT/AA Company commander also dies for his emperor in a heroic counter-attack. |
 bishenpur082 |
82. The assault presses home on Kwa Sipahi as the surrounded Japanese platoon desperately defends its bunkers against attacks from all sides. |
 bishenpur083 |
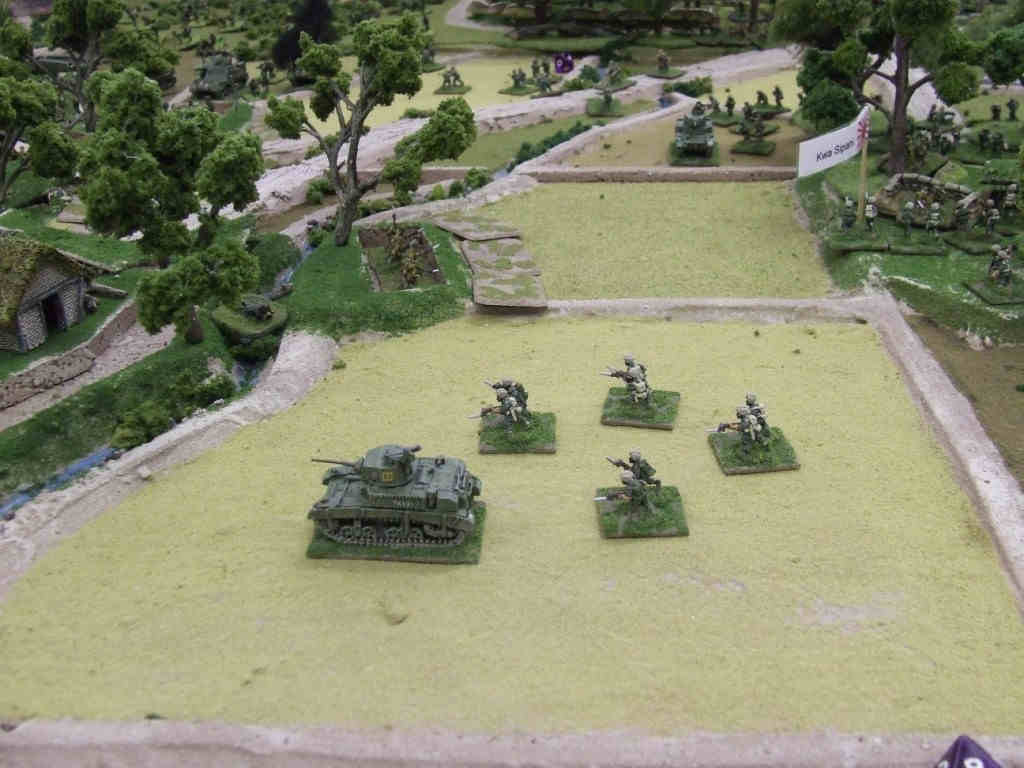
83. Seizing the initiative, a detachment of Sikhs, with a troop of Stuarts, attempts to establish a second foothold in Potsangbam. |
 bishenpur084 |
84. Assaulted by Sikhs and Sappers, the Japanese defenders of Kwa Siphahi sell their lives dearly. |
 bishenpur085 |
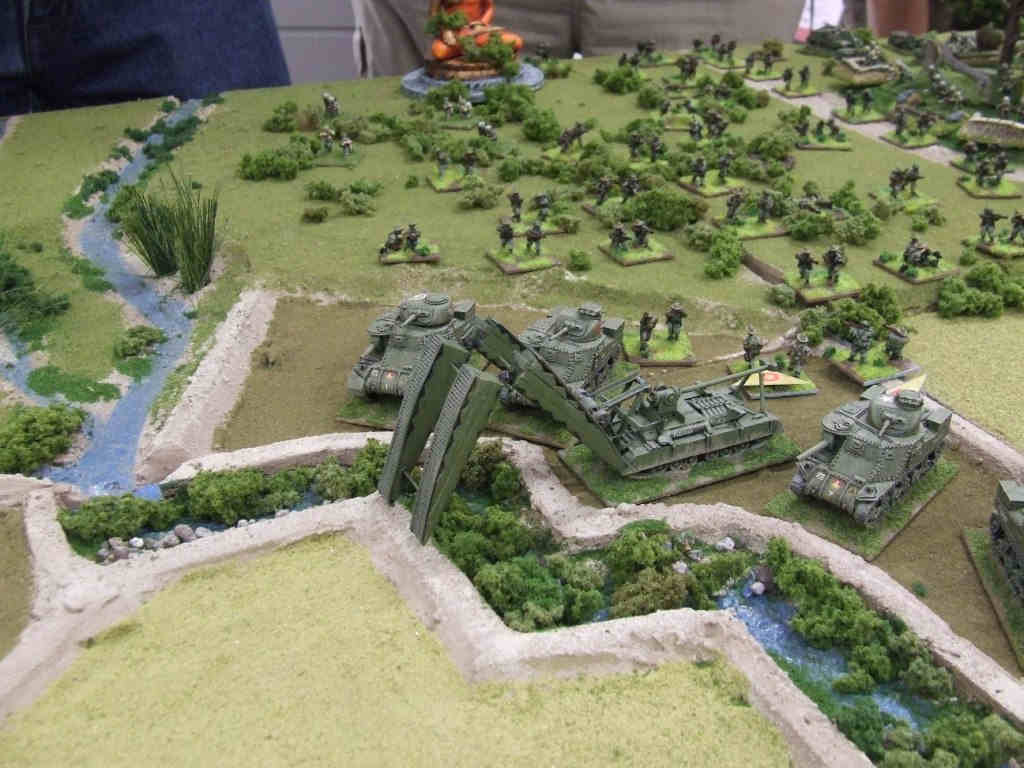
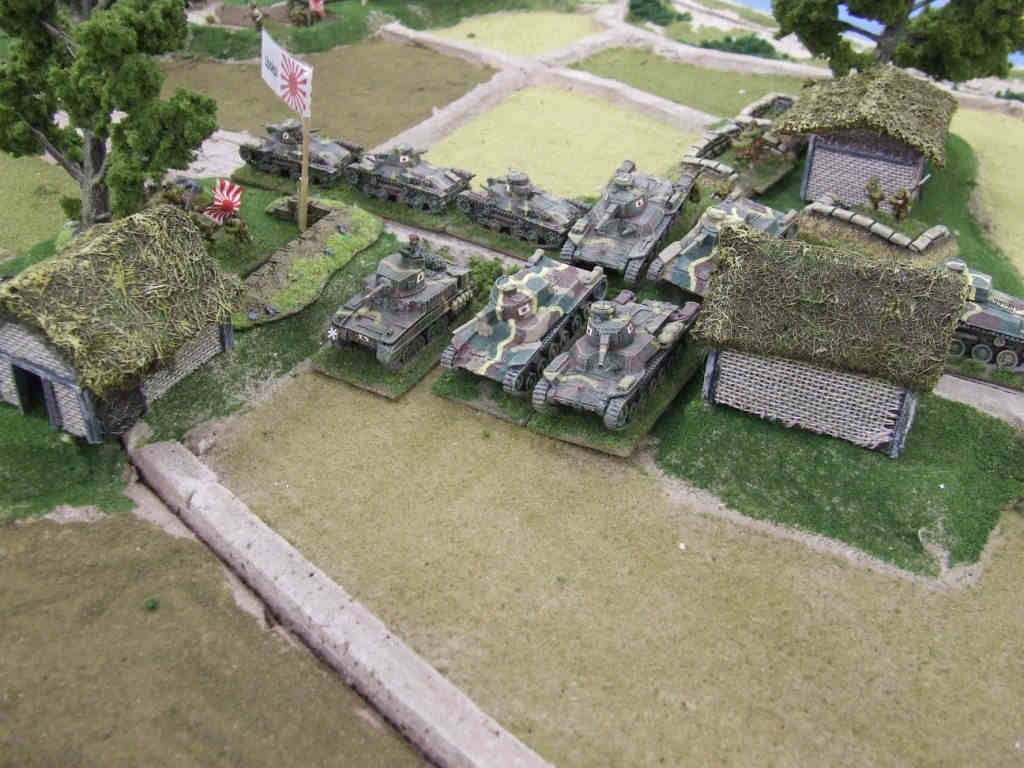
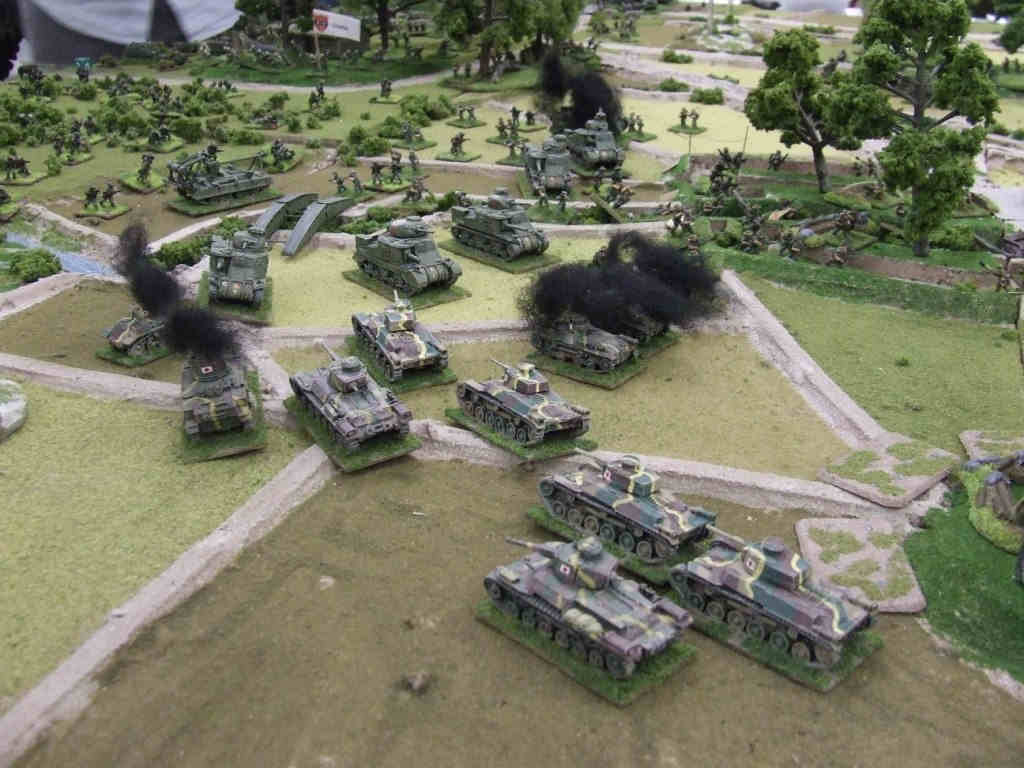
85. Allied air reconnaissance spots a new threat: The Japanese 14th Tank Regiment, having finally traversed the hellish Tiddim Road, arrives on the Imphal plain. However, having left the 5th Company (comprising Ho-Ni 75mm SPGs) behind as a rearguard at Fort White and having suffered numerous breakdowns, the 'Regiment' is now reduced to a mere company in strength. At the head of the column is the much-reduced 6th Company, comprising Stuart tanks captured from the British in 1942. Following behind is the 1st Company, comprising Ha-Go light tanks |
 bishenpur086 |
86. Bringing up the rear of the column are the 2nd and 3rd Companies, plus the Regimental HQ, all equipped with Shinhoto Chi-Ha medium tanks. A few of these tanks have been upgraded with armour plate taken from Stuarts wrecked in 1942. |
 bishenpur087 |
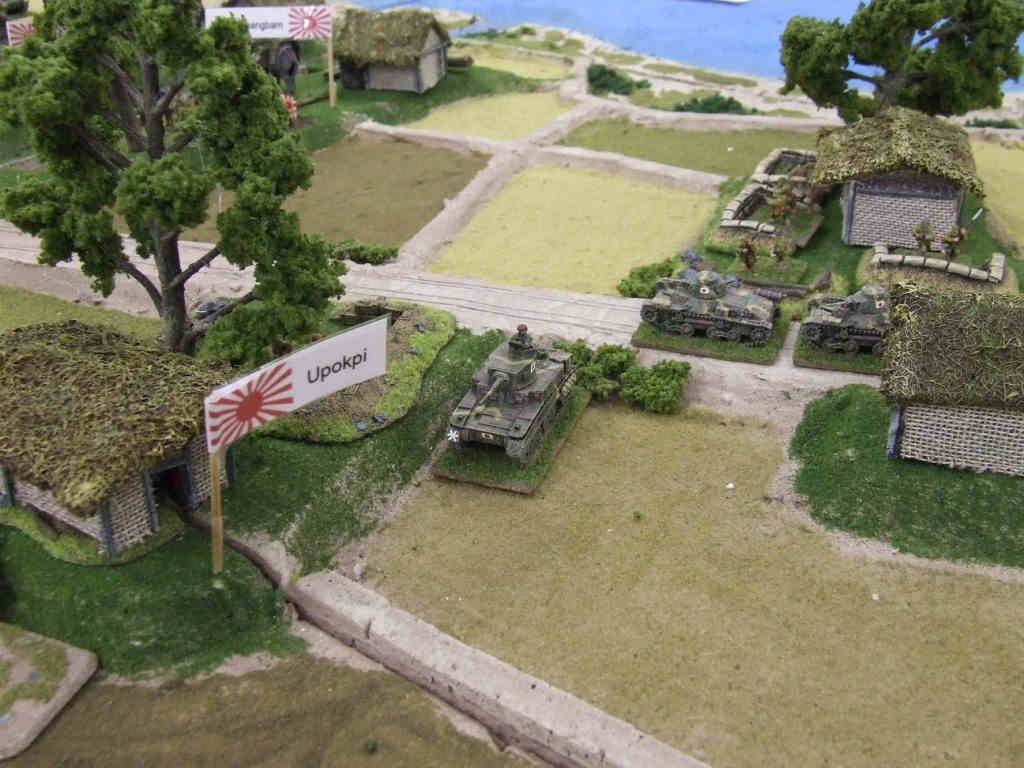
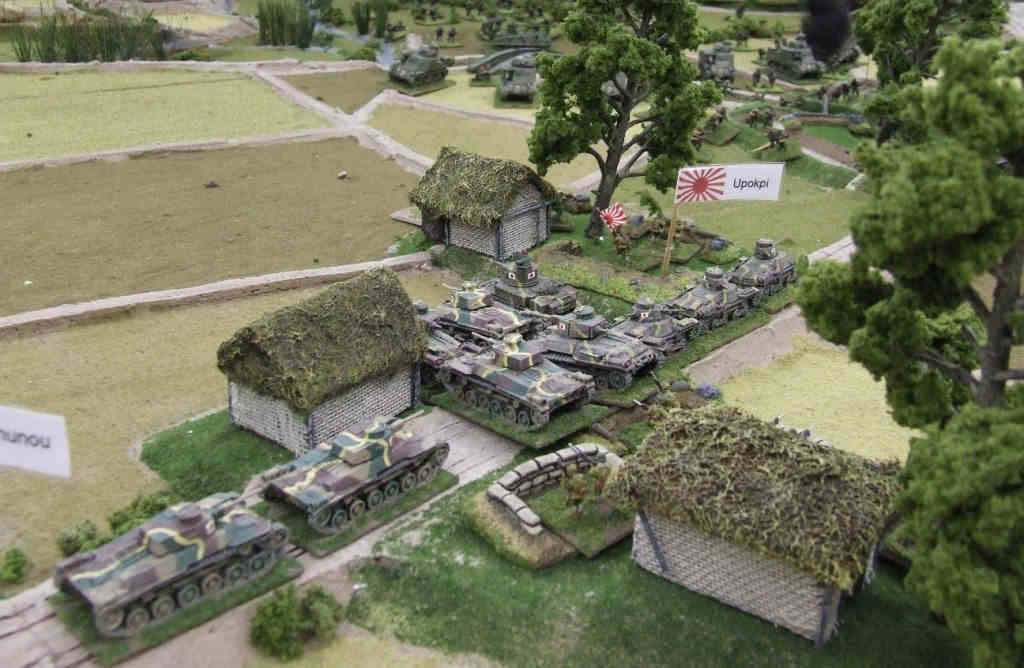
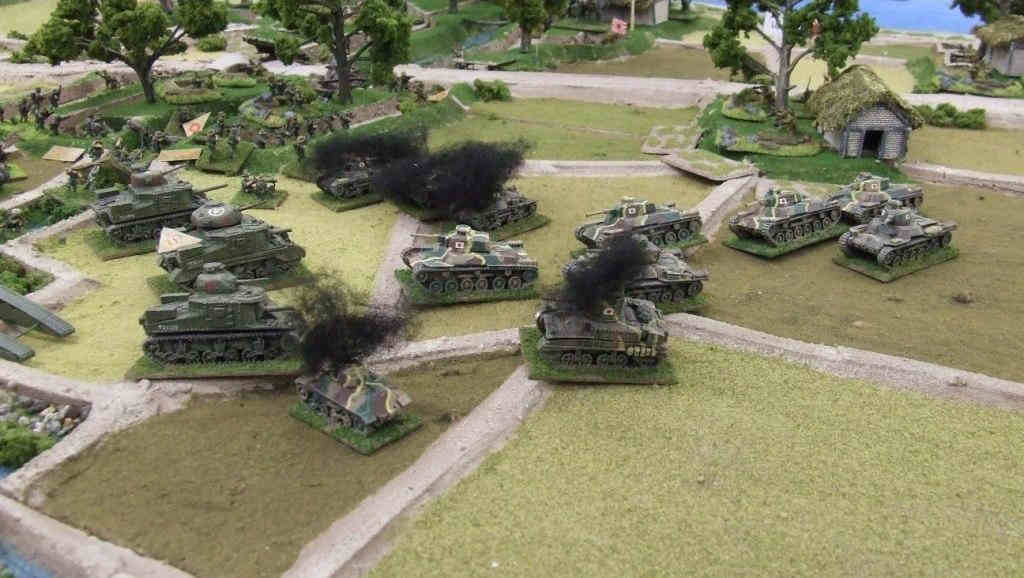
87. Passing through Ningthoukong and Awang Khunou, the column turns off the road at Upokpi, intending to meet the British tanks on the open paddy-plain. |
 bishenpur088 |
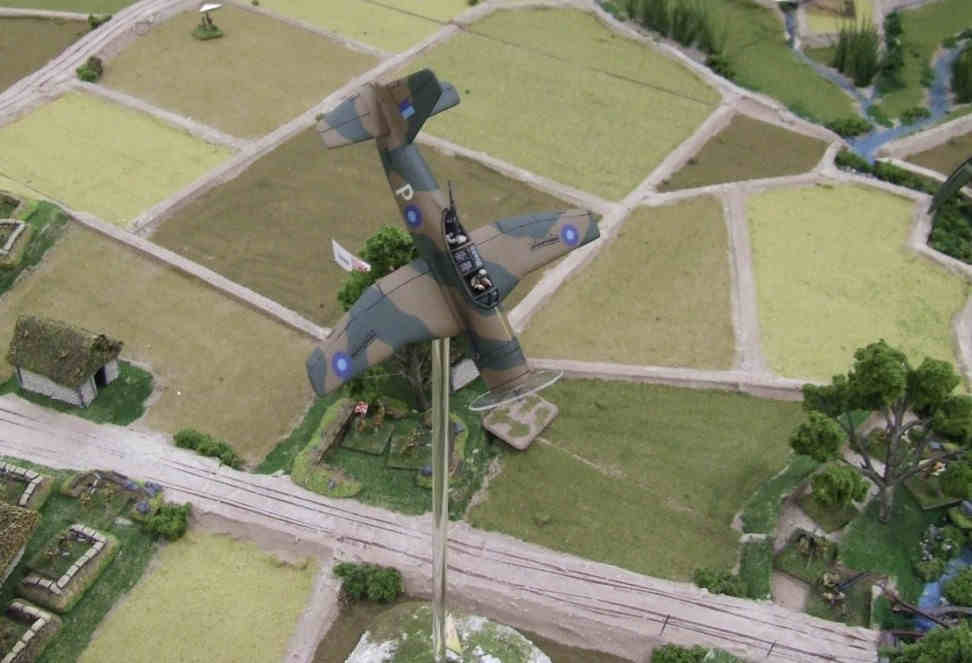
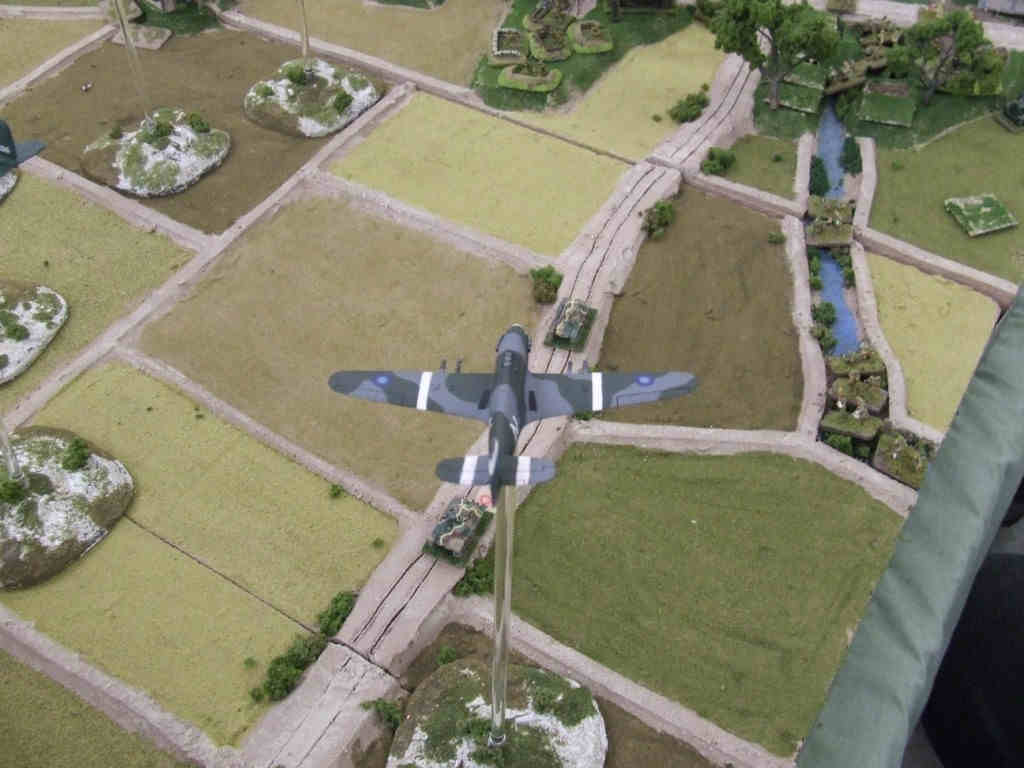
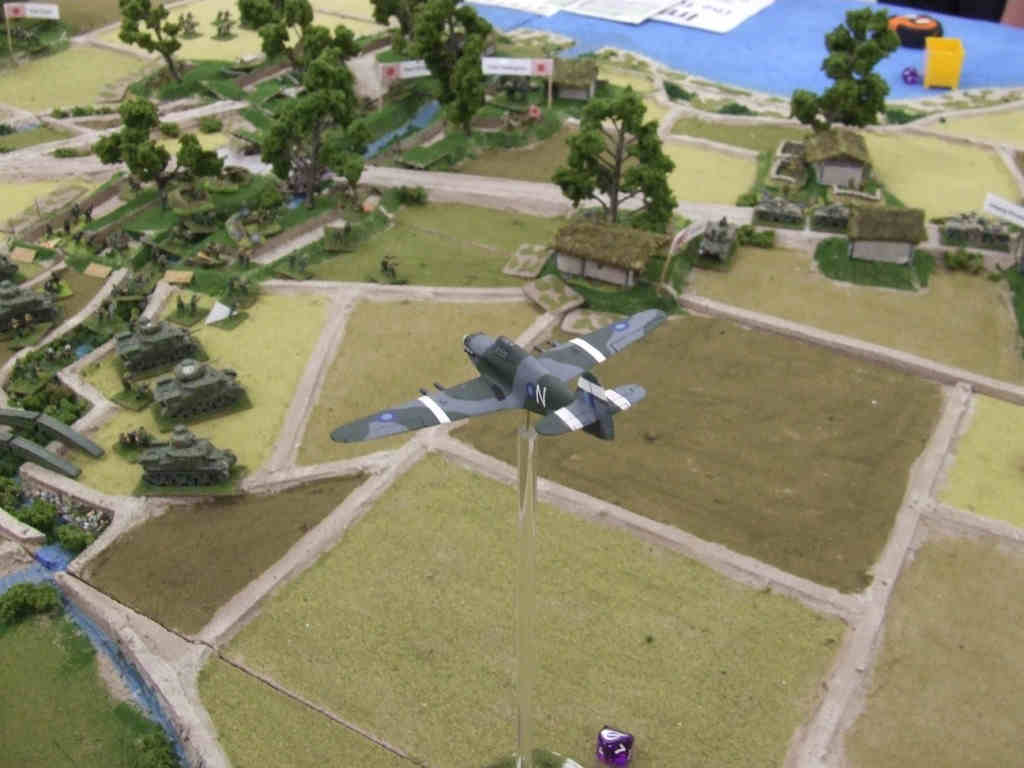
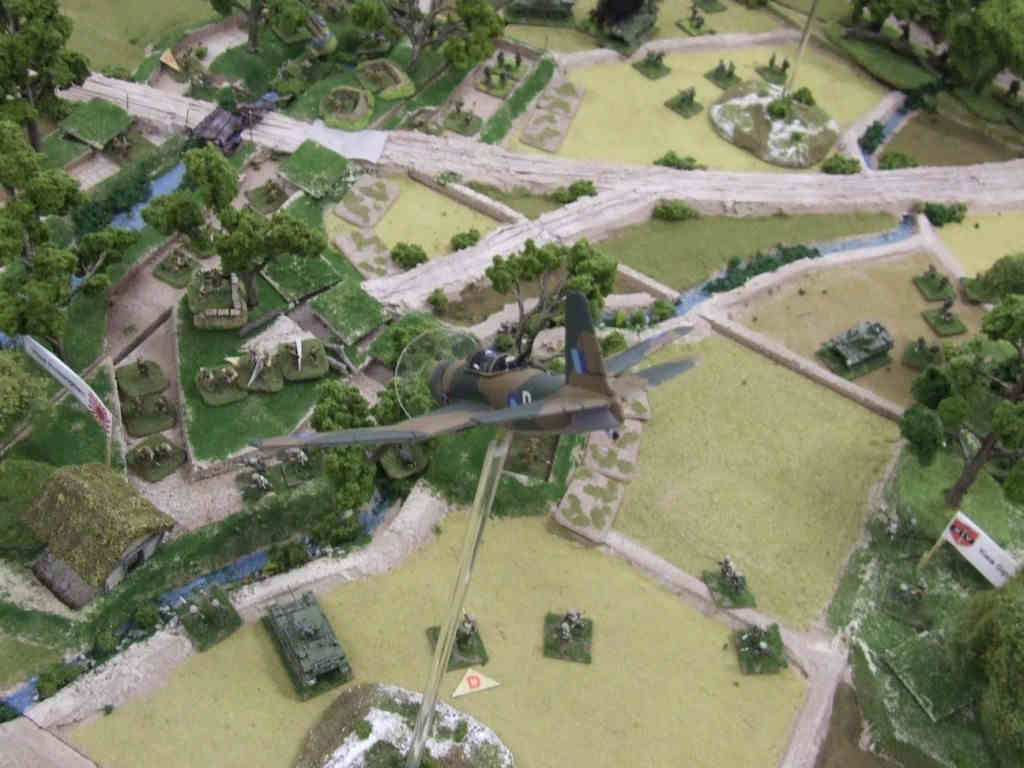
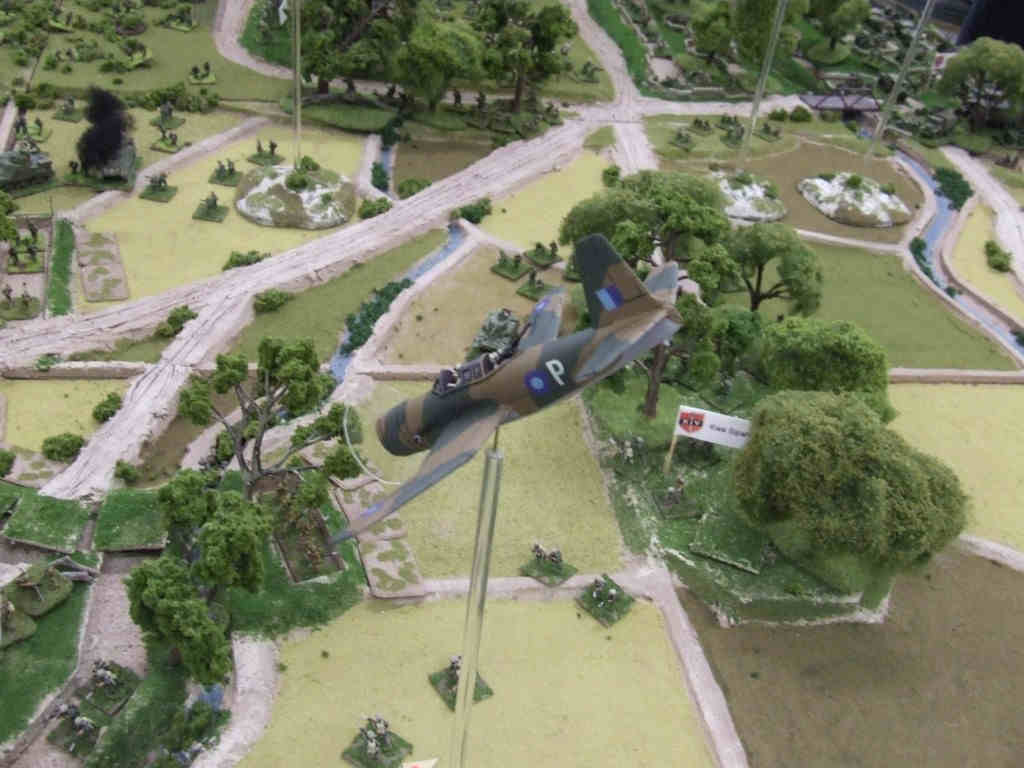
88. A Hurricane IIc circles high over the plain, waiting for targets to be identified to him by the Tactical Control Parties on the ground. |
 bishenpur089 |
89. The commander of 14th Tank Regiment hopes that by putting his Stuarts at the head of the column, the British will be fooled into holding fire. |
 bishenpur090 |
90. As the Japanese tanks press optimistically forward, the firepower of 3rd Carabiniers wait, covering the flank of the continued assault on Potsangbam. |
 bishenpur091 |
91. 11th Company finally catches up with the tankettes at Kha Aimol, securing the Emperor's great victory! Banzai! |
 bishenpur092 |
92. The rest of 11th Company hurries across the paddy fields. |
 bishenpur093 |
93. The Sikh-sneak flank attack approaches Potsangbam. All that awaits them is the lonely FO for the 'Mega-Mortar' Company. |
 bishenpur095 |
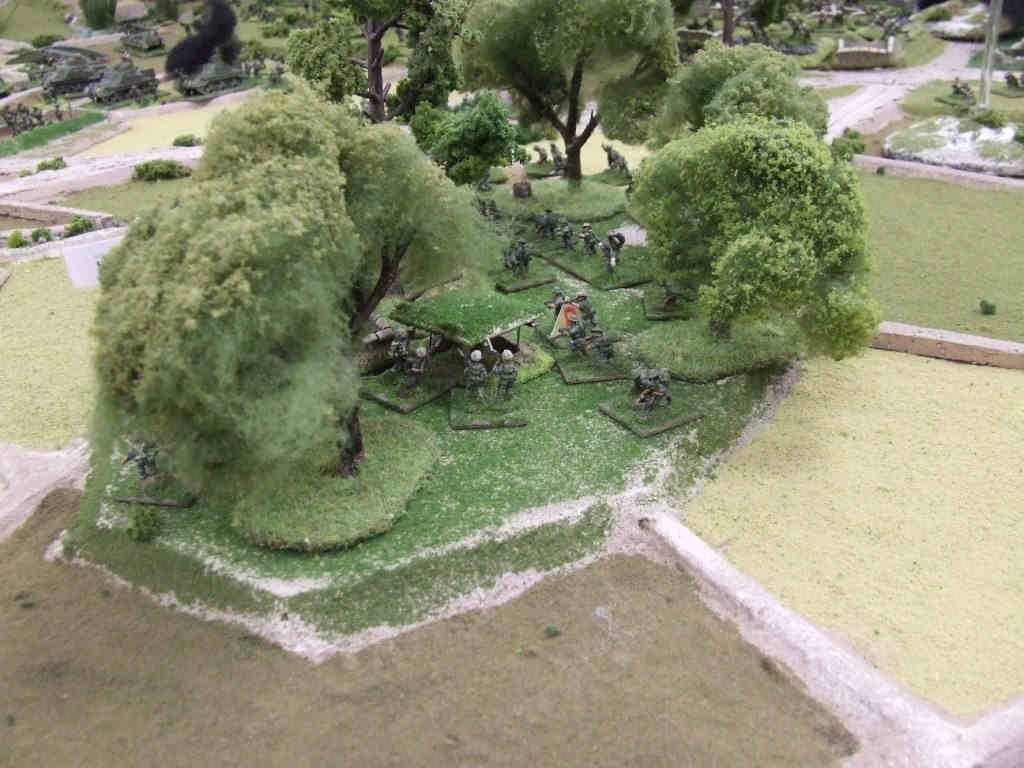
95. The Japanese garrison of Kwa Sipahi, beset on all sides by Sikhs and Bombay Sappers, makes its last stand. The fight is brutal and brief. |
 bishenpur096 |
96. Having been relieved by 11th Company, the Tankette Company is now free to leave the cover of Kha Aimol and join the attack of 14th Tank Regiment. However, the company soon suffers losses to long-range 75mm fire from the Lees of 3rd Carabiniers. |
 bishenpur097 |
97. Despite the heroic sacrifice of the 33rd Tankette Company (or perhaps because of it?), the 14th Tank Regiment seems reluctant to exchange fire with the Lee tanks of 3rd Carabiniers and instead assesses the tactical situation (hides behind) from Upokpi. |
 bishenpur099 |
99. The lead Ha-Go picks off an unwary section of Yorkshiremen as they move around the southern side of Potsangbam, but otherwise the 14th Tank Regiment remains curiously un-engaged, despite the urgings of Colonel Taguchi. |
 bishenpur100 |
100. On the northern side of Potsangbam, the Sikhs successfully breach the defences and establish a foothold in the defences. However, one section of Sikhs is beaten off by the heroic mortar FO! |
 bishenpur101 |
101. With Kwa Sipahi now securely in Allied hands, the rest of the Sikhs move south to reinforce the foothold. The Bombay Sappers & Miners follow. |
 bishenpur102 |
102. Pushing down the southern side of Potsangbam and down the nullah, the 1st West Yorks reach the demolished bridge and knock out a 37mm anti-tank gun and one of the anti-aircraft guns situated there. The last remaining defender in this corner of the strongpoint is a solitary section of engineers, but they will soon be overwhelmed. On the northern bank of the nullah, the MG Company maintains its incredible defence. |
 bishenpur103 |
103. As the Sikhs push into Potsangbam, Isagoda rushes his last remaining troops to that corner of the perimeter. |
 bishenpur104 |
104. Finally spurred into action by Taguchi's encouragement, abuse and downright threats, the 14th Tank Regiment (aided on the flank by the survivors of 33rd Tankette Company) launches a charge reminiscent of the charge of the Takeda cavalry at Nagashino. with much the same result. |
 bishenpur105 |
105. Though the RHQ, 2nd & 3rd Companies (with the balance of the regiment's medium tanks) remain intact, the 1st and 6th Companies, together with the 33rd Tankette Company, are exterminated. |
 bishenpur106 |
106. Another view of the Death Ride of the 14th Tank Regiment. |
 bishenpur107 |
107. As Japanese engineers attempt to dislodge the Sikh incursion into a Potsangbam, a Vengeance dives in to provide support. |
 bishenpur108 |
108. Another view of the Vengeance. |
 bishenpur109 |
109. As the last Japanese defenders cling on to their trenches, the MG Company continues hammering away to the bitter end. |
 bishenpur110 |
110. The remnants of the Japanese reinforcement engineer company launch a desperate counter-attack against the Sikh foothold. |
 bishenpur111 |
111. The 1st West Yorks finally overwhelm the defenders south of the river, but it's too little, too late. |
 bishenpur112 |
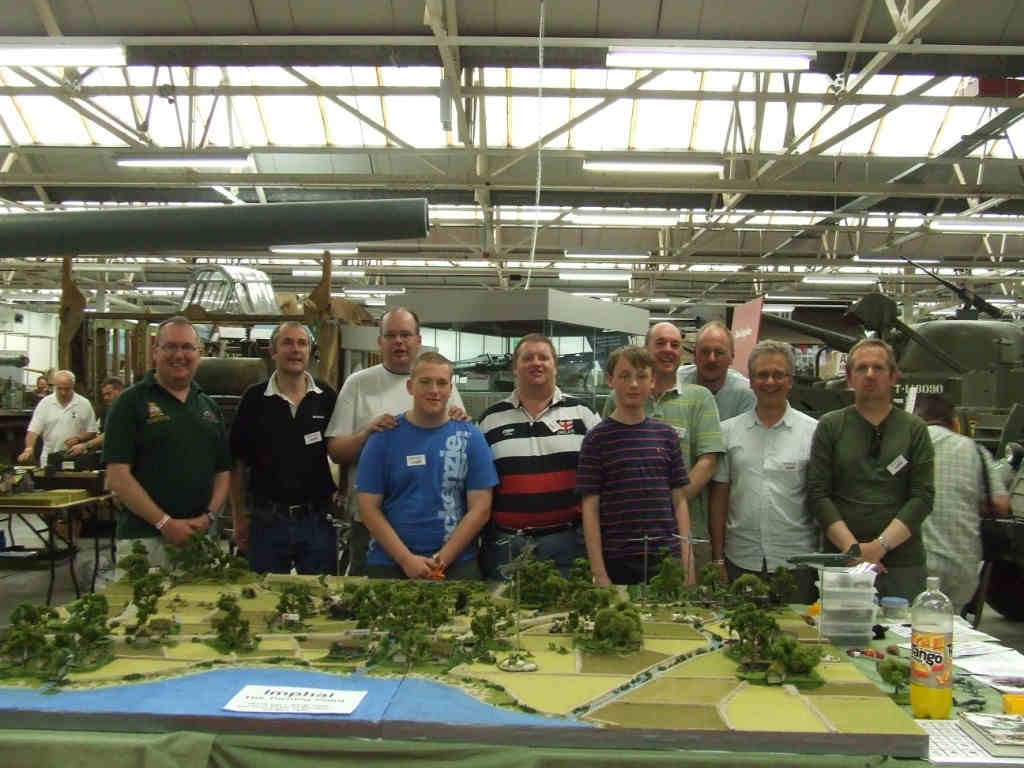
112. The 2011 team photo. From left to right: Mark Davies, Steve Uden, Paul Davison, Phil Shield, Ken Natt, George Gass, Gary Loosen, Andy Parkes, Richard de Ferrars and Martin Small. |
 bishenpur113 |
113. Gary had forgotten that we were in India this year and was completely unaware that he was being stalked by a very large Tiger. |
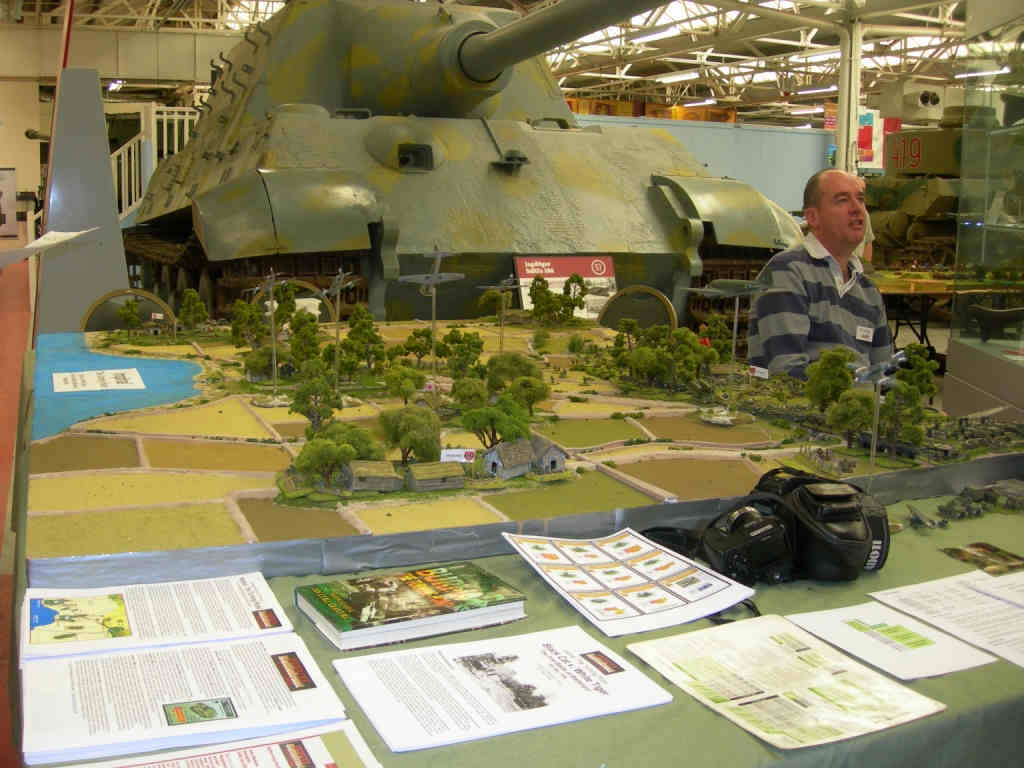
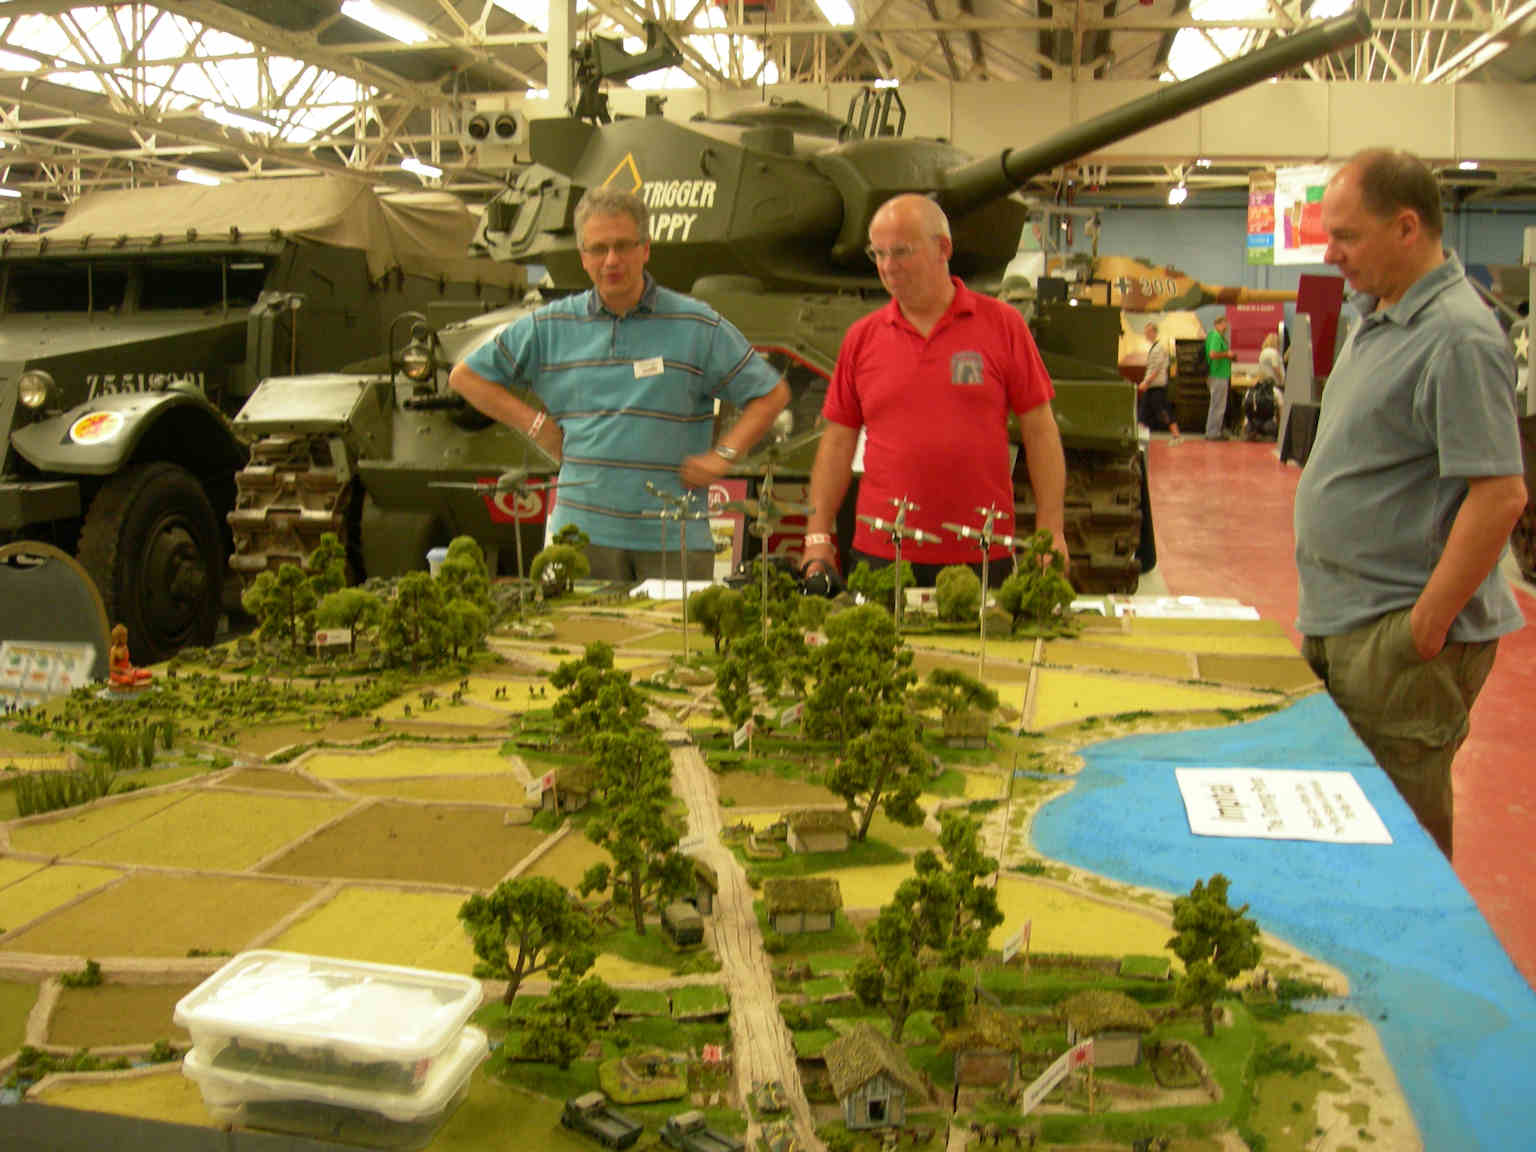 bishenpur114 |
114. Overall view of the table. Richard de Ferrars describes the game to our friend Trevor Body, of Redoubt Miniatures. Trevor was the first of dozens of people over the weekend to ask 'So is this the battle with the tennis court?'. I think our next Burma game will have to be 'The battle with the tennis court' if nothing else, but so we can say 'Yes, it is.'. |
 bishenpur115 |
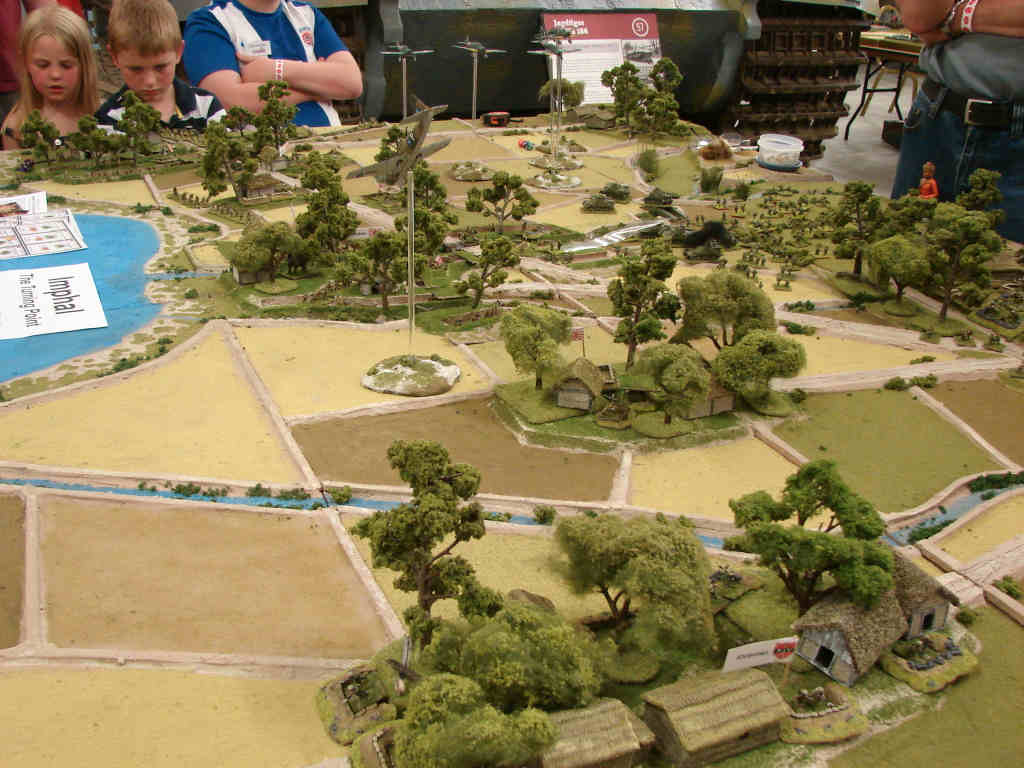
115. Some spectators view the game at Japanese eye-level. |
Copyright 2000-2019 Fire and Fury Games, all rights reserved
Web page maintained by
Webmaster@FireAndFury.com.