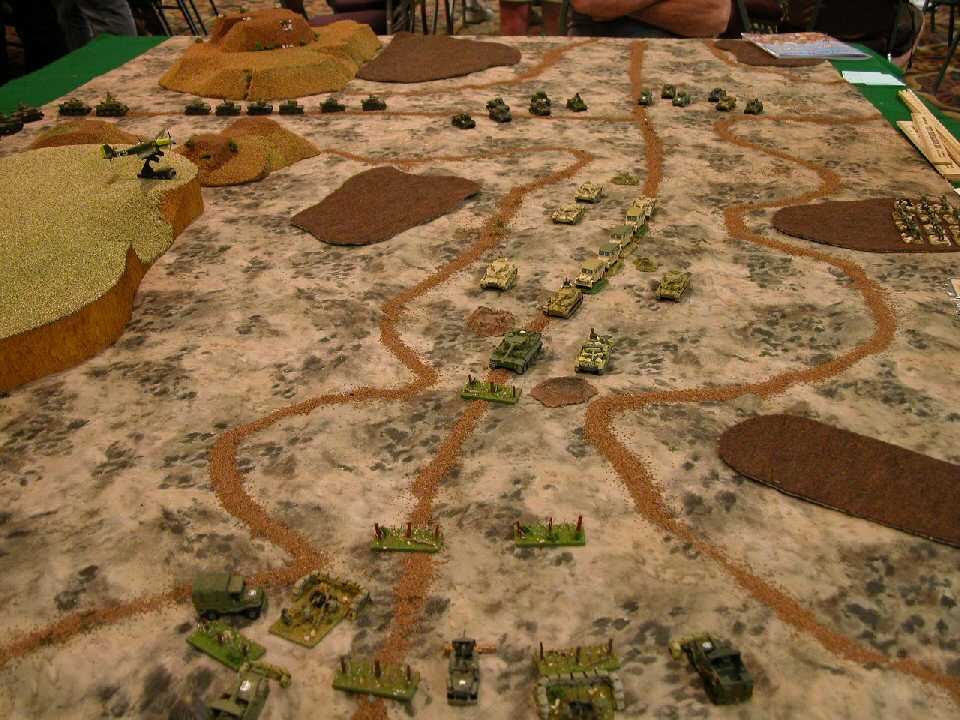
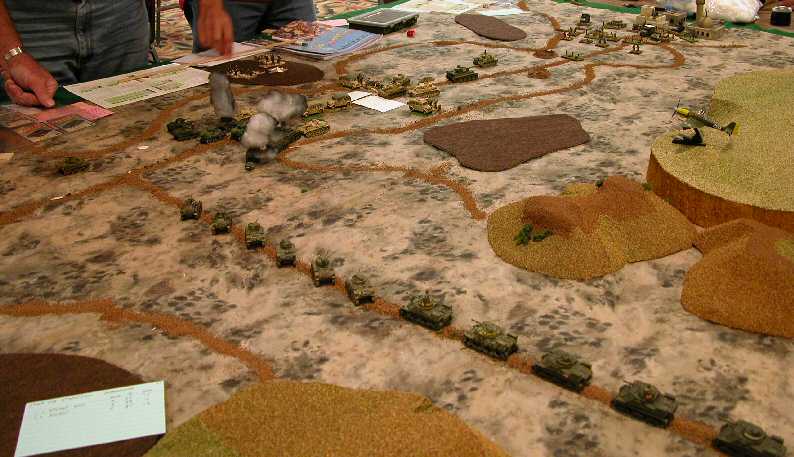
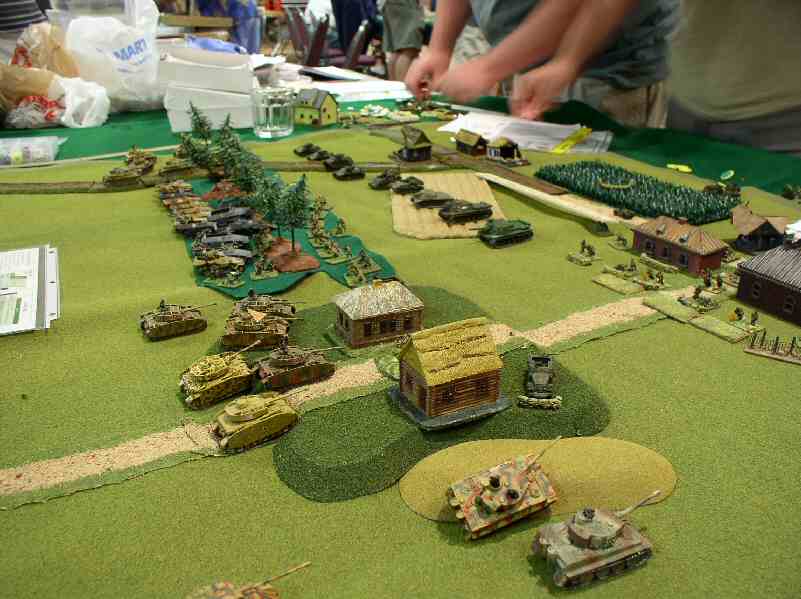
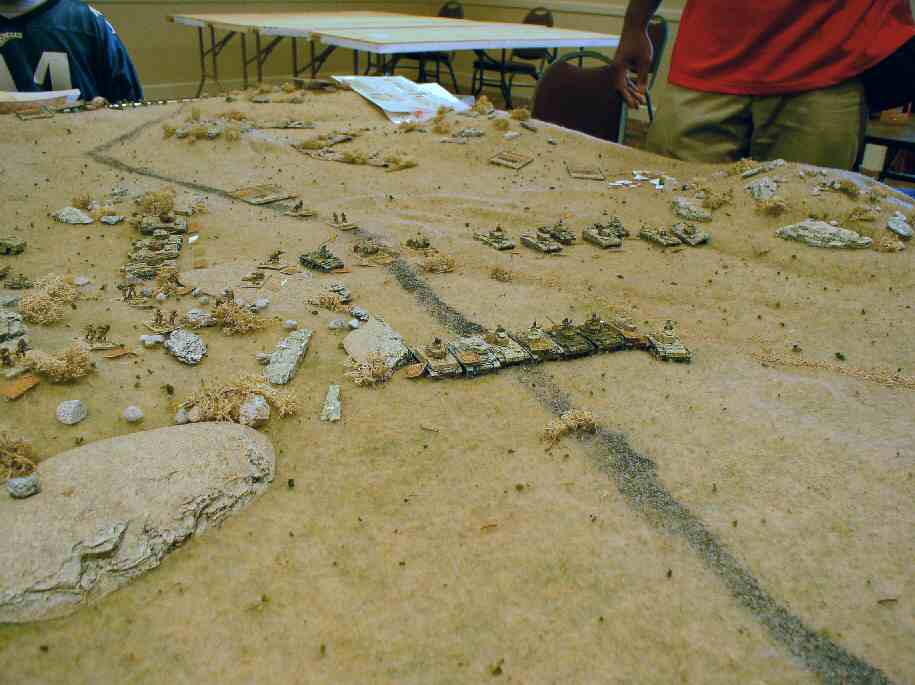
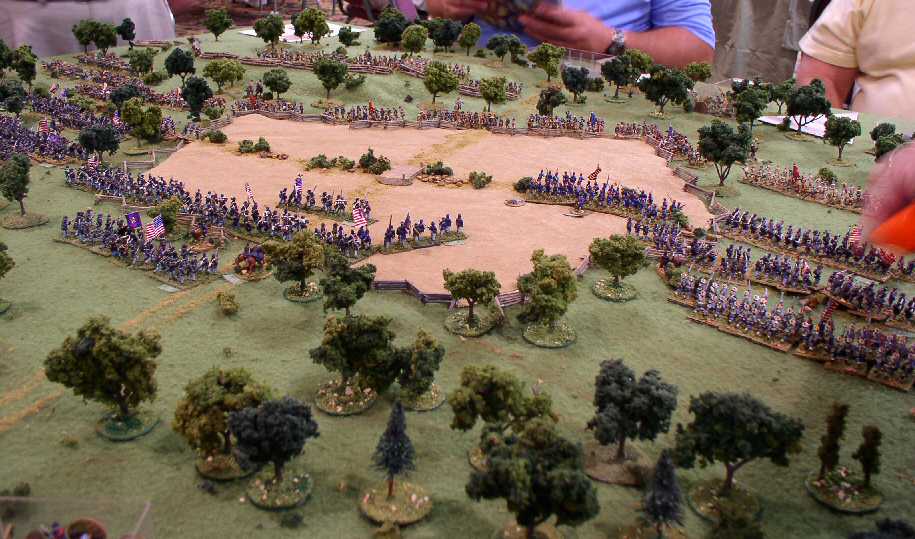
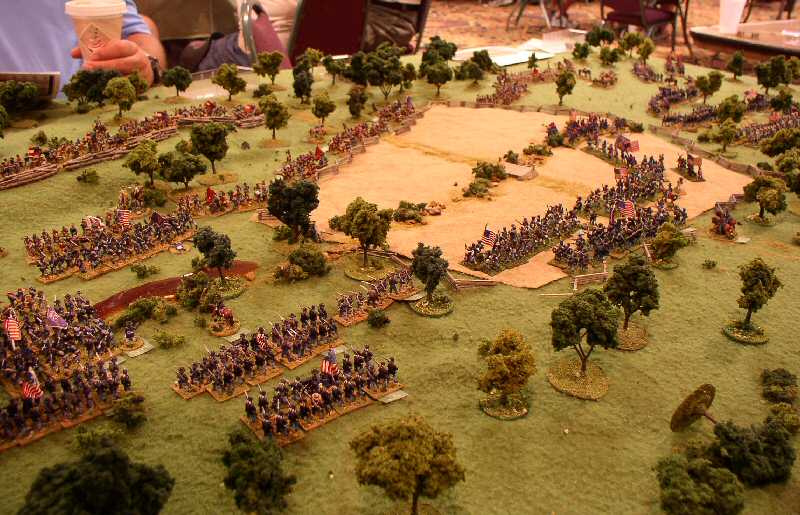
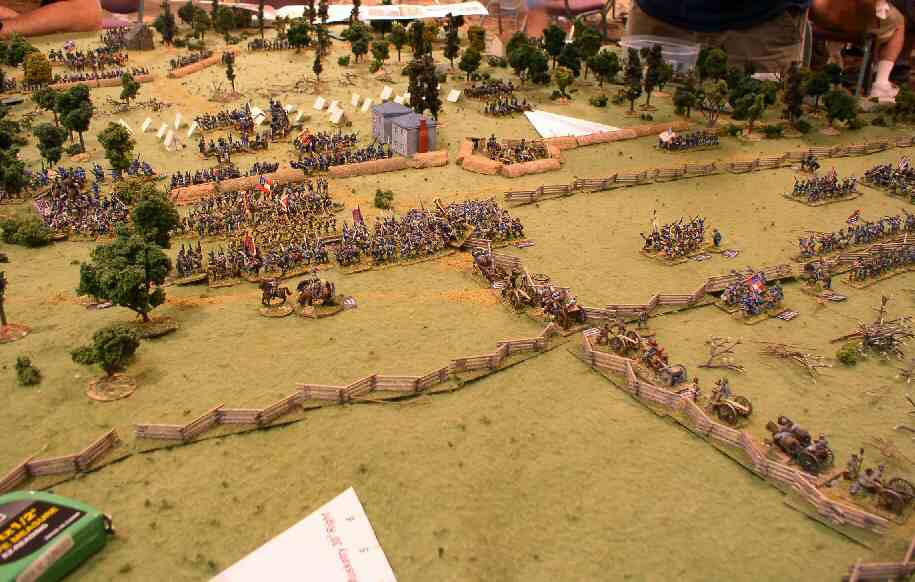
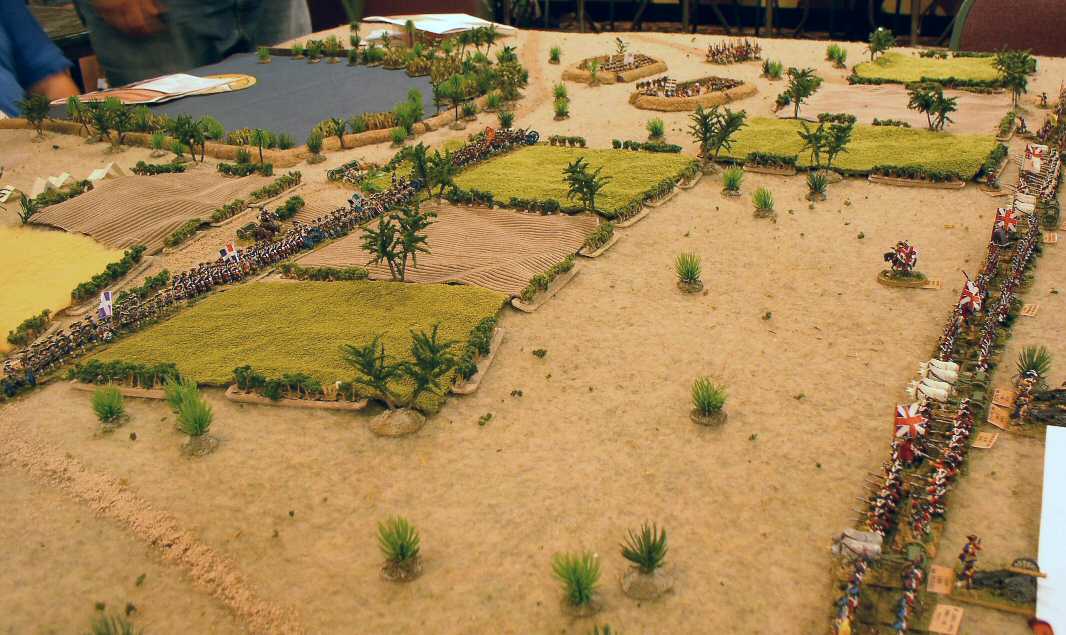
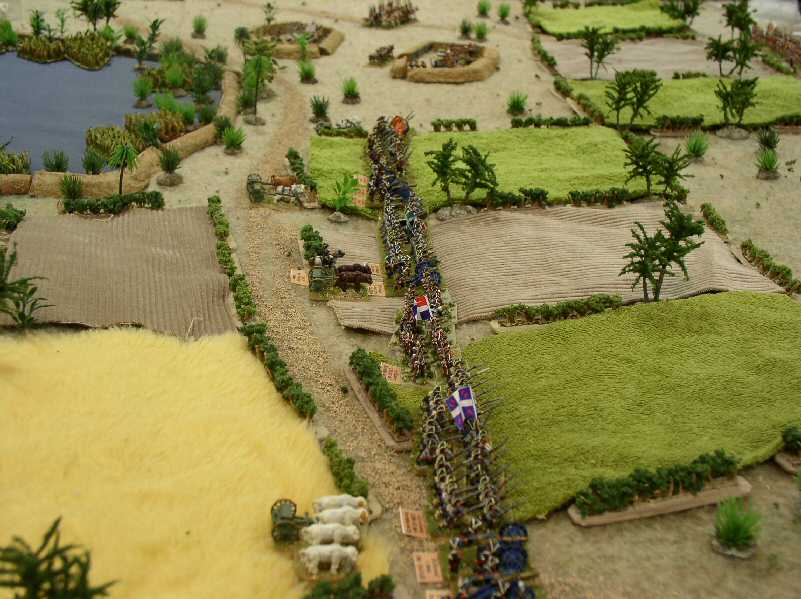
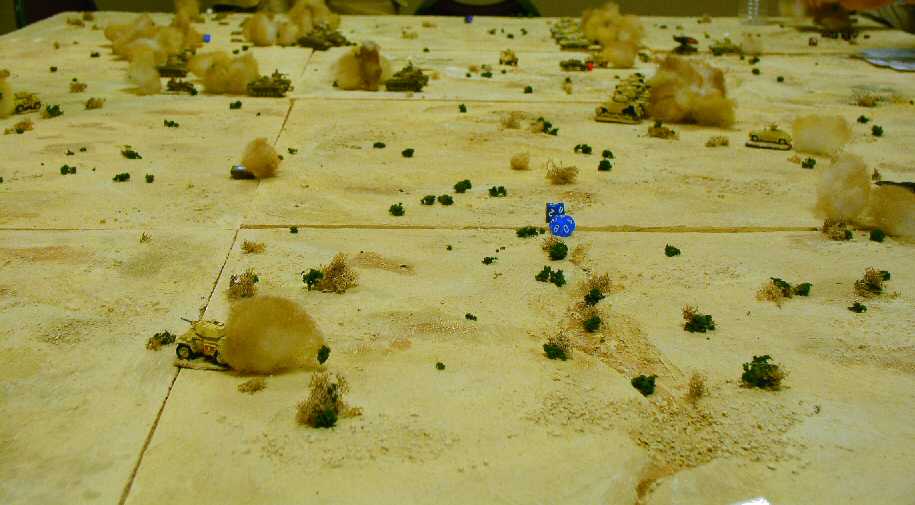
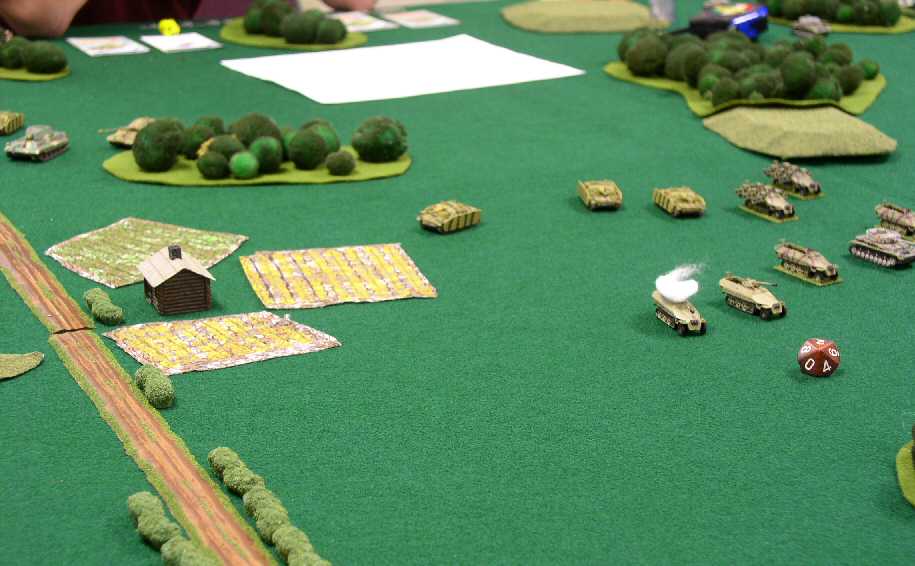
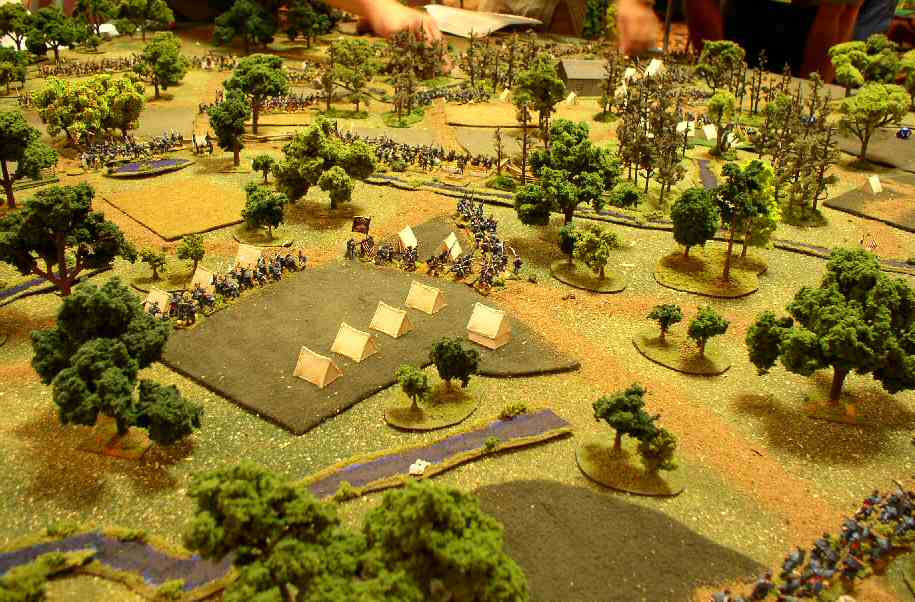
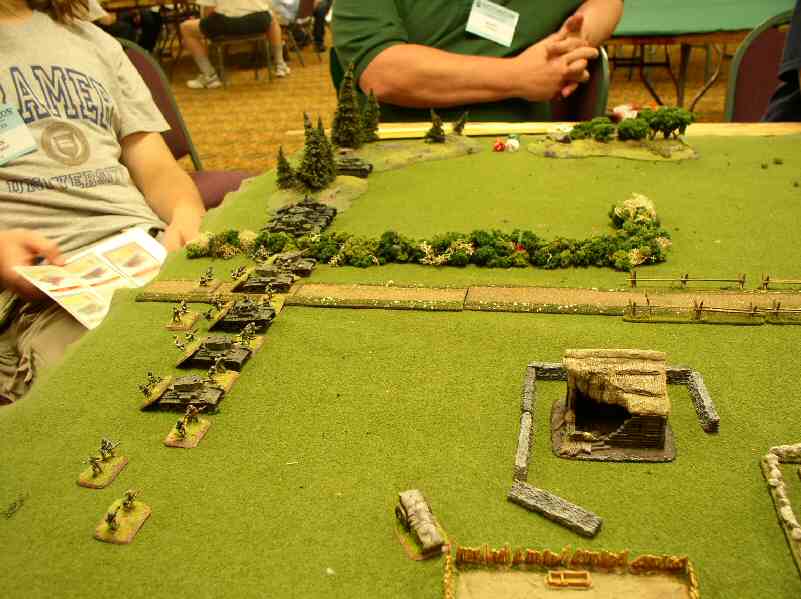
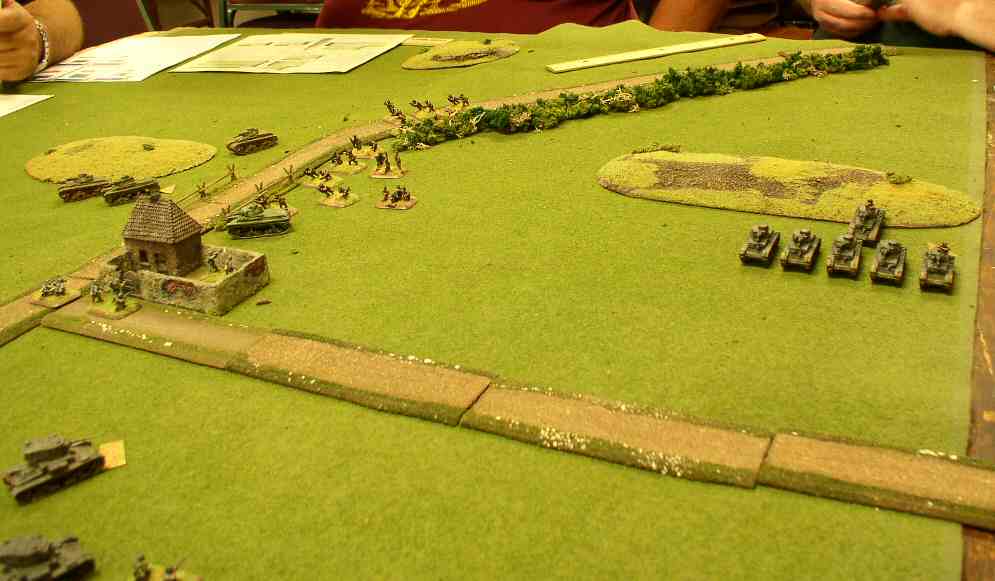
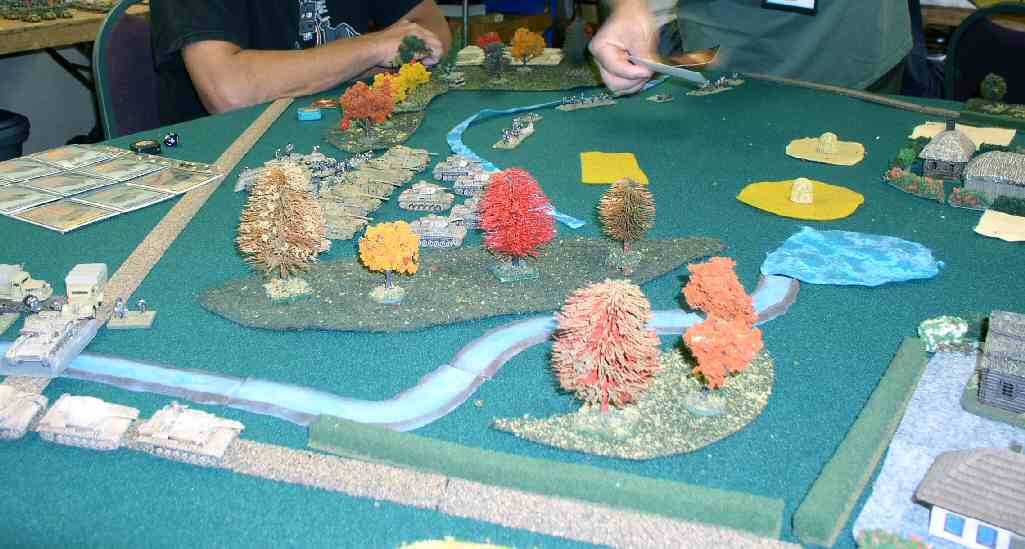
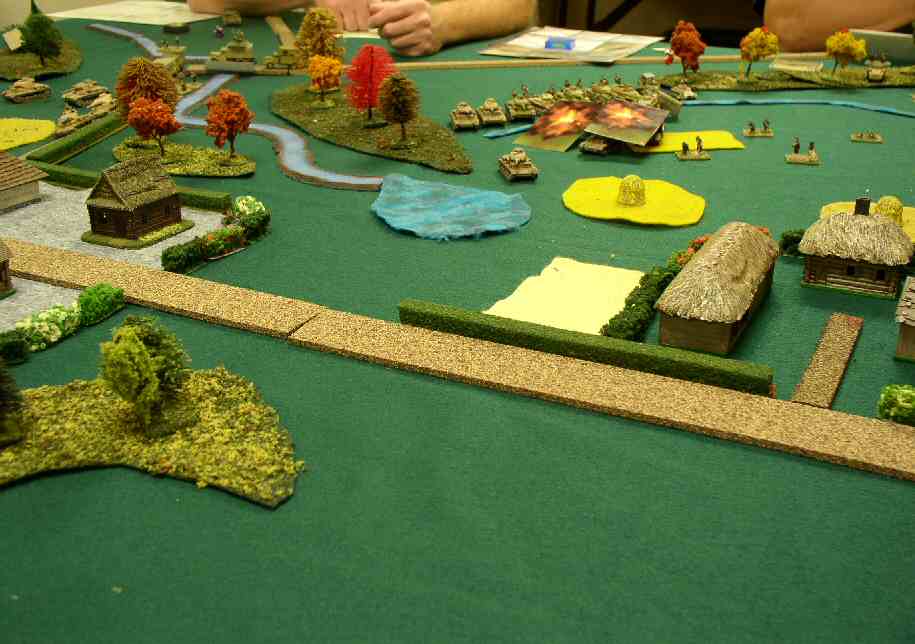
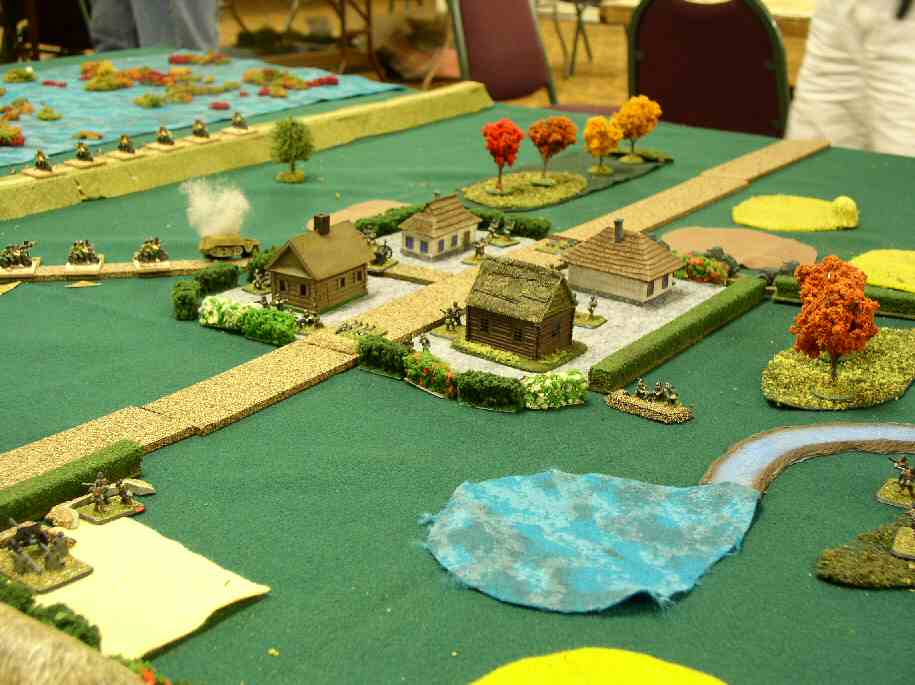
Starting Positions
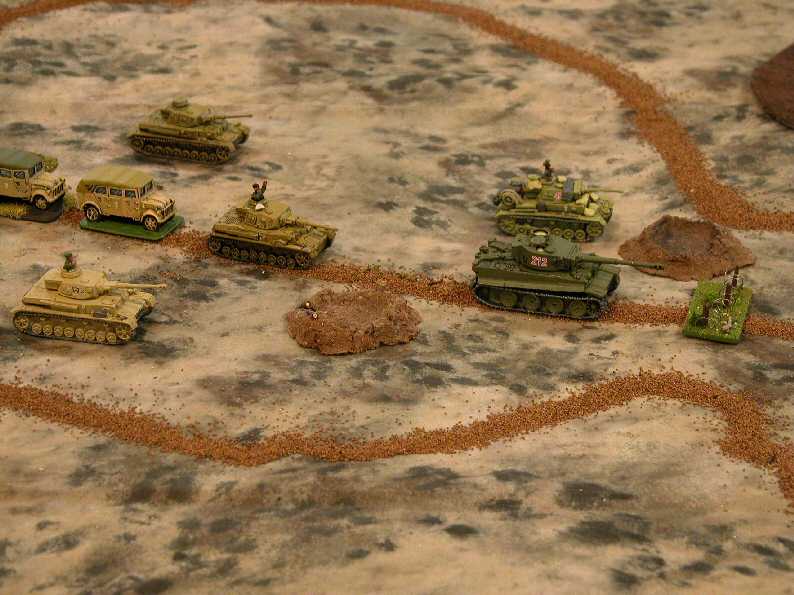
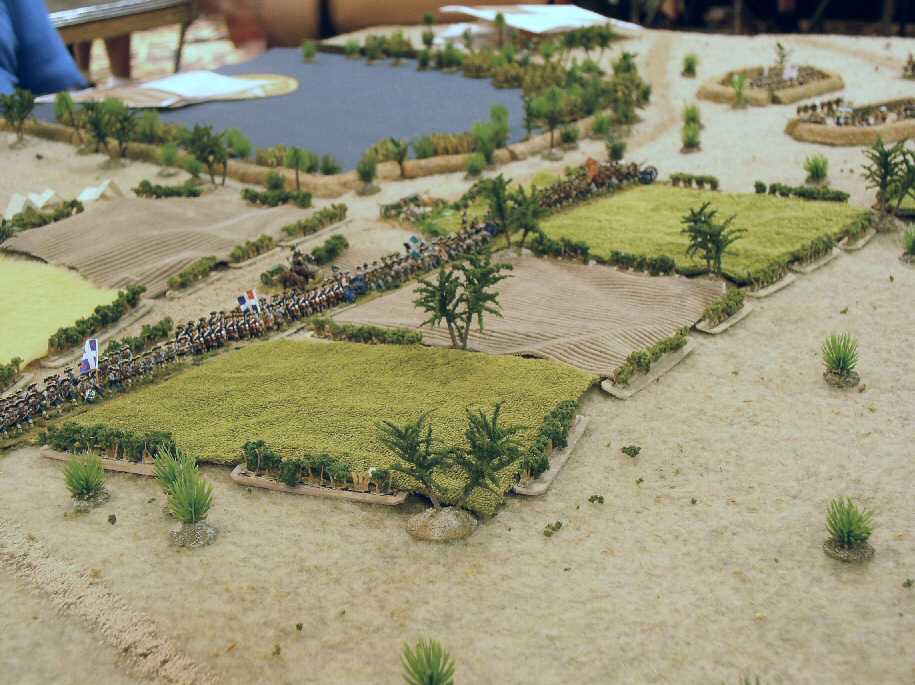
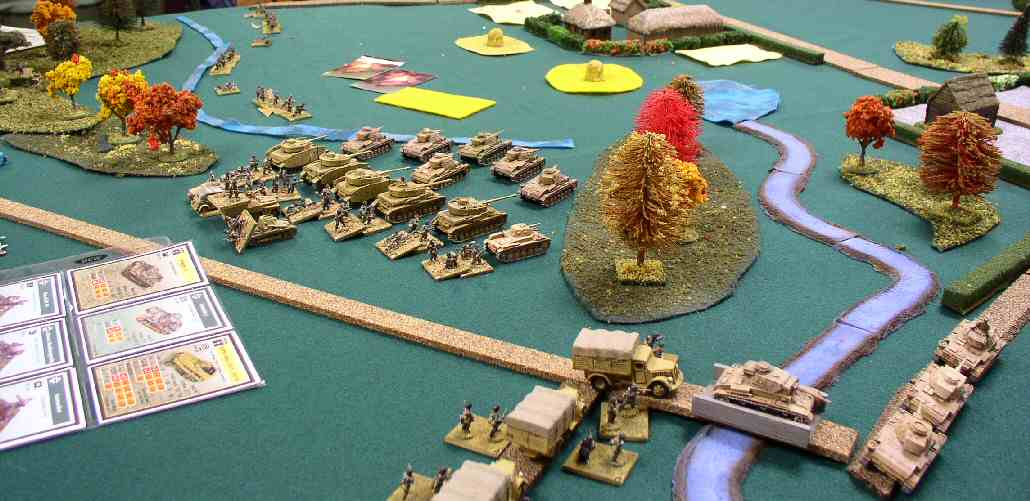
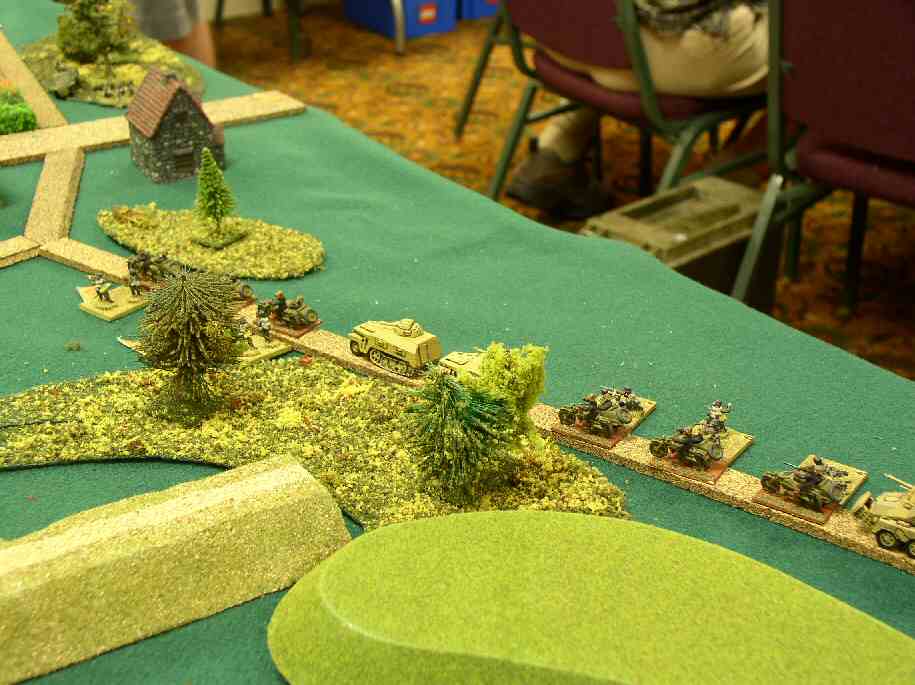
German Column
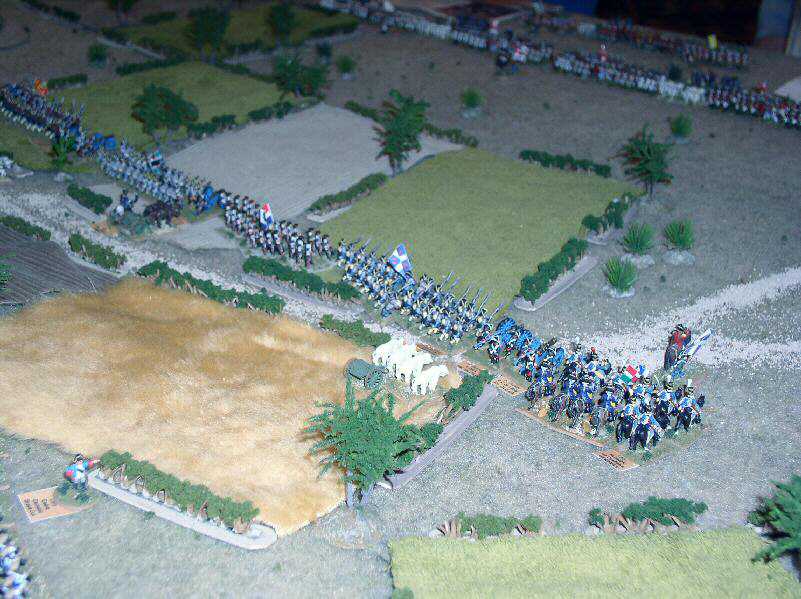
Retreat Begins
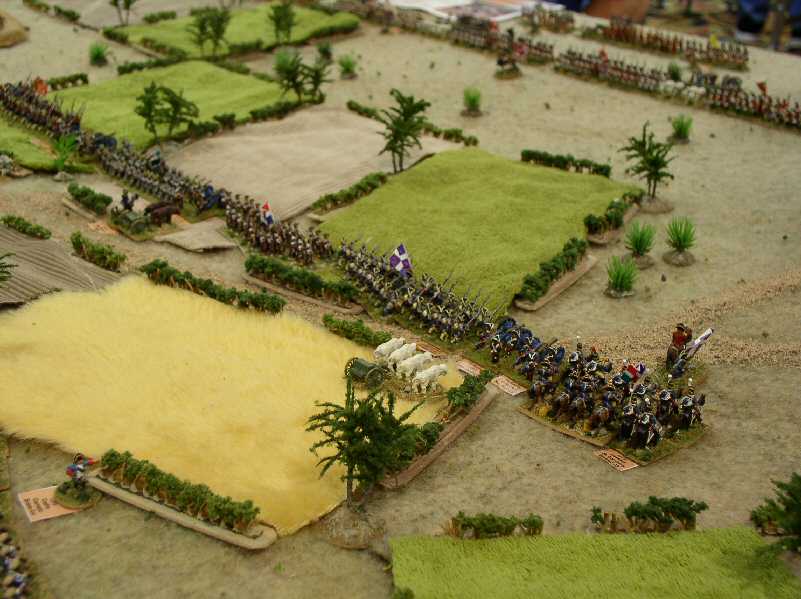
Charge of the Light Brigade 1
American Reinforcements
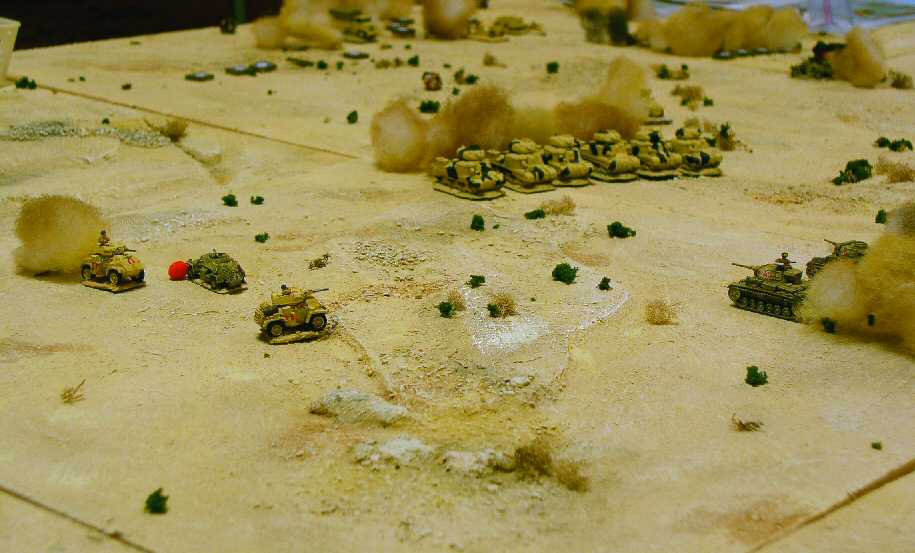
Casualties
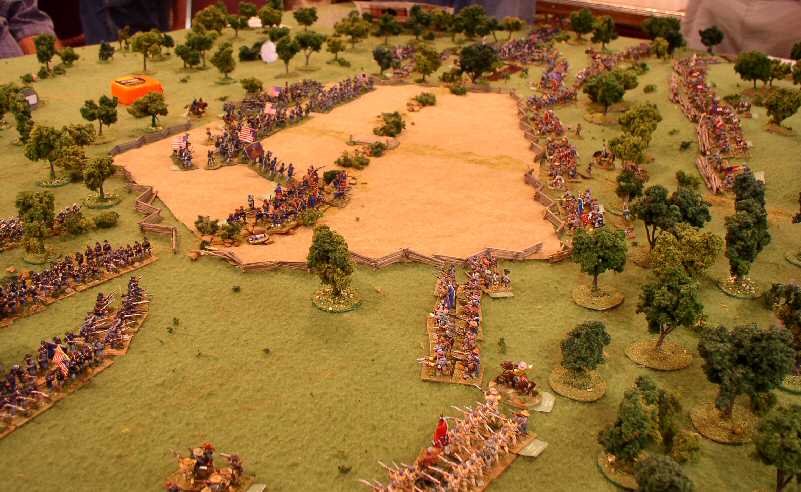
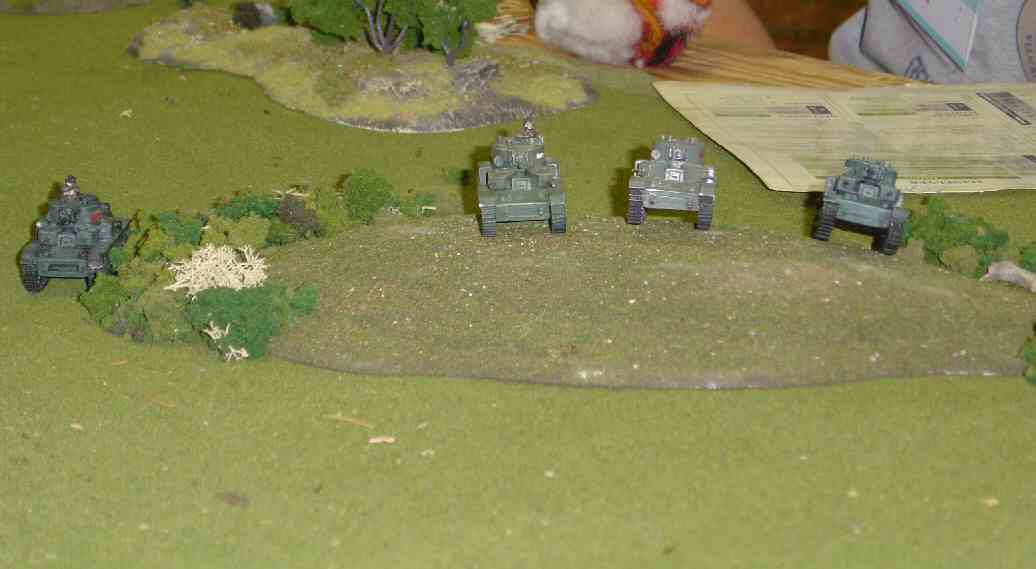
Stuarts hold off the Juggernaut
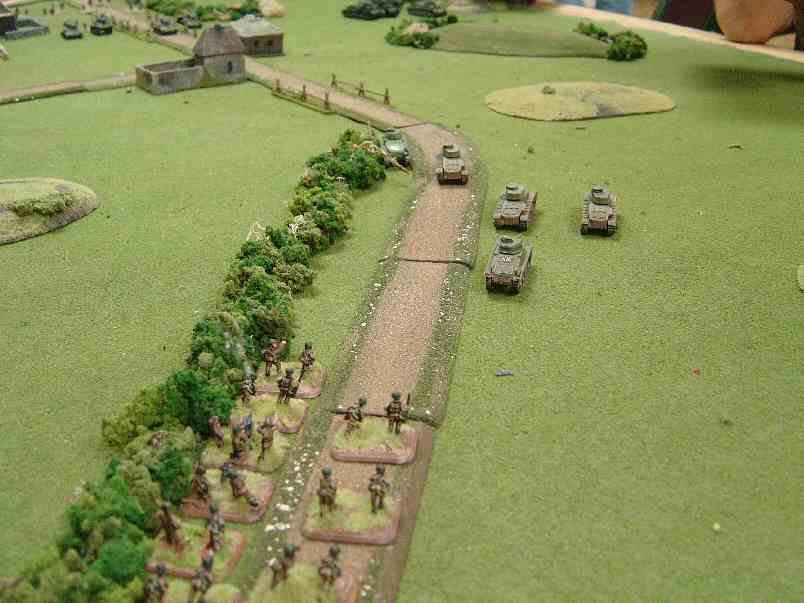
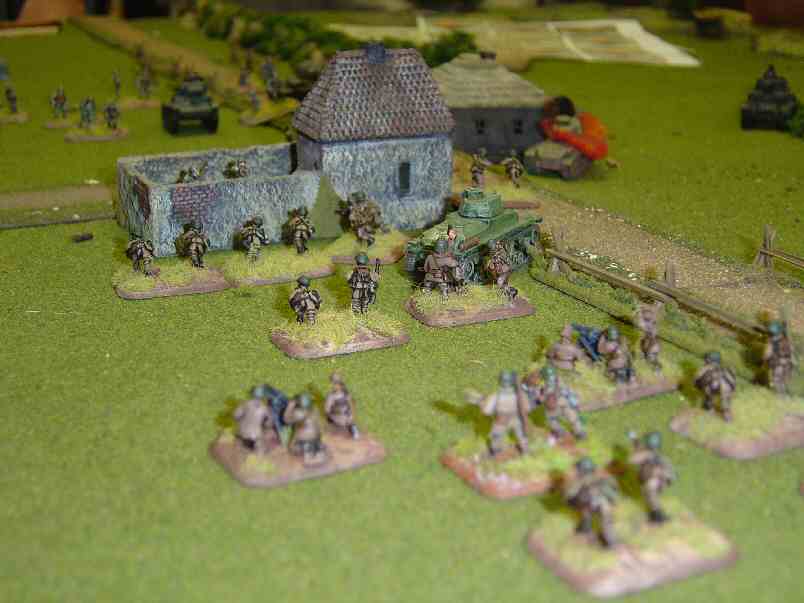
U.S. Infantry carefully moves out
Stuka attacks
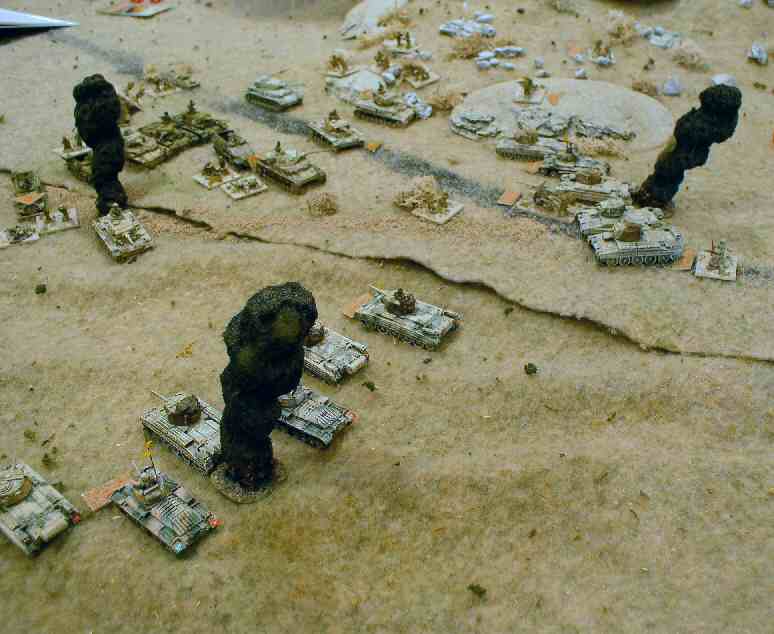
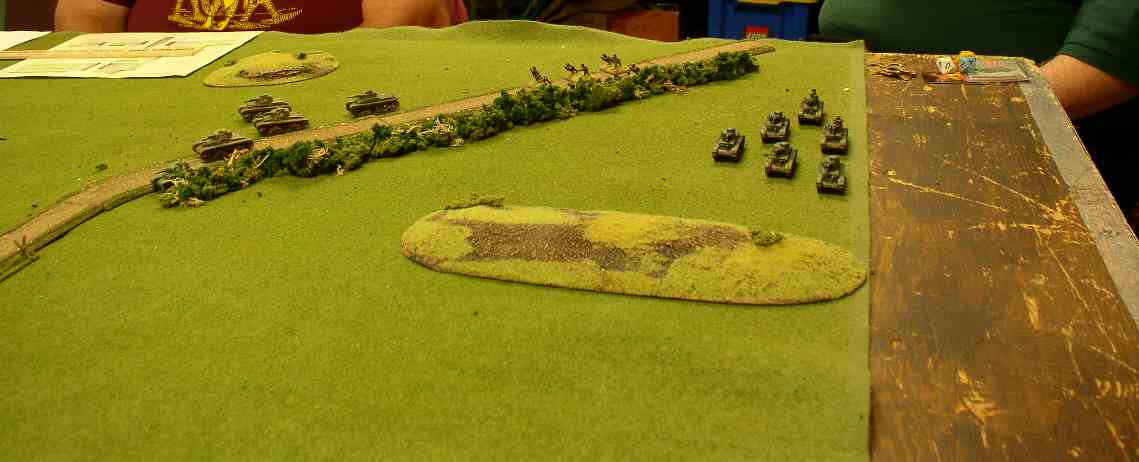
Junkyard
Tiger Backs up
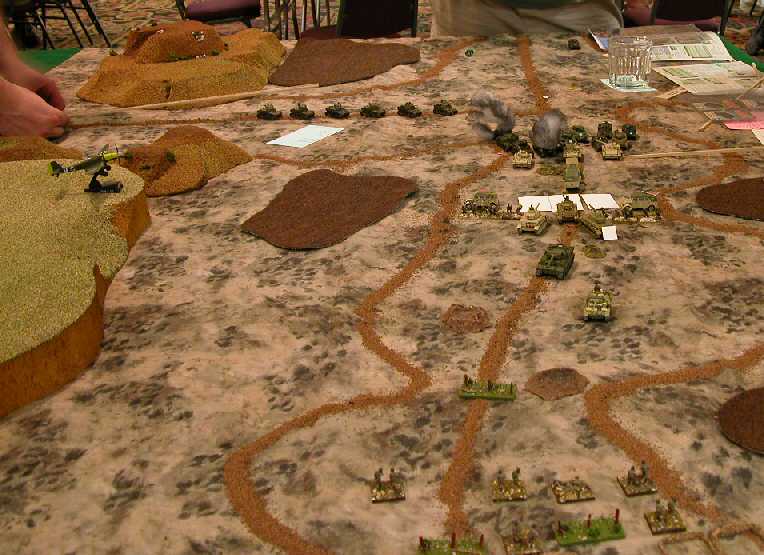
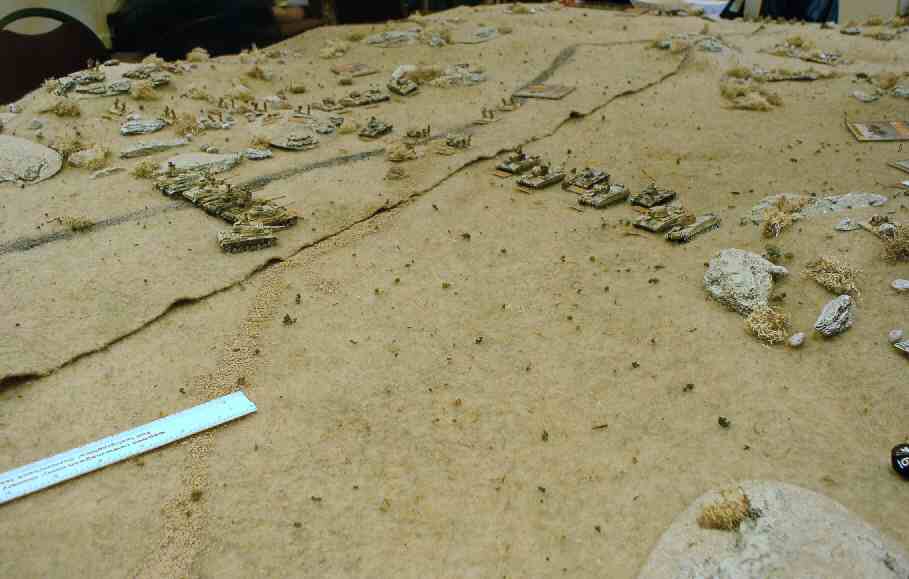
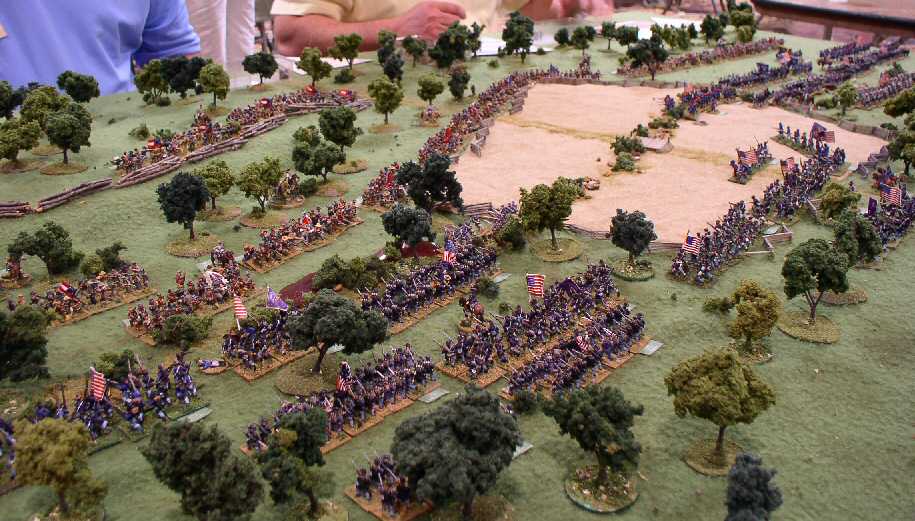
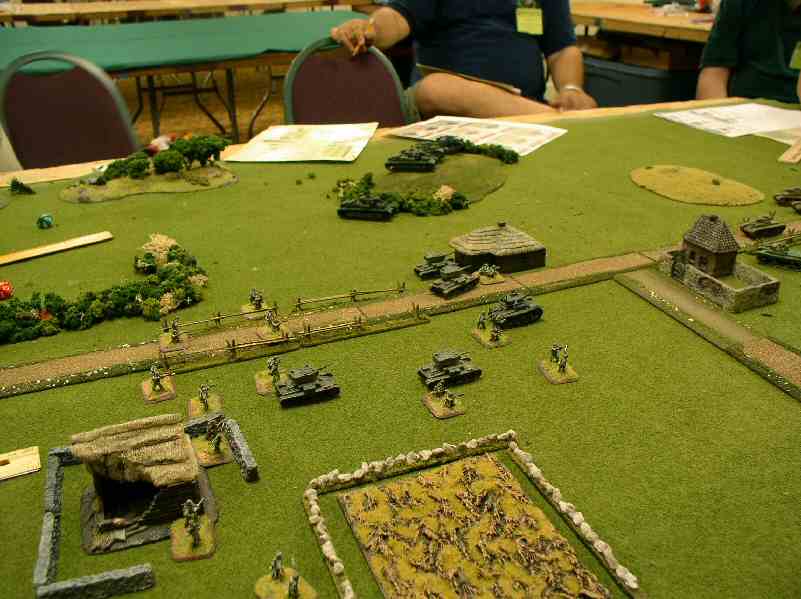
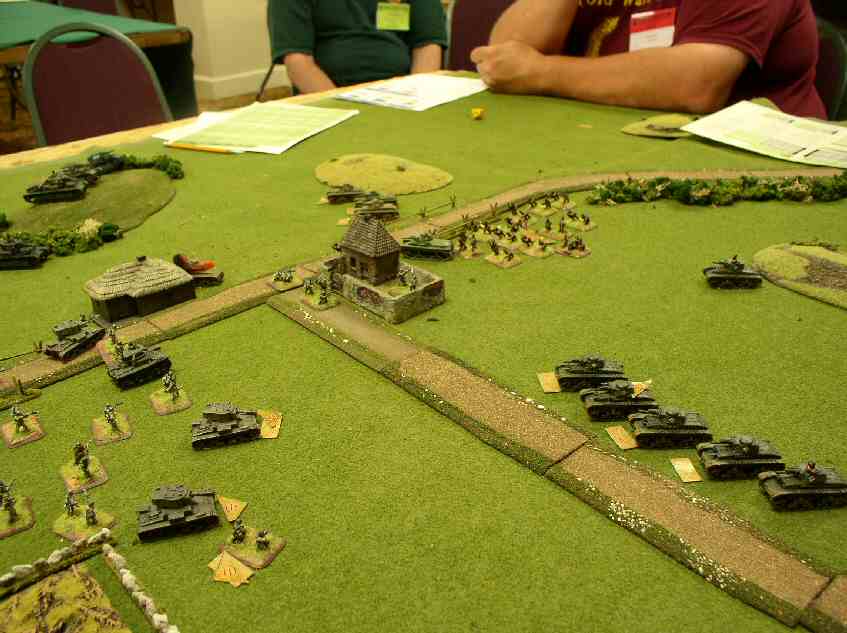
US forms 2nd defensive line
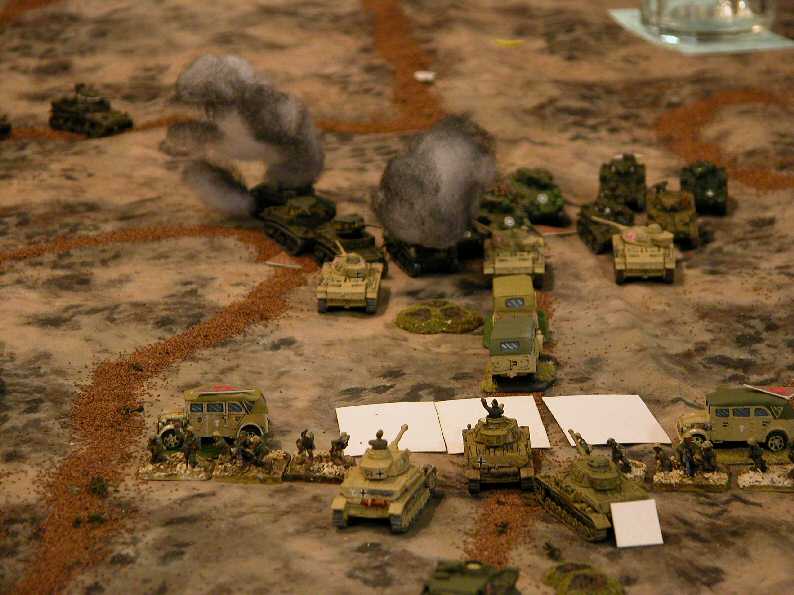
Oops
| Click on the Thumbnail for a full-size photo | Description |
|---|---|
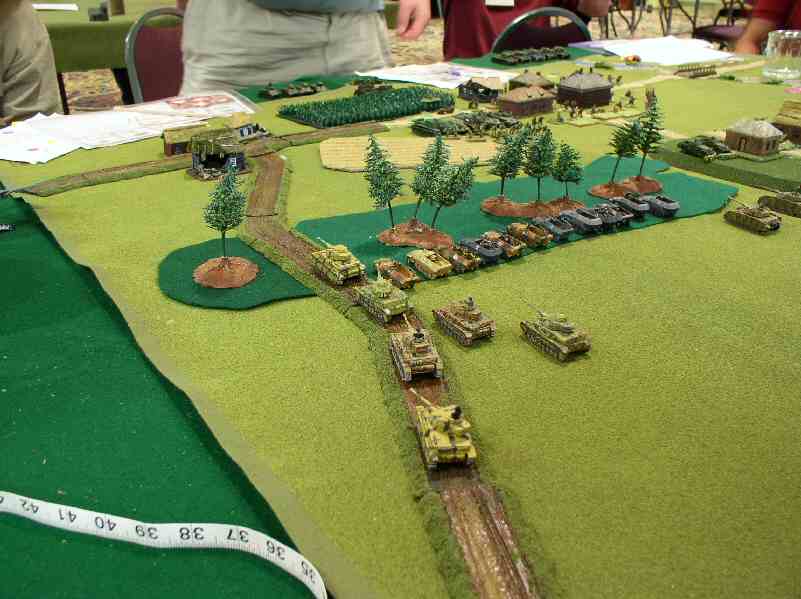
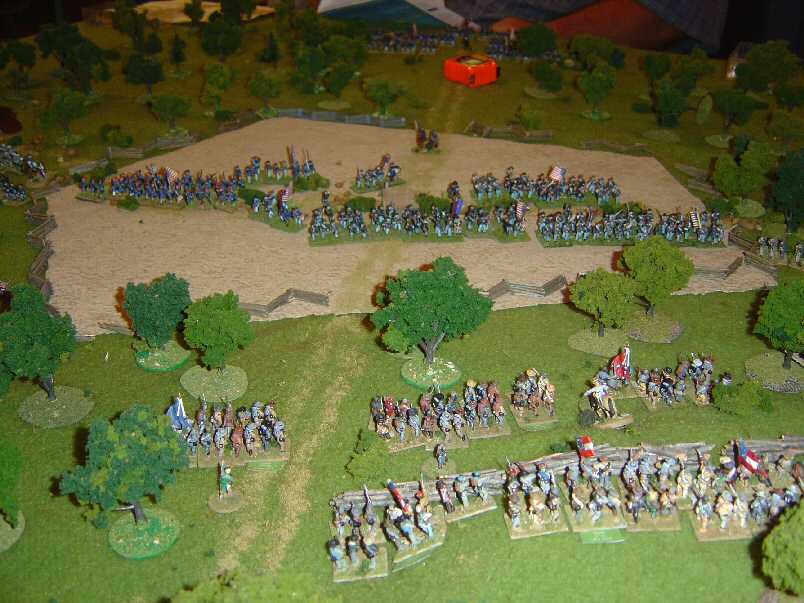
Starting Positions |
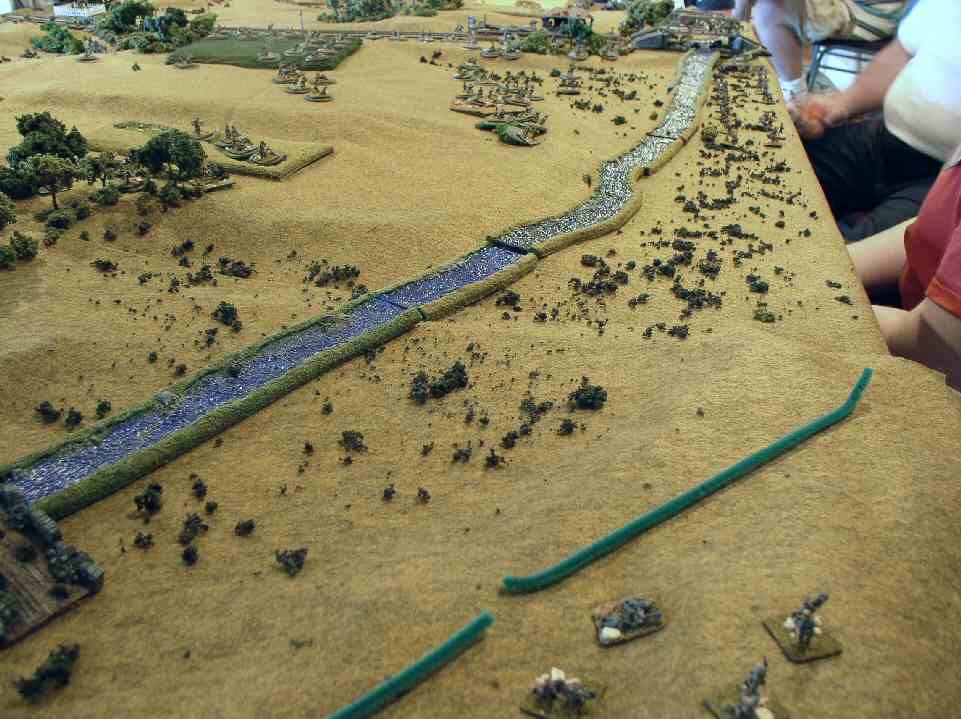
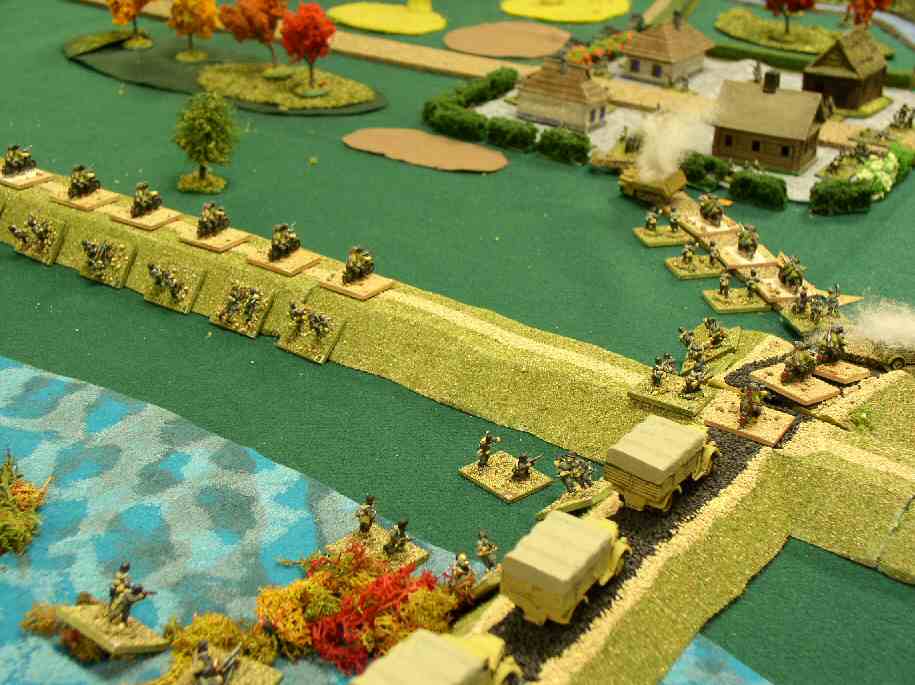
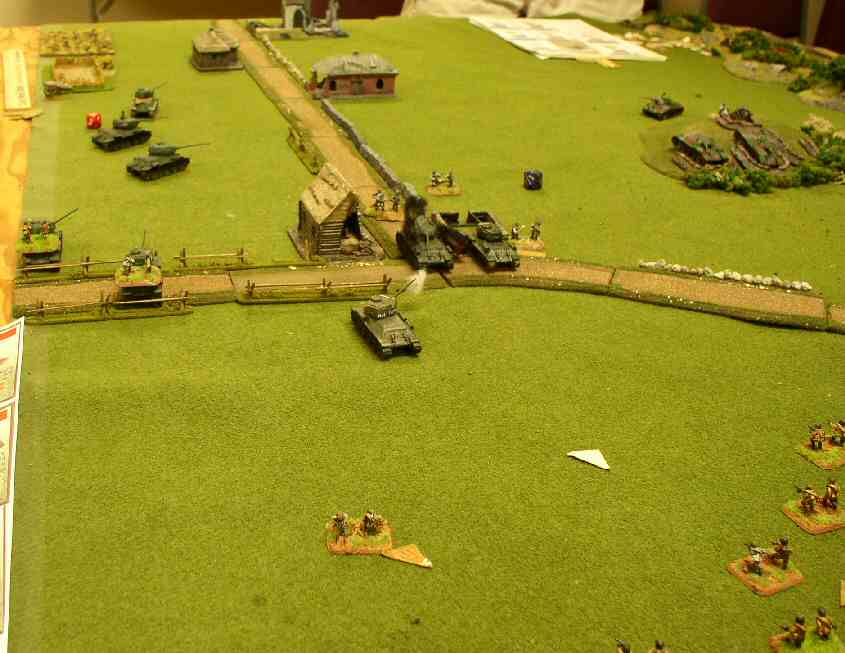
The US has cut off the Germans from their base. Note that if vehicles leave the road, all but the Stuarts need to check for bog-down, and the Tiger needs to check for bog-down every 4 inches it moves off road. Also, anything outside the curving brown outline is completely impassable. |
German Column |
Leading the German column, Tiger 212. |
Retreat Begins |
The Tiger starts to fall back. |
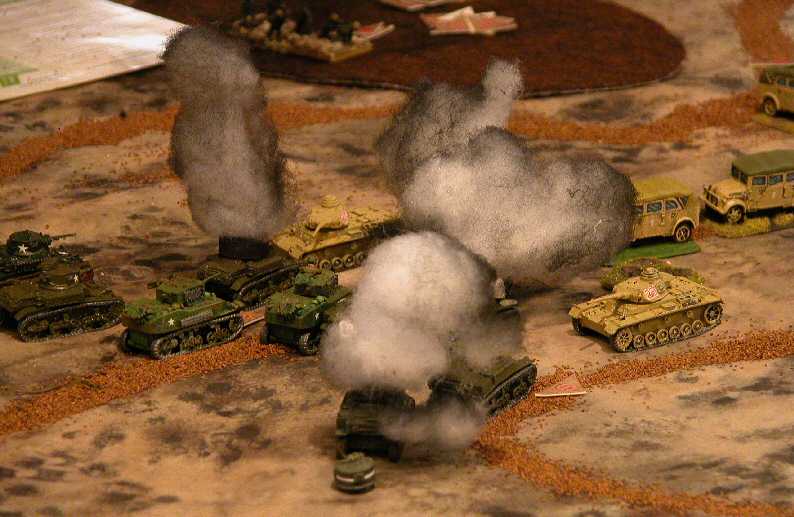
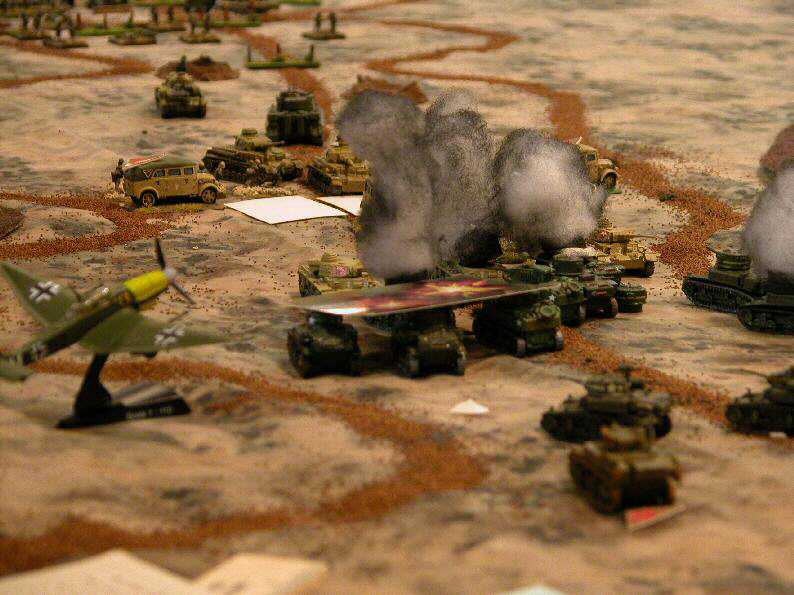
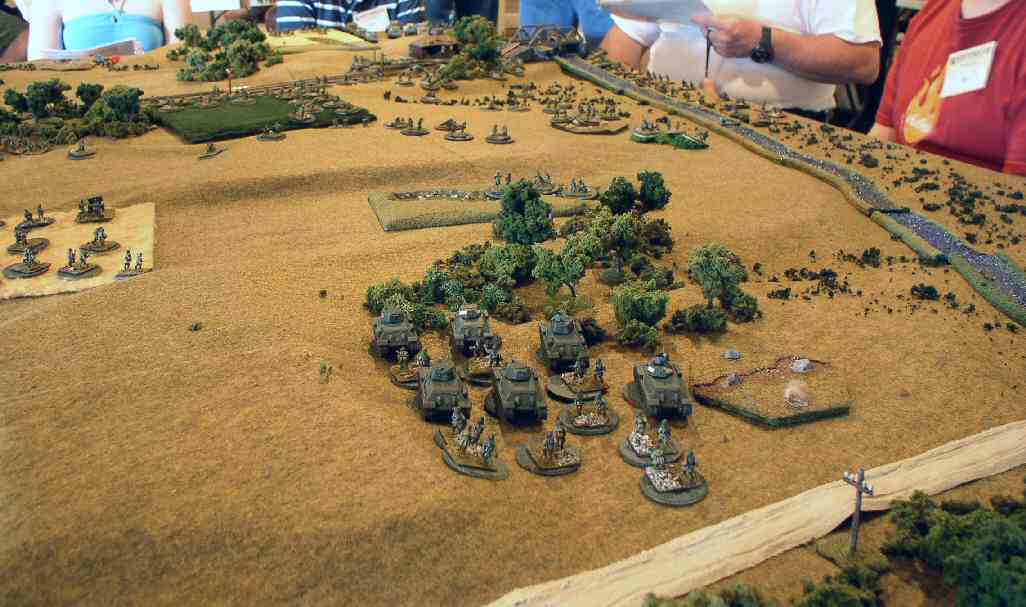
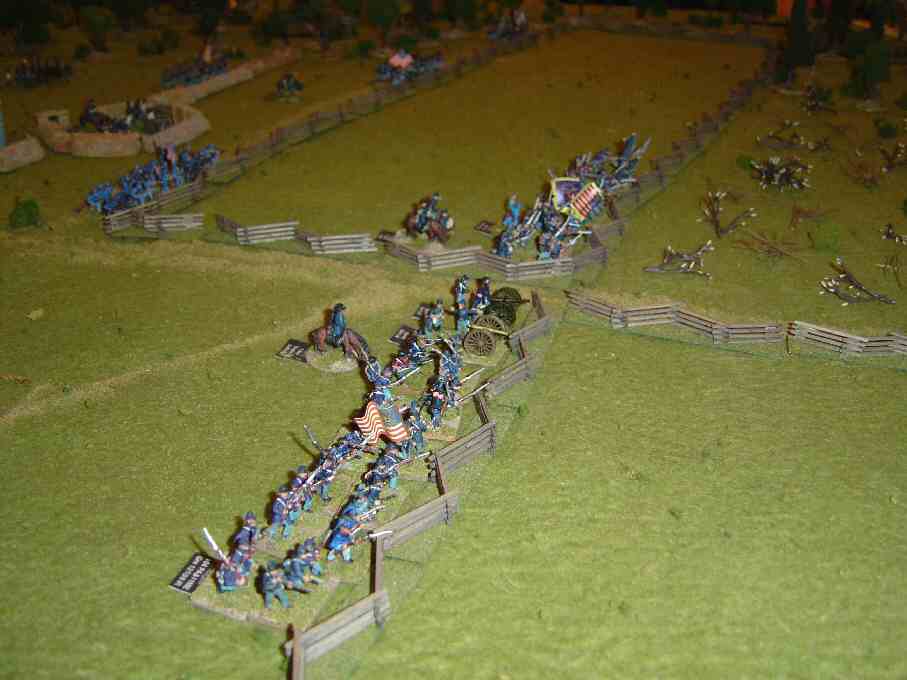
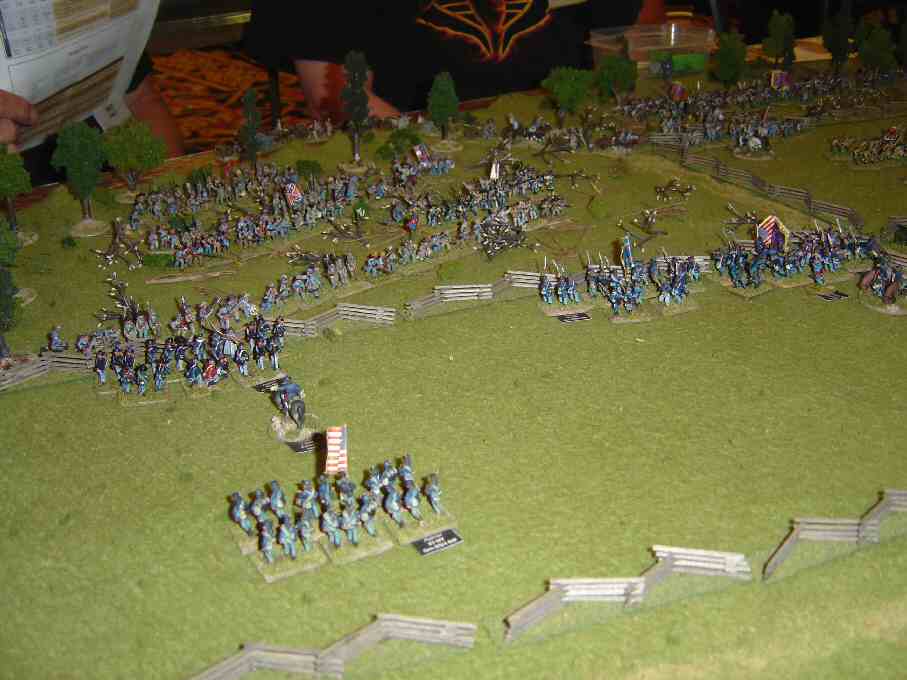
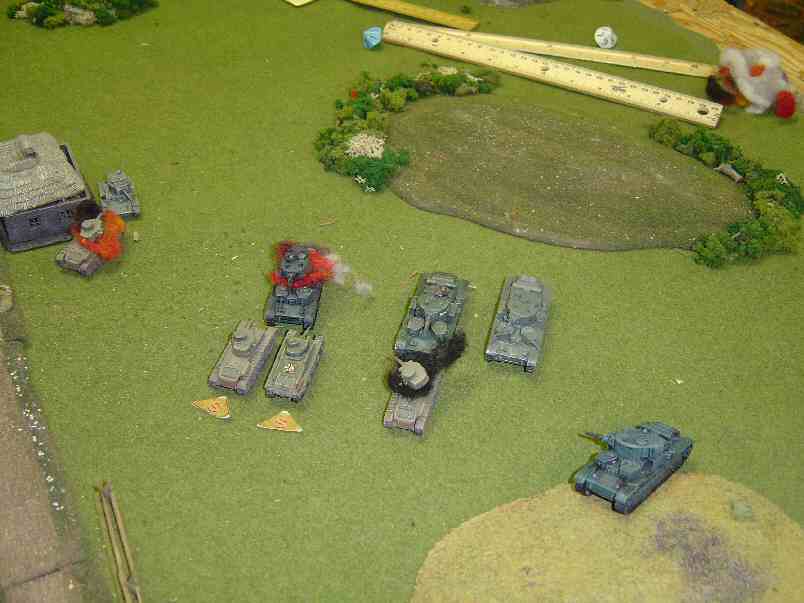
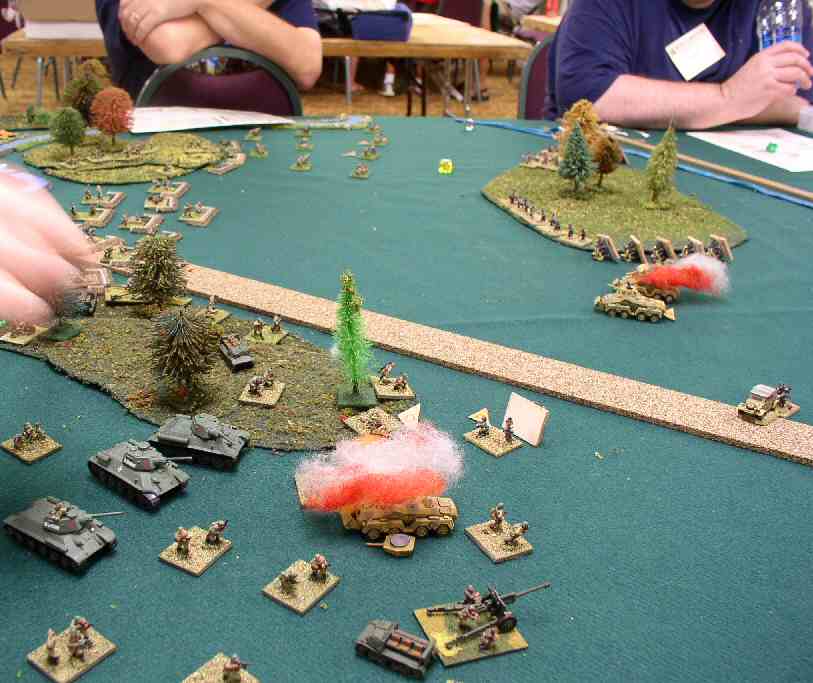
Charge of the Light Brigade 1 |
The lead companies of the Stuarts charge the lead German tanks. In an attempt to cut off the trailing German tanks, A French battery supports the US with a smoke mission (white Cards). This temporary smoke screen is rapidly replaced by a more permanent screen from burning Stuarts. |
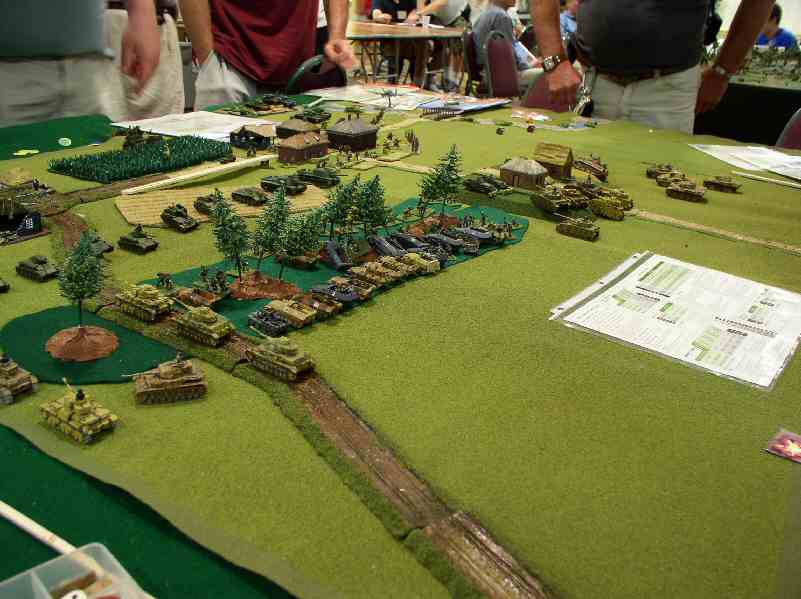
American Reinforcements |
A 3rd company of Stuarts and a company of Lees carefully approach the battle. |
Casualties |
4 Stuarts and a Mk III are quickly turned into wrecks. The U.S. outnumbers the Germans by about this ratio, but this is still not a good exchange rate. |
Stuarts hold off the Juggernaut |
The Stuarts are taking one for the team until help arrives. |
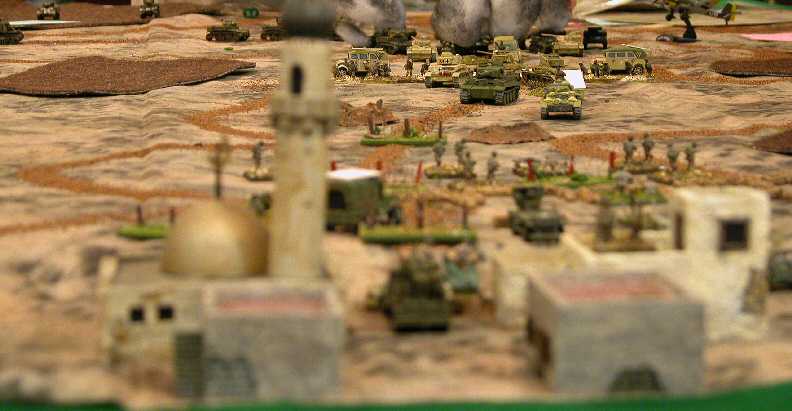
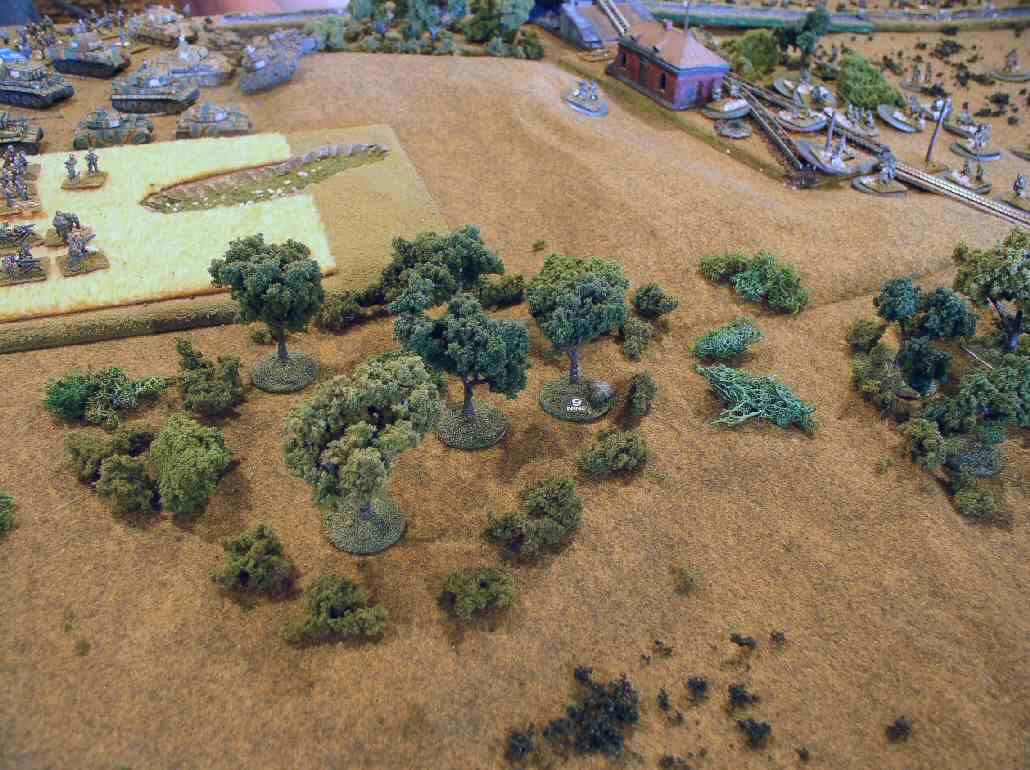
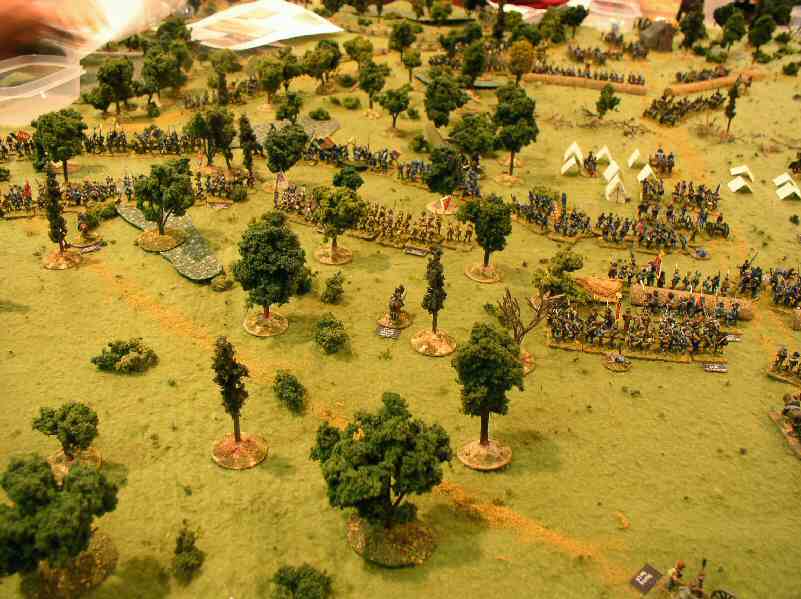
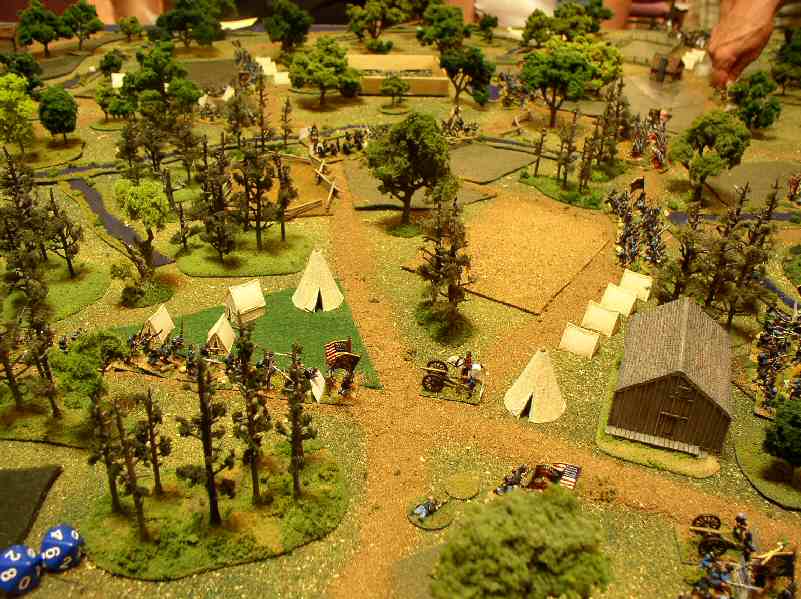
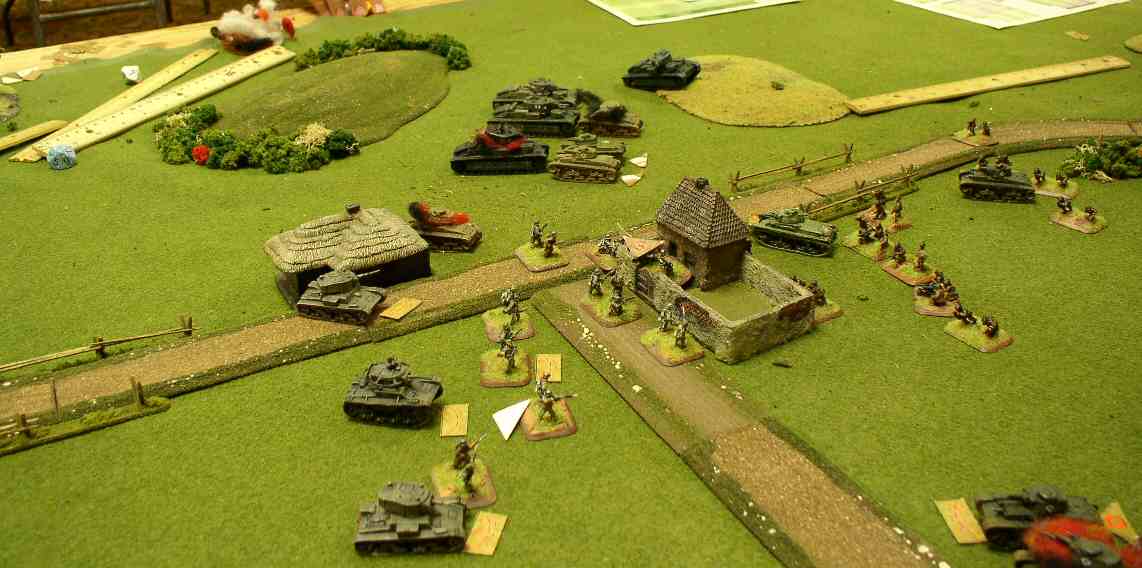
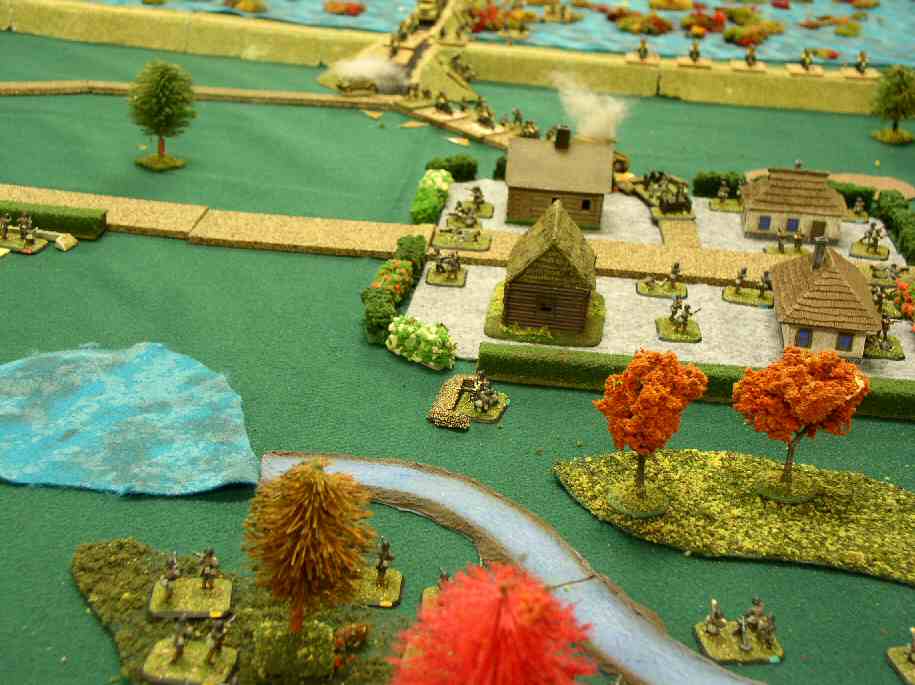
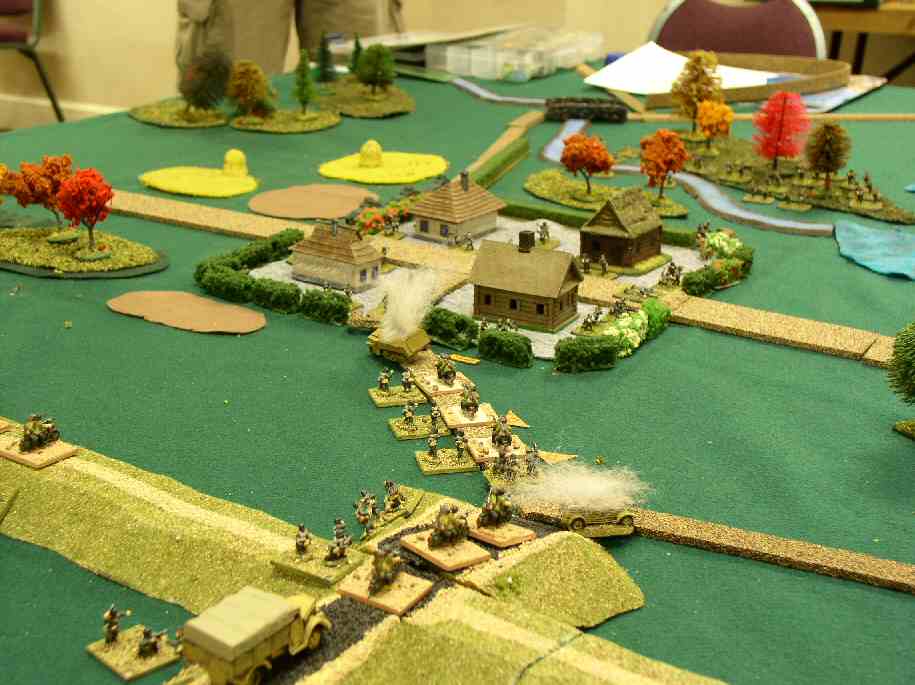
U.S. Infantry carefully moves out |
The battle rages to the east while the U.S. infantry and AT units carefully prepare to leave the town. |
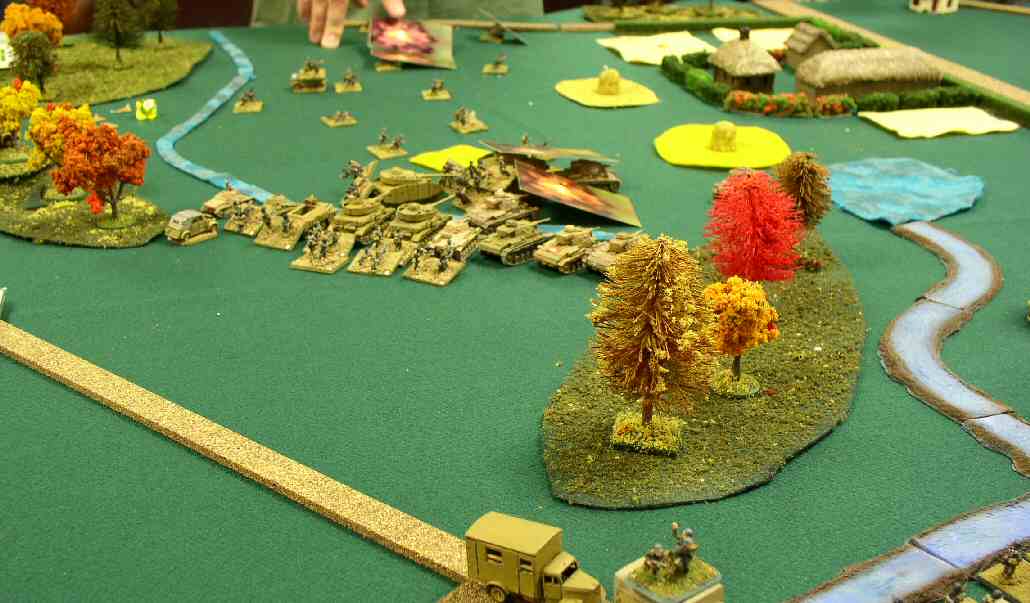
Stuka attacks |
A Stuka dives on the Stuarts, but AA fire shoots it down. |
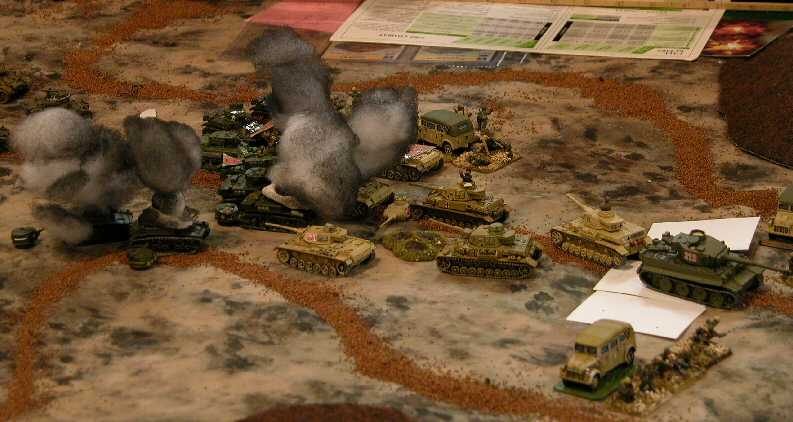
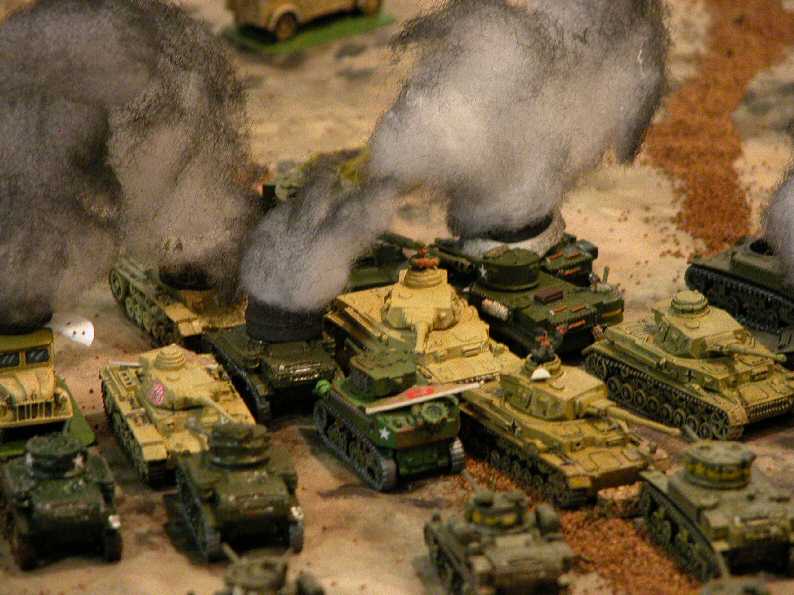
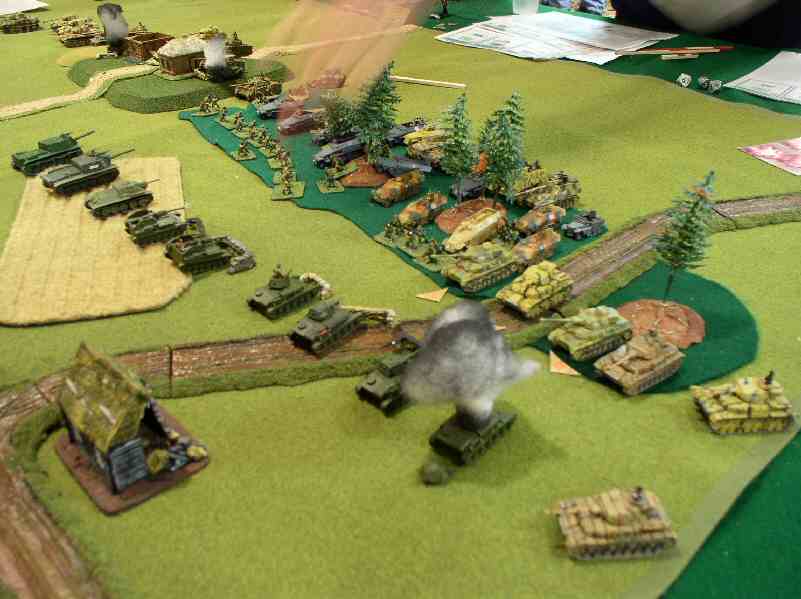
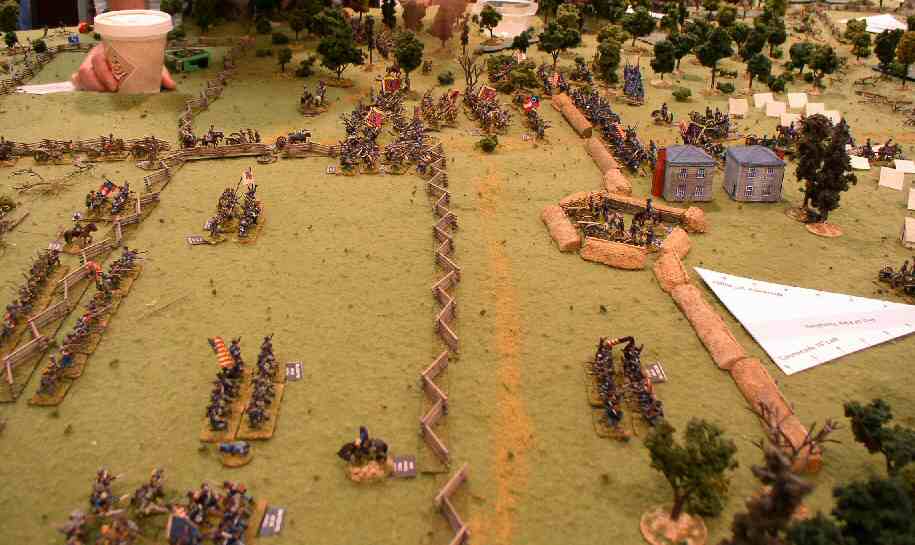
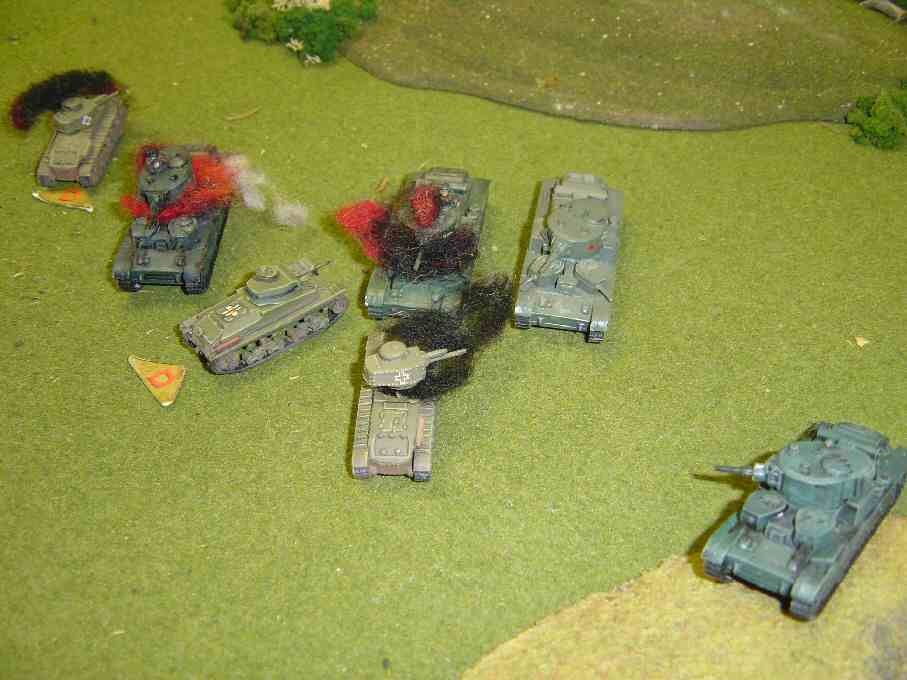
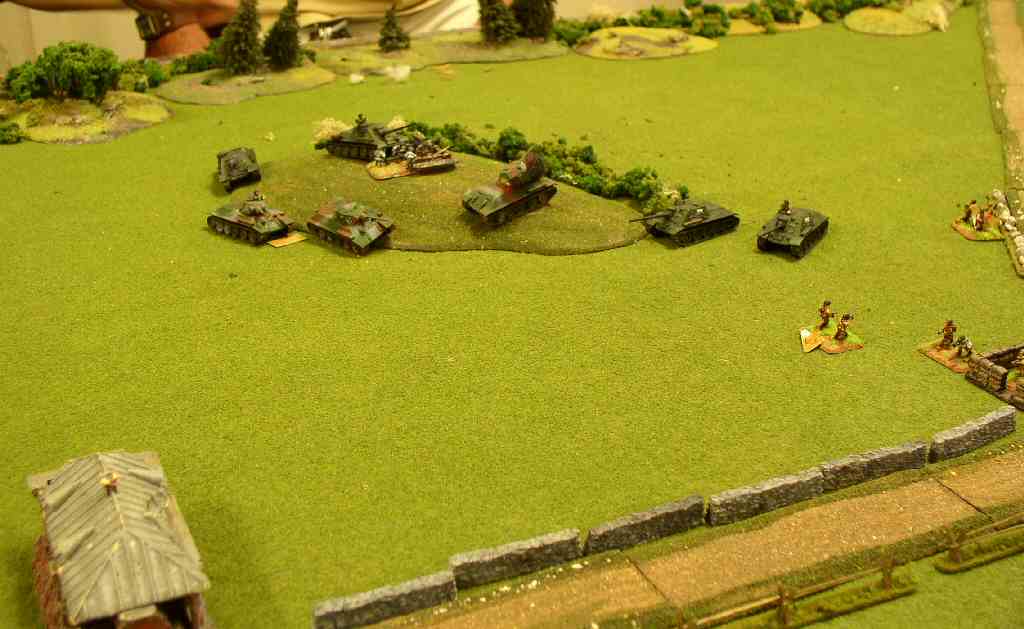
Junkyard |
The scrap pile is growing as both sides feed their tanks into the melee. |
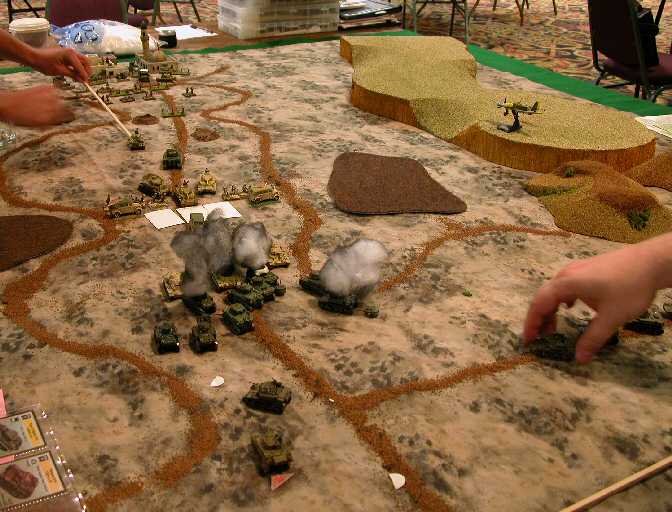
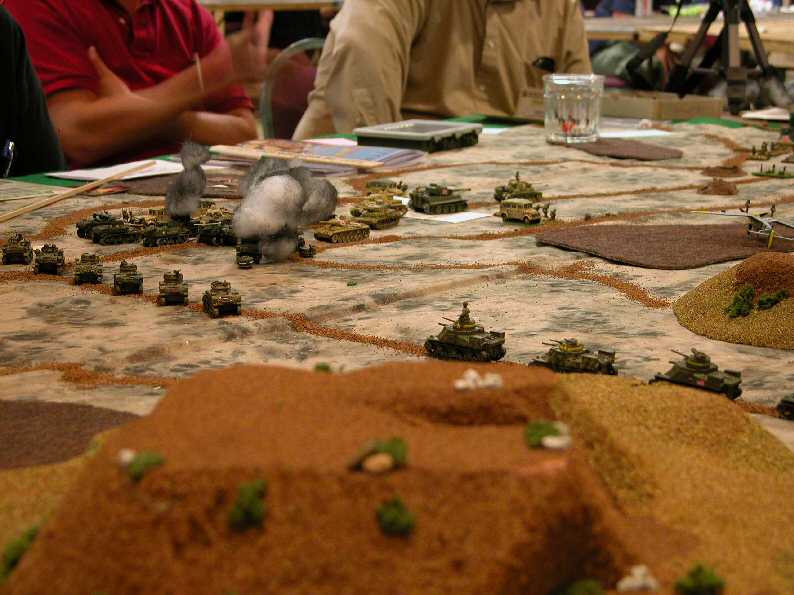
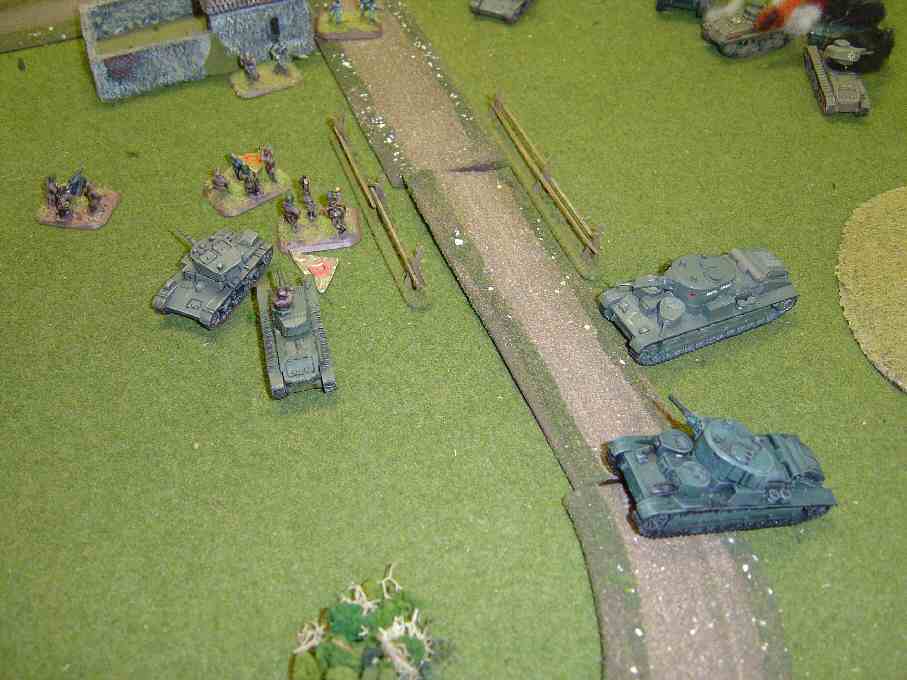
Tiger Backs up |
The Tiger backs up through the smoke while U.S. reinforcements approach the battle. |
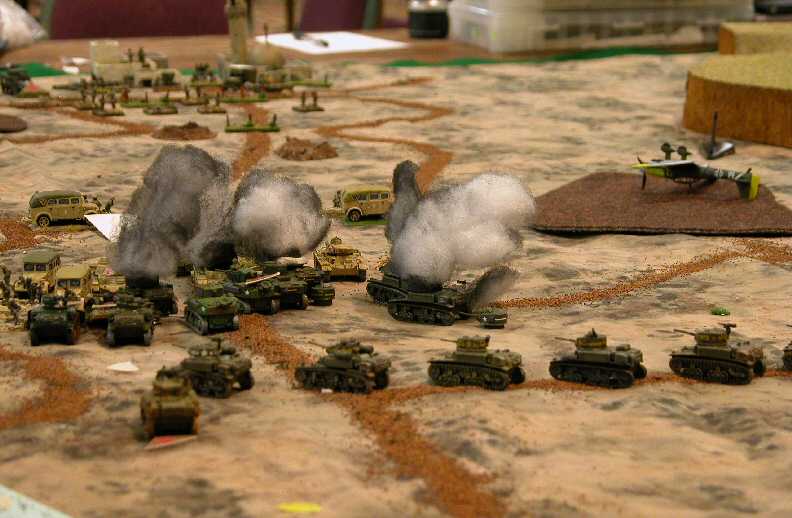
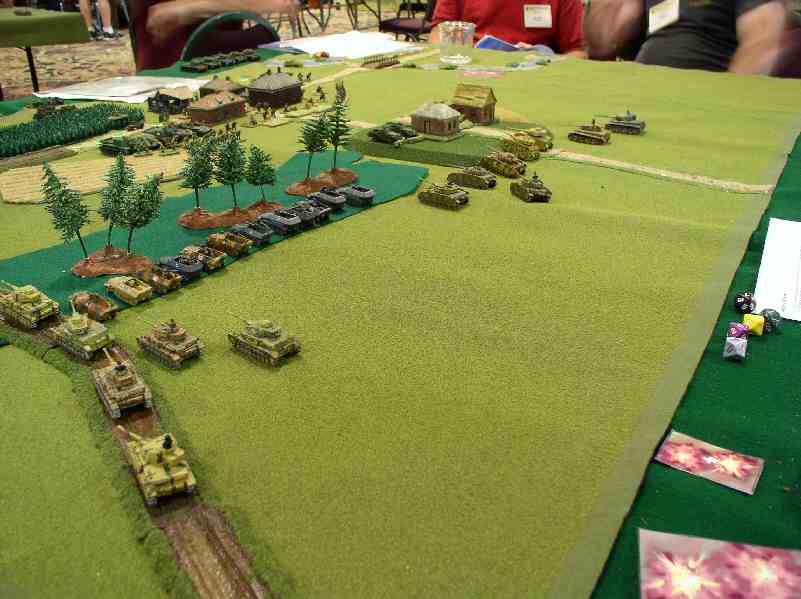
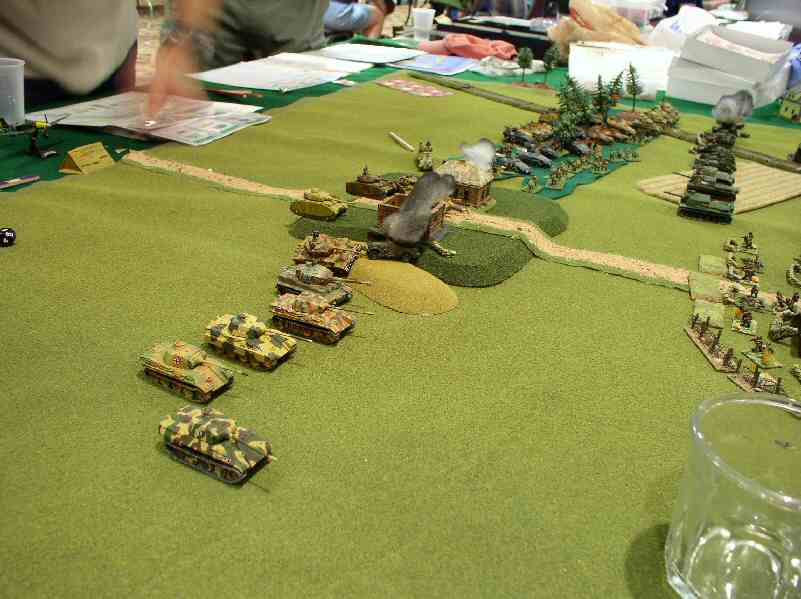
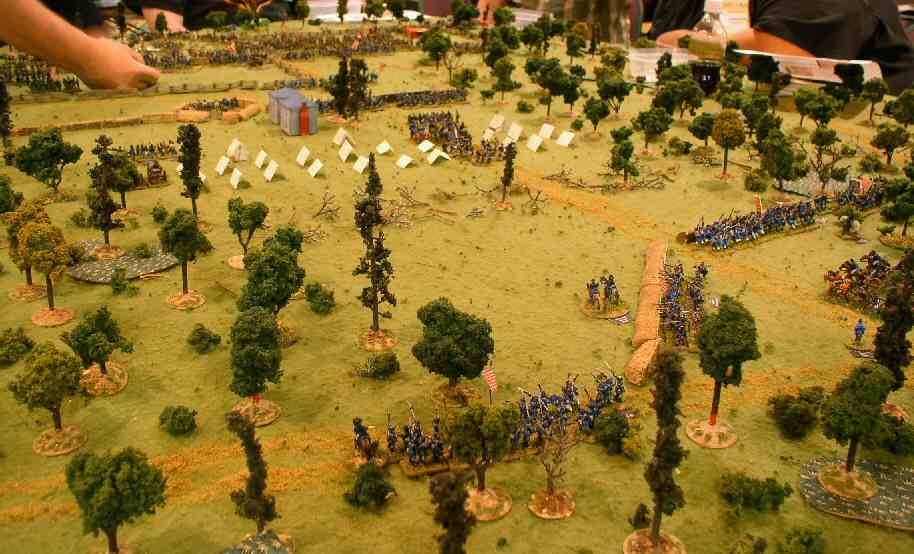
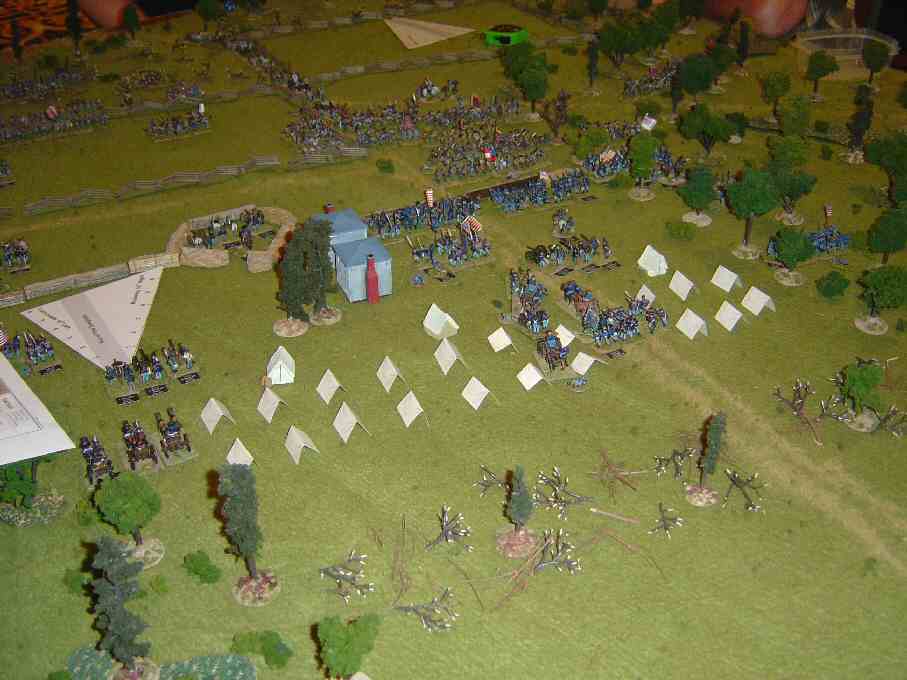
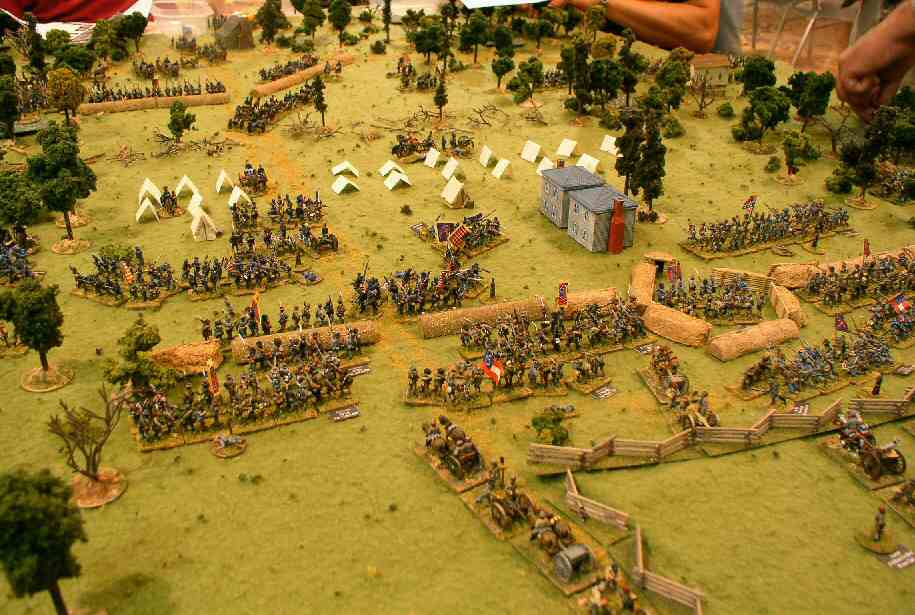
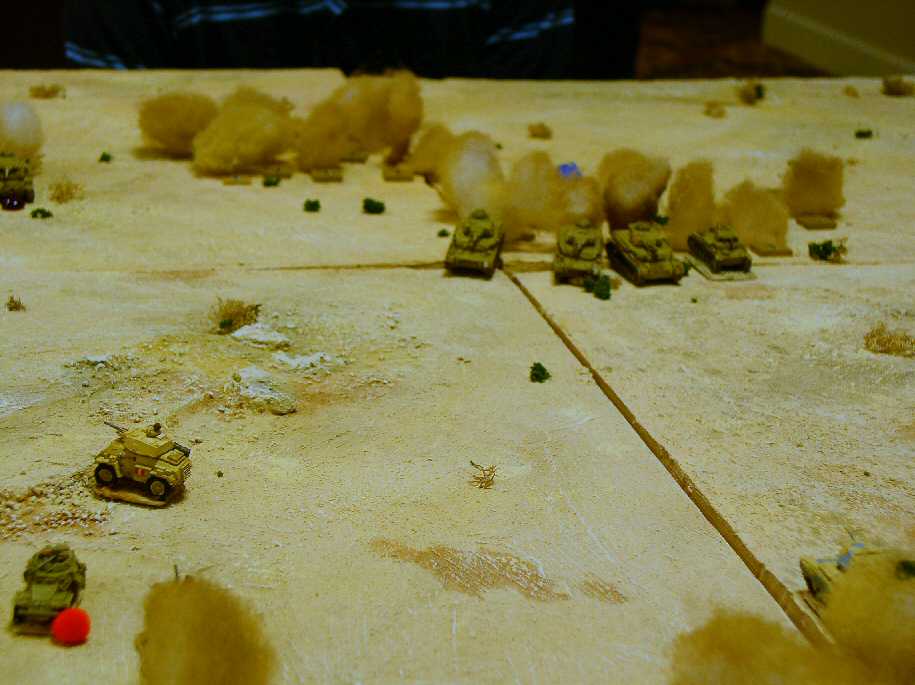
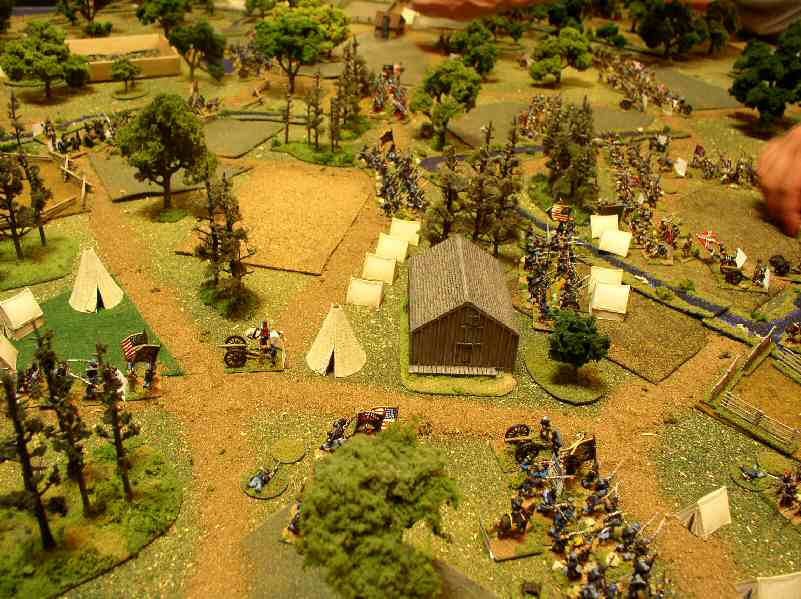
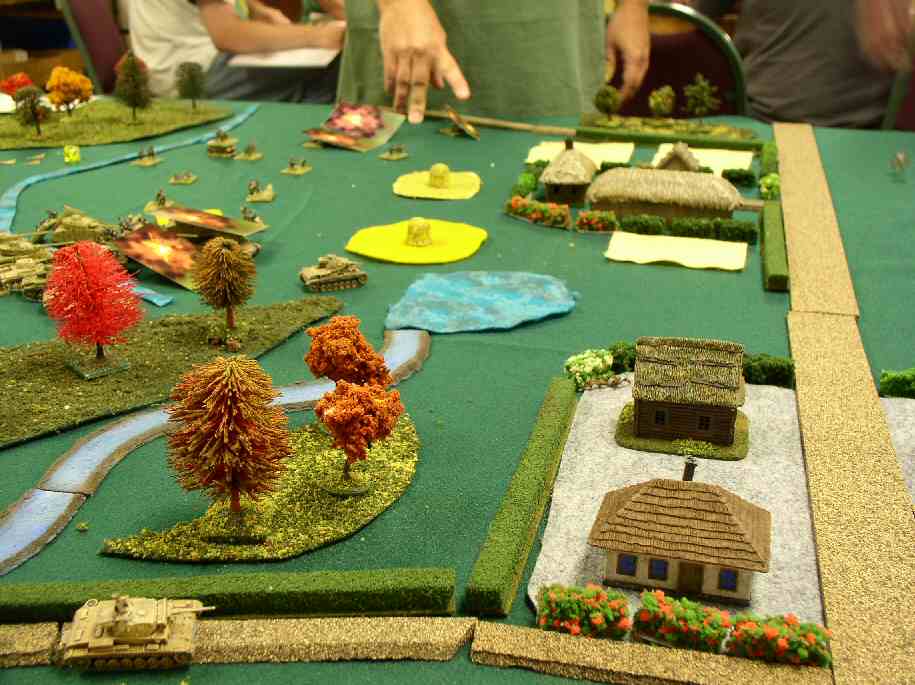
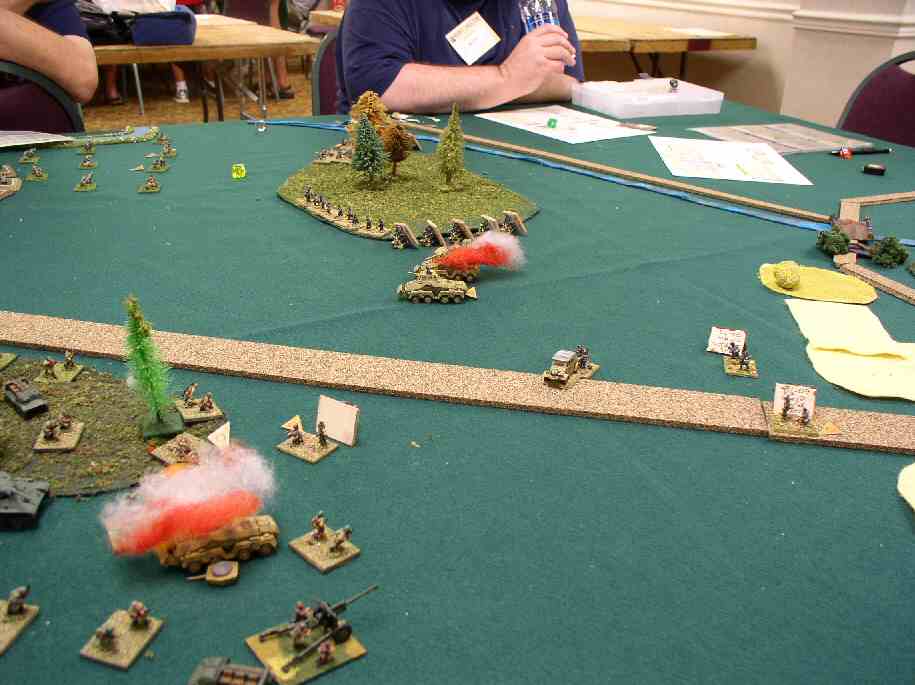
US forms 2nd defensive line |
The US form a 2nd defensive line away from the brawl, using the flaming wrecks to interfere with long range fire. When the Panzers emerge from the smoke, the U.S. guns might be able to do more than scratch the paint. |
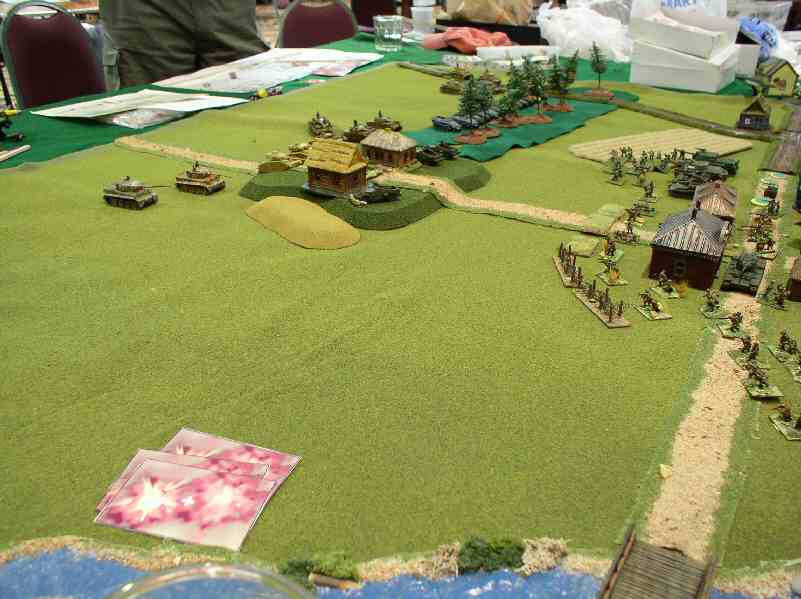
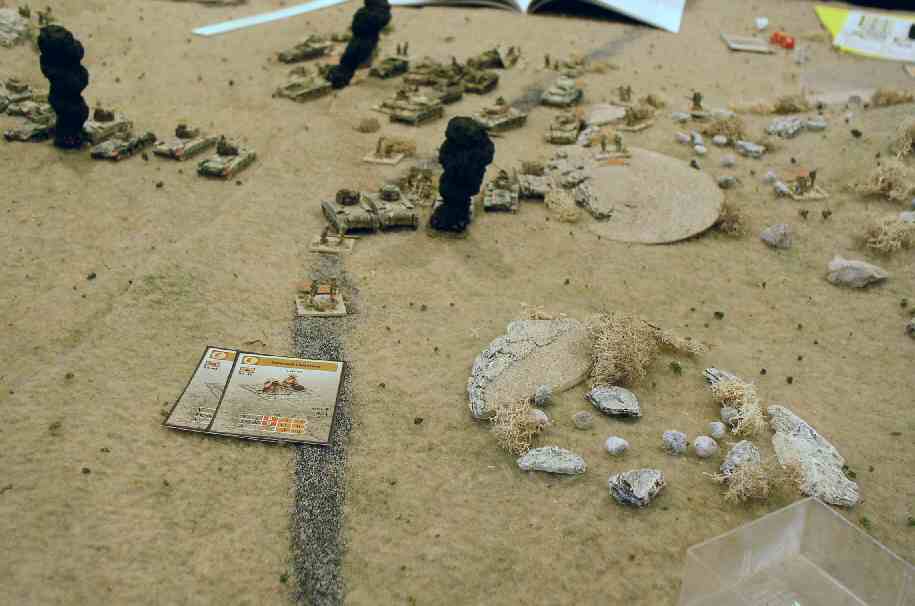
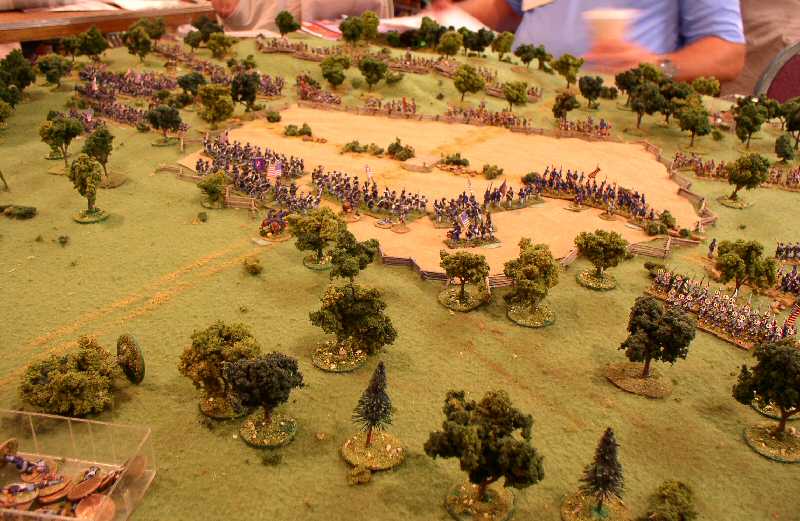
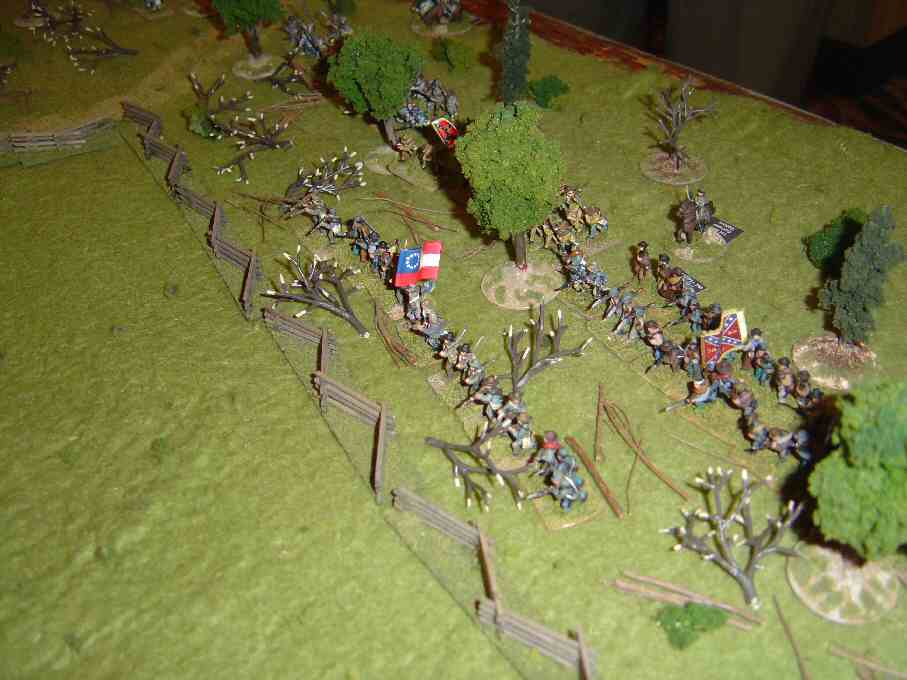
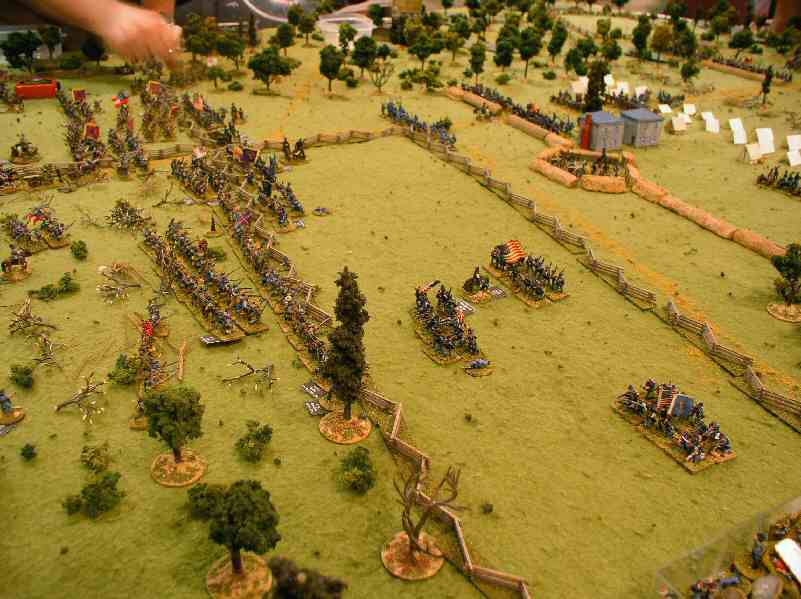
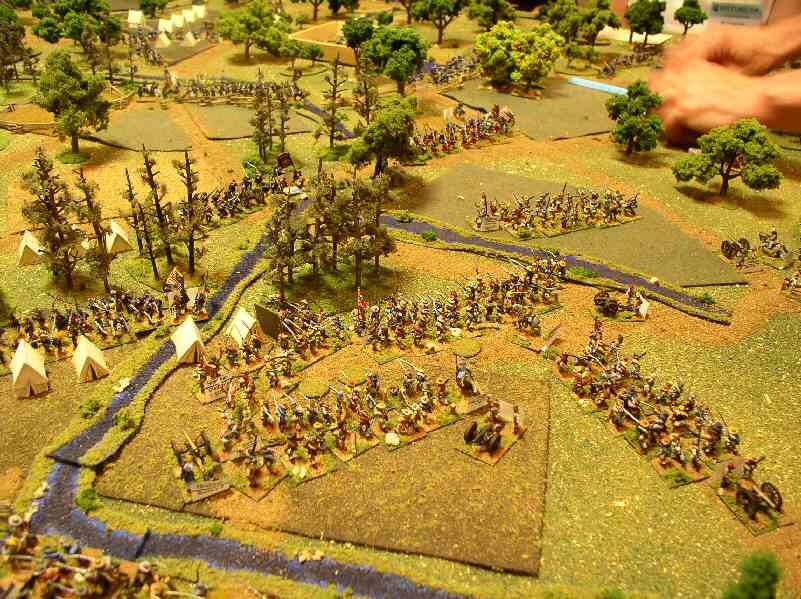
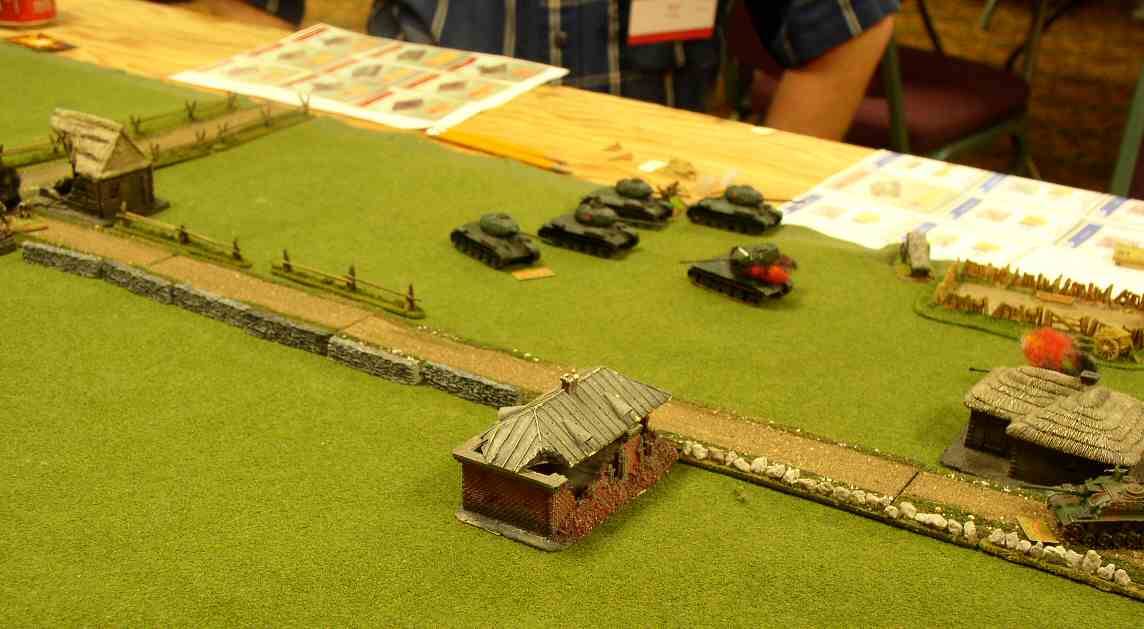
Oops |
The Germans decide to force their way through the defensive line using close combat. In the middle of the picture, the long barrel of the Tiger can be seen emerging from the smoke as it hits a Stuart in close combat. The Stuart's defensive fire (10!) suppresses the Tiger(!) and in the point blank melee disables the Tiger (10!) forcing the Germans to destroy it before they flee. The scenario ends suddenly with a U.S. victory. |
| Click on the Thumbnail for a full-size photo | Description |
|---|---|
 Dash for the Woods |
All of the German infantry and most of the PzIV dash into the woods. |
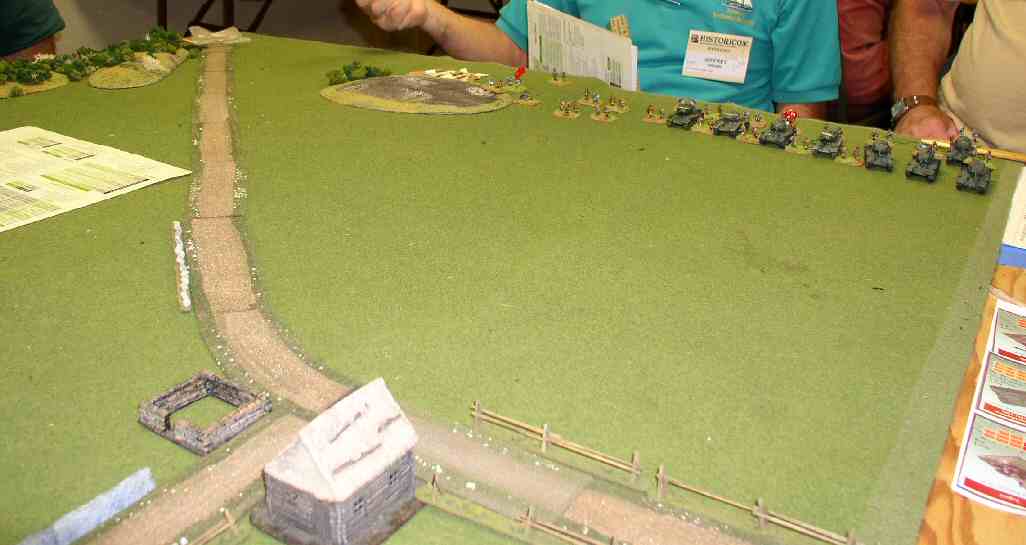
 German First turn |
While the left flank of the Germans go into the woods, the heavy German armor assaults a town held by some Russian scouts. |
 On the German Right |
Looking down the line from the other end. Note the open space with no tanks, where the Panthers could cover the advance. |
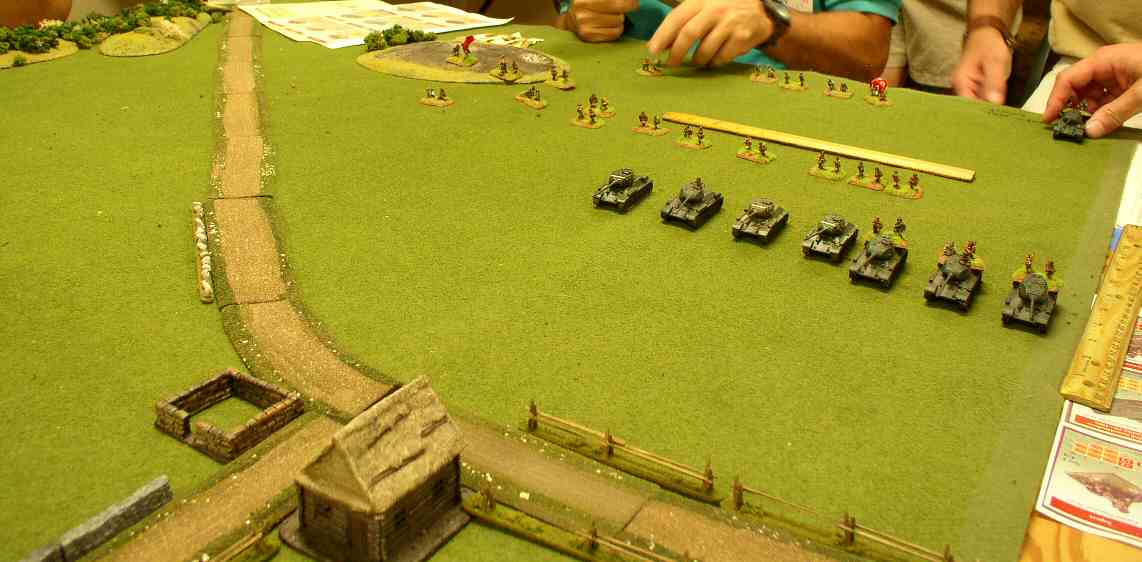
 Russian Response |
The Russian response was to set up a defensive line with their infantry in the woods just outside 2" from the Germans, and their tanks just under 5" from the woods edge. Any German moving up would be subject to multiple ambush fires. |
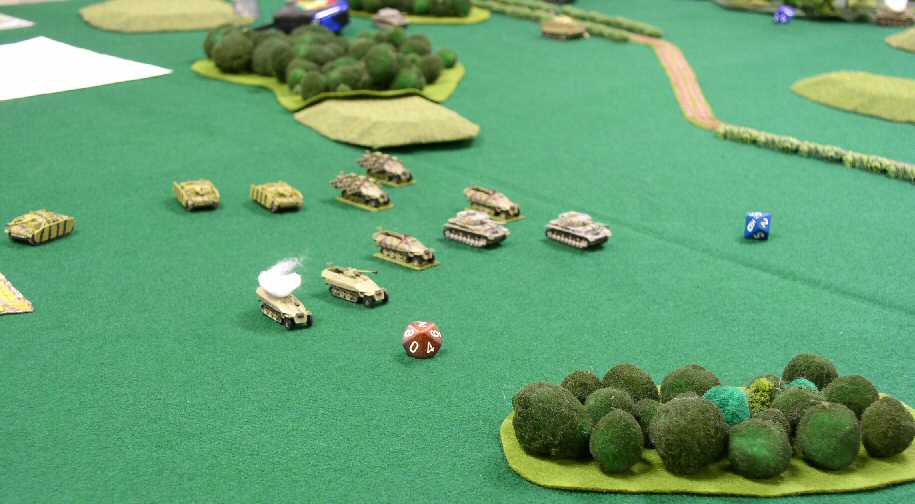
 Parking Lot |
The Russian response slowed the Germans down until they decided to send some PzIV around the left flank. |
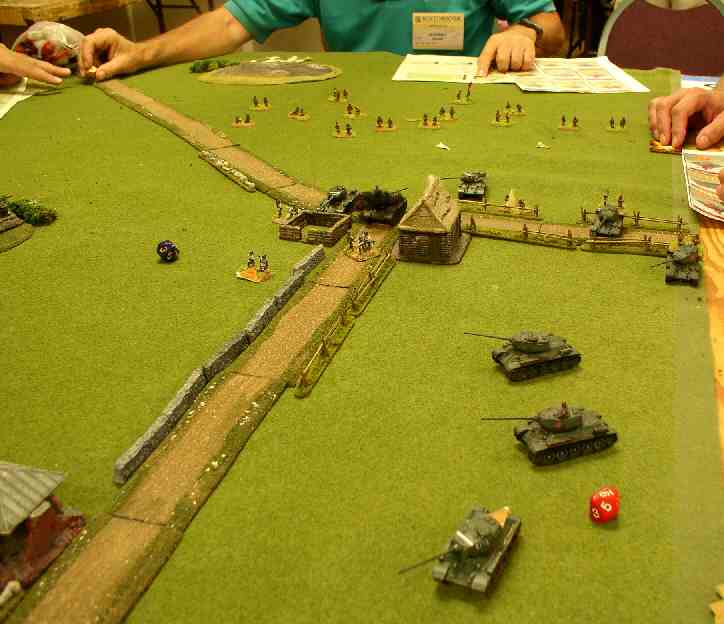
 End Run |
The Germans flanked the Russian position, and started working down the delaying Russians. |
 Village Cleared |
The heavy armor finally cleared the village and started moving up. Finally, some long range guns moved out into the open. |
| Click on the Thumbnail for a full-size photo | Description |
|---|---|
 Soviet Reserves |
A gaggle of Russian tanks wait for the German offensive to get involved with the forward infantry. |
 German Tanks Approach |
Heavy German Armored formations approach a defended town. |
 German Infantry Assaults |
German infantry assaults across the open into the first Russian fortifications. |
| Click on the Thumbnail for a full-size photo | Description |
|---|---|
 British tanks defend |
British Tanks confront the Germans in the rugged terrain. |
 Shoulder-to-Shoulder |
A concentrated line of Germans moves up. |
 Slugging it out |
Valentines and PzIIIs exchange fire. |
 Slugging it out 2 |
Casualties on both sides. |
 Slugging it out 3 |
Another view. |
| Click on the Thumbnail for a full-size photo | Description |
|---|---|
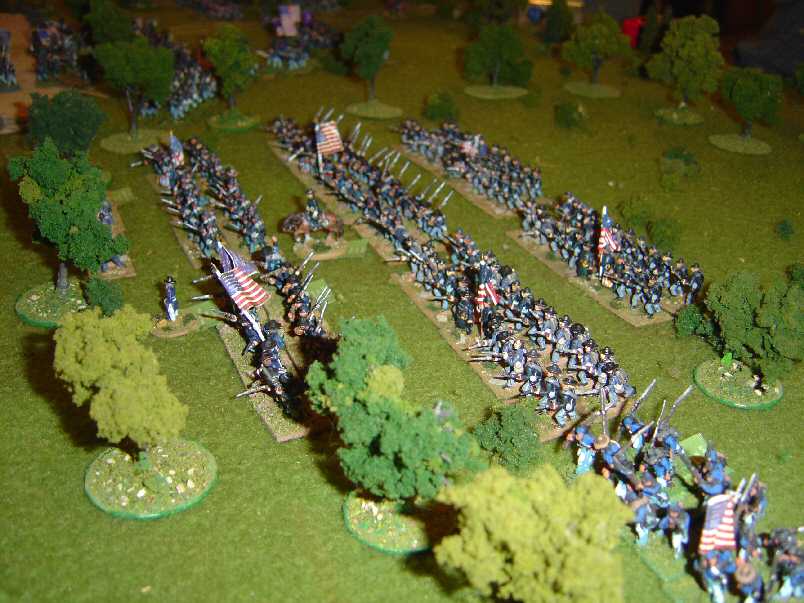
 View of Battlefield 1 |
From behind the Union Right Flank |
 View of Battlefield 2 |
From behind the Union Left Flank |
 View of Battlefield 3 |
From behind the Confederate Left |
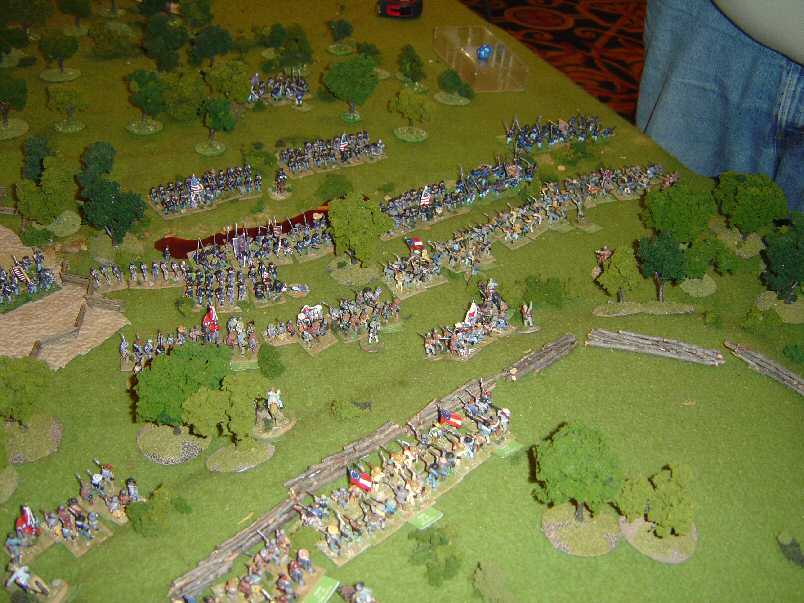
 The right moves up quickly |
The right side of the Union line moves ahead of the left |
 Another Angle |
Another view of the Union Push |
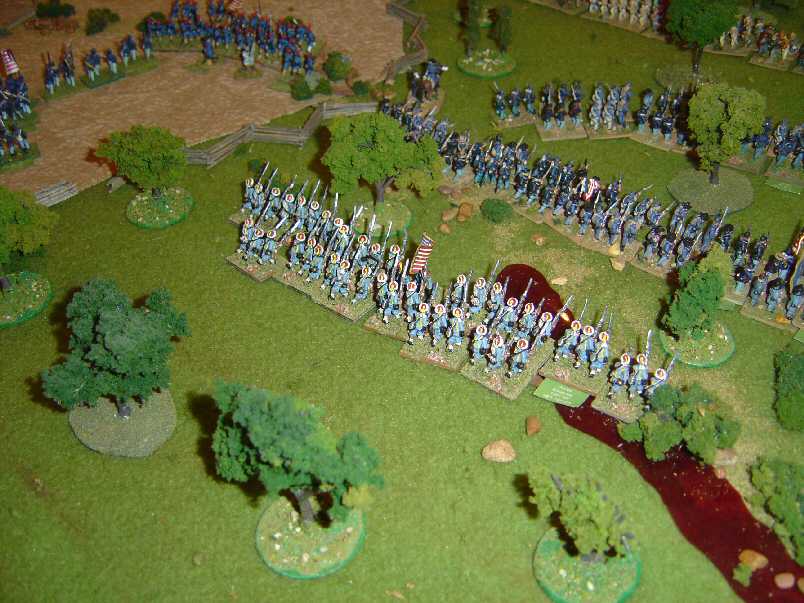
 Iron Brigade Attacks |
Iron Brigade on the attack through the Wilderness south of Saunders Field. |
 Iron Brigade Slugfest |
Iron Brigade slugs it out with Jones' and Dole's Confederate brigades. |
 Zouaves Attack |
146th New York Zouaves attack through the Wilderness north of Saunders Field. |
 Bartlett's Brigade Attacks |
Bartletts Brigade struggles across Saunders Field into the Confederate brigades of Jones and Steuart. |
| Click on the Thumbnail for a full-size photo | Description |
|---|---|
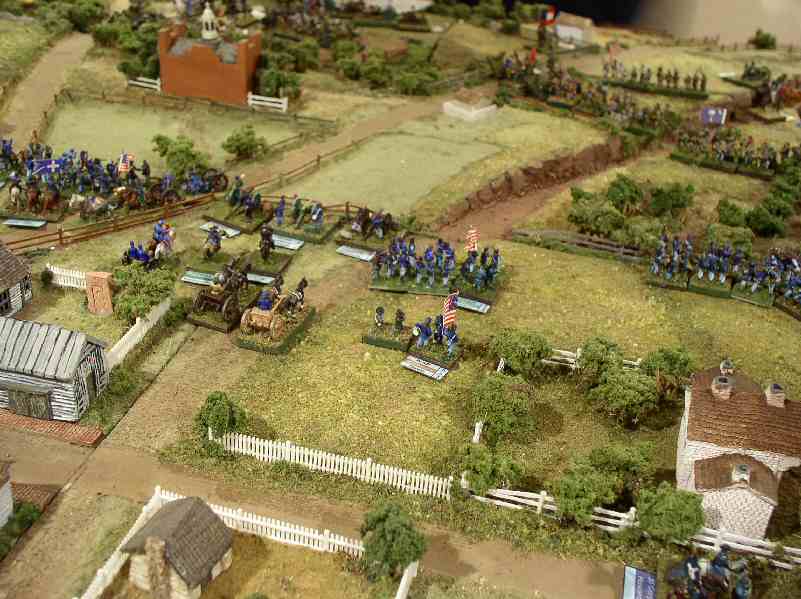
 Long View |
A view of the start of the battle, showing the successive Union positions and the massed Confederates. |
 Union Right |
On the Union right flank, Negle's Brigade awaits the Confederate onslaught |
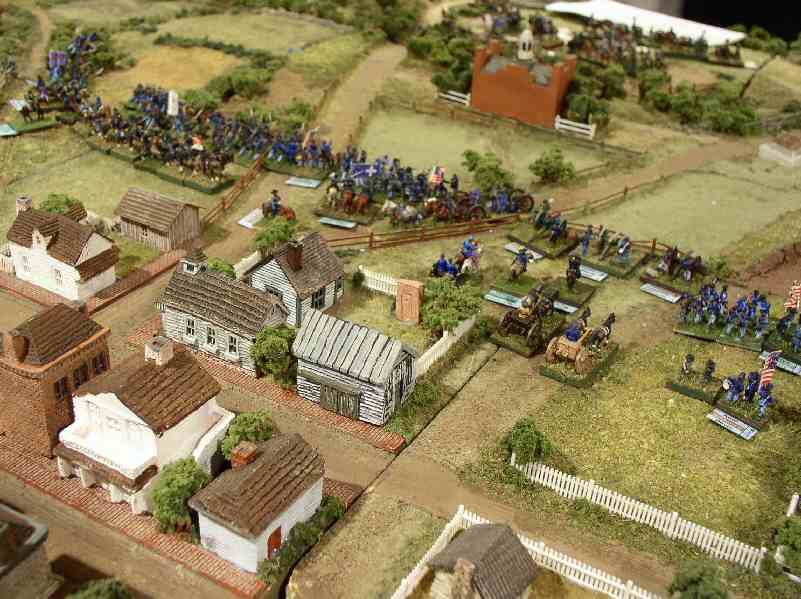
 Garnett Attacks |
Garnett's Confederate Brigade of D.H. Hill's leads the Rebel attack |
 Rodes Attacks |
Rodes' Confederates crash into Palmer's Brigade on the Union left flank |
 Right Flank crumbles |
Garnett, G.B. Anderson, and Jenkins overwhelm the Union right |
 Union tries to hold the line |
Union troops rush forward to support the crumbling line. |
 Back to the first trench line |
The Confederate left hits the trenches while other Union troops fall back. |
 Confederate Massed Attack |
A better view of the Confederate push on the left. |
 Breaking Through |
The Confederates are breaking through the trench line. |
 Forward |
The trench line is in Confederate hands, but another defensive position is forming. |
| Click on the Thumbnail for a full-size photo | Description |
|---|---|
 The French lines |
 Start of the Battle |
The two sides line up opposite each other. |
 Center of the French |
The center of the French Lines. |
 Looking across no man's land |
The English line moves up, as seen from behind the French position. |
 Another View |
Another view from behind the French lines. |
 Looking down the line |
Looking down the French line to the redoubts anchoring the left flank. |
| Click on the Thumbnail for a full-size photo | Description |
|---|---|
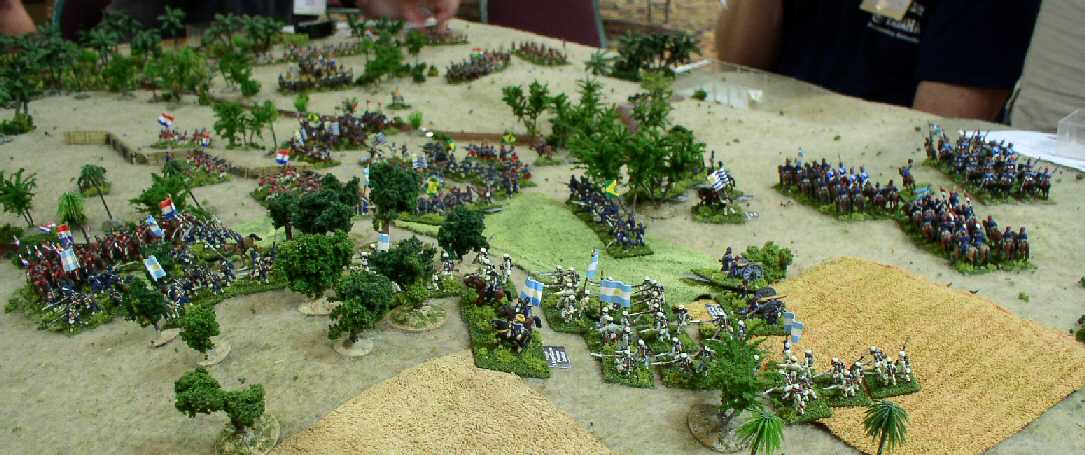
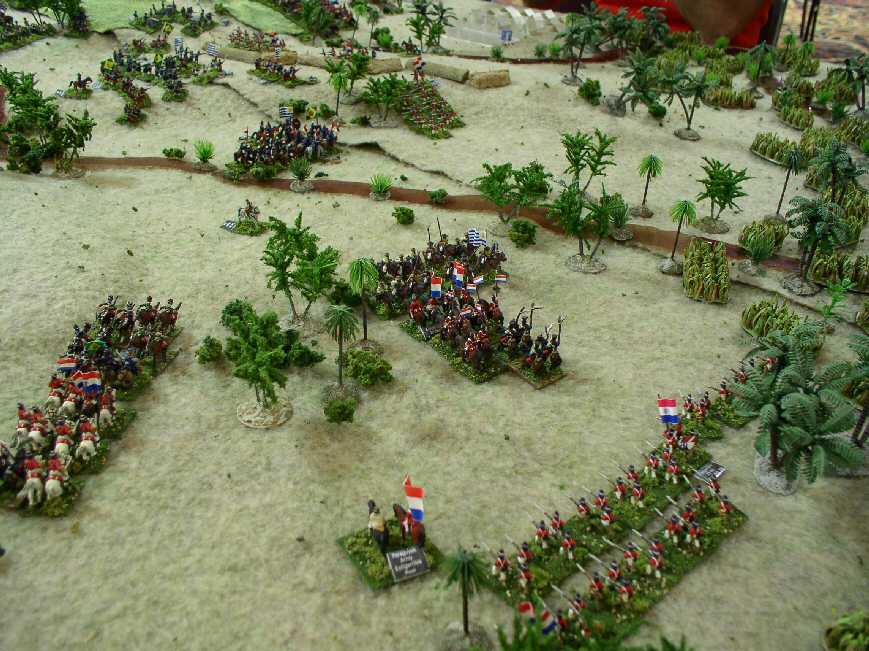
 The Paraguayan Position |
The Paraguayans defend entrenchments, but the bulk of the enemy is off to their right flank. |
 The Alliance Forces |
The Alliance forces move up to outflank the entrenchments. |
 The Alliance Forces 2 |
Closer view of the Alliance forces. |
 The Alliance Forces 3 |
Closer view of the Alliance forces 2. |
 The lines engage |
Some Alliance forces engage the trenches while the bulk move up on the flank. |
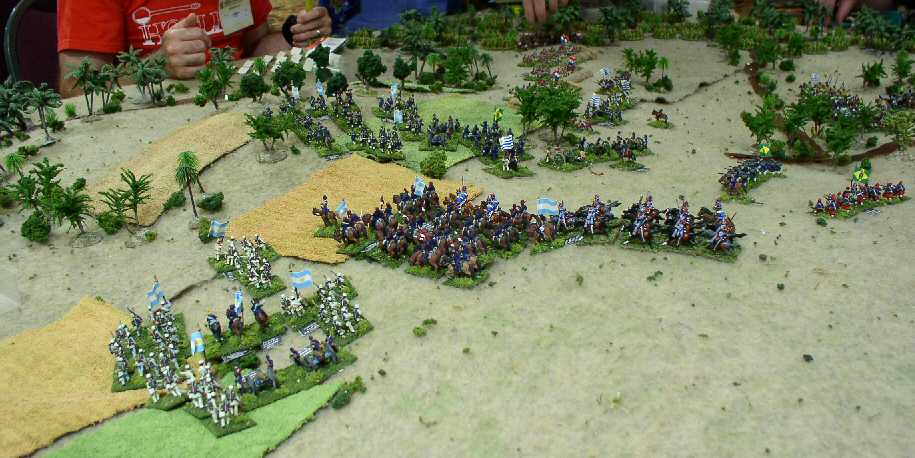 The flanking sweep |
The Alliance flank move. |
 The Paraguayan reinforcements arrive |
While other troops delay the flanking maneuver, large numbers of Paraguayan reinforcements can be seen in the distance moving into the Alliance flank. |
 The Alliance Flank guards engage |
Alliance Cavalry on their right flank engage the Paraguayan reinforcements. |
| Click on the Thumbnail for a full-size photo | Description |
|---|---|
 Recon moves up |
Light recon vehicles lead the way, while the large forces remain hidden in the dust. |
 Hidden movement |
You know something is there, but what is it? Dust clouds obscure long range visibility. |
 Forces collide |
German and British tanks reveal themselves in the dust. |
 Grants |
British Grants lead the way. |
 Mixed German tanks |
The Germans expose PzIIs, IIIs, and IV and IIIs. |
| Click on the Thumbnail for a full-size photo | Description |
|---|---|
 Germans Advance |
German armor moves up, and a halftrack finds out why it should not be out in front. |
 Heavy Metal |
This scenario featured some big tanks. You can see King Tigers in the background, and they were up against JSIIs and T34-85s. |
| Click on the Thumbnail for a full-size photo | Description |
|---|---|
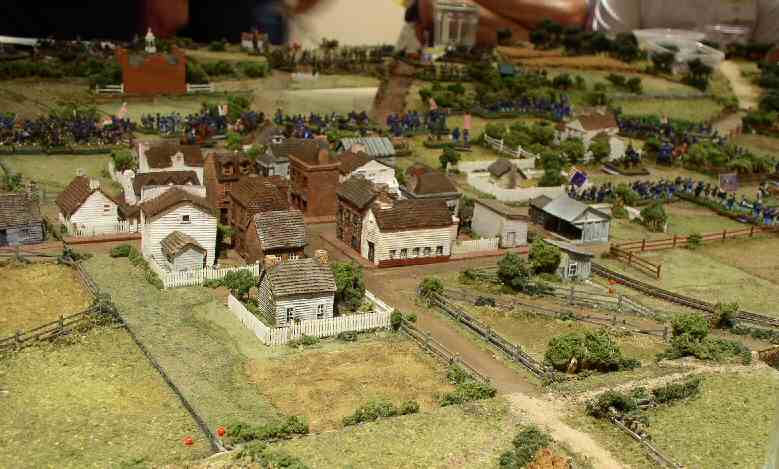 Union Forces deploy |
Gettysburg-day one, the Union forces deploy to meet the initial Confederate advance. |
 Facing West |
Gettysburg - Artillery and Infantry set up. |
 Another view |
Gettysburg - Another view of the Union line. |
 Union Camp |
Shiloh - The Union camp is surprised. |
 Union Camp 2 |
Shiloh - Surprised Union forces attempt to organize. |
 Battle Begins |
Shiloh - Confederates hit the first Union line. |
 Confederate Attack |
Shiloh - The Confederate Attack. |
| Click on the Thumbnail for a full-size photo | Description |
|---|---|
 Russians Deploy |
Russian Tanks deploy with tank riders to move to the town quickly. |
 Romanians Advance |
Led by a company of R-2 tanks, Romanian infantry close on the Russian village. |
 Romanians Advance 2 |
A different angle on the Romanian advance, showing the left flank tank company. |
 Russians reach the town |
The Russians reach the town first, barely ahead of the advancing Romaniansan advance. |
 Romanians race to catch up |
The Romanians move their forces forward as well. The left flank tank company is a bit out of the action. |
 Russian T28s |
Russian T-28's take up a strong position to prevent the Romanians from flanking the village. |
 Romanians attack |
Beaten to the village, Romanian infantry struggle to fight their way in. |
 View of the battle |
When the attack on the village begins, the left flank Romanian tank company is content to engage in a long range gun battle with outnumbered T26s. This was probably a critical error, as their support might have been crucial in the center. |
 Charge! |
A flanking effort by the T-28s is couragously met by the inferior R-2s. |
 View of the Battle 2 |
The central part of the battle at the time of the charge. |
 Close Combat |
Close range tank battle proves deadly for both sides. |
 The End |
Heavy losses lead to a morale collapse for the Romanians. Soviet tanks rampage through the Romanian rear. |
| Click on the Thumbnail for a full-size photo | Description |
|---|---|
 Charge! |
The main German attack goes right across the stream using the shortest distance between two points. Some, but not many units go off to the flank. |
 Another View |
The German attack from a different angle. |
 Traffic Jam |
The bad terrain has slowed the German advance and Russian artillery drops on the concentrated target. |
 Another View 2 |
A different view of the traffic jam, while the lead elements of the flanking column approach the outskirts of the town. |
 Another View 3 |
Yet a different angle shows that the terrain is extremely effective in blunting the German attack. Note that no Russians have yet revealed themselves, but their artillery is dropping effectively on massed targets. The German attack is approaching the town, but piecemeal insted of en masse |
| Click on the Thumbnail for a full-size photo | Description |
|---|---|
 T34s rule |
The armored cars charge forward and encounter T34s at close range. The guns on the T34s dispatch two of the ACs and the battle is essentially over. |
 Another View |
The armored car in the center has fallen victim to one of the direct fire 76mm guns that is supporting the attack. |
| Click on the Thumbnail for a full-size photo | Description |
|---|---|
 We found them |
Close range AT fire reveals Dutch defenders in the village. |
 Another angle |
Another view of the same situation. A German AC has been destroyed. |
 Another angle 2 |
Yet another view of the same situation. Advancing down a road without scouting it first can be dangerous. |
 Defenders wait |
On the German right flank, dutch defenders wait for the advancing motorcycles. |
 German 2nd column |
A column of German recon troops advances up the right flank. |
 Motorcycles deploy |
German motorcycles deploy to support the left hand column. |
| Click on the Thumbnail for a full-size photo | Description |
|---|---|
 The horde |
Russian T34-85s with tank riders and a supporting infantry company line up on the board edge. The Finns start hidden. |
 The horde advances |
Moving as fast as they can, the Russians head toward the village. |
 Armor Breakthrough |
A Finn veteran jaeger company defended the village for several turns, taking out most of the tankriders and a tank. 3 of the T34-85s head for the objective town in the rear, but another is stuck in combat with a Finnish panzerfaust infantry. Although this looks bad, none of the Russian infantry advanced past the forward village until the end of the game. |
 Locked in combat |
The T34-85s engage the Finnish armor while the jaegers fight for the village. |
 Another tank kill |
The Finnish panzerfaust unit knocks out another T34-85. |
 Timely reinforcements |
The company of Finnish Sturmgeshutz arrive to combat the forward Russian tanks. The battle for the village rages. |
 Russian SU-100s |
Just after the Finns receive their Sturmgeshutzen, the Russians receive A company of Su100s. These vehicles are really deadly, easily comparable in armor and gunpower to some of the German big cats. They quickly force the initial Finnish armor (captured T34-76s) to retreat off the hill they were occupying. |
 Slugfest |
The Sturmis and the T34-85s fight it out, with casualties on both sides. At this point a second Finnish infantry company arrived to strongly occupy the objective town, and the game ended in a Finnish victory. |
Copyright 2000-2019 Fire and Fury Games, all rights reserved
Web page maintained by
Webmaster@FireAndFury.com.